7. Stem Busses
To use THS on a stem bus, you will need to begin by instantiating the following plugins, in order, at the end of the stem bus's insert slots:
- YSFX for THS
- Router Plugin
Post-Fader Inserts
If you are using a DAW that supports post-fader inserts, I would recommend making your router plugin a post-fader insert on your stem busses. Doing so will allow you to use the channel fader to control the level of the stem bus and still use the channel meter when mixing.
7.1 YSFX for THS
First, open YSFX. By default, YSFX will look similar to the following:

To load THS, click Load and navigate to the folder where you saved your copy of the plugin. Select the JSFX file for THS, and then click Open. Once loaded, YSFX should look similar to the following:
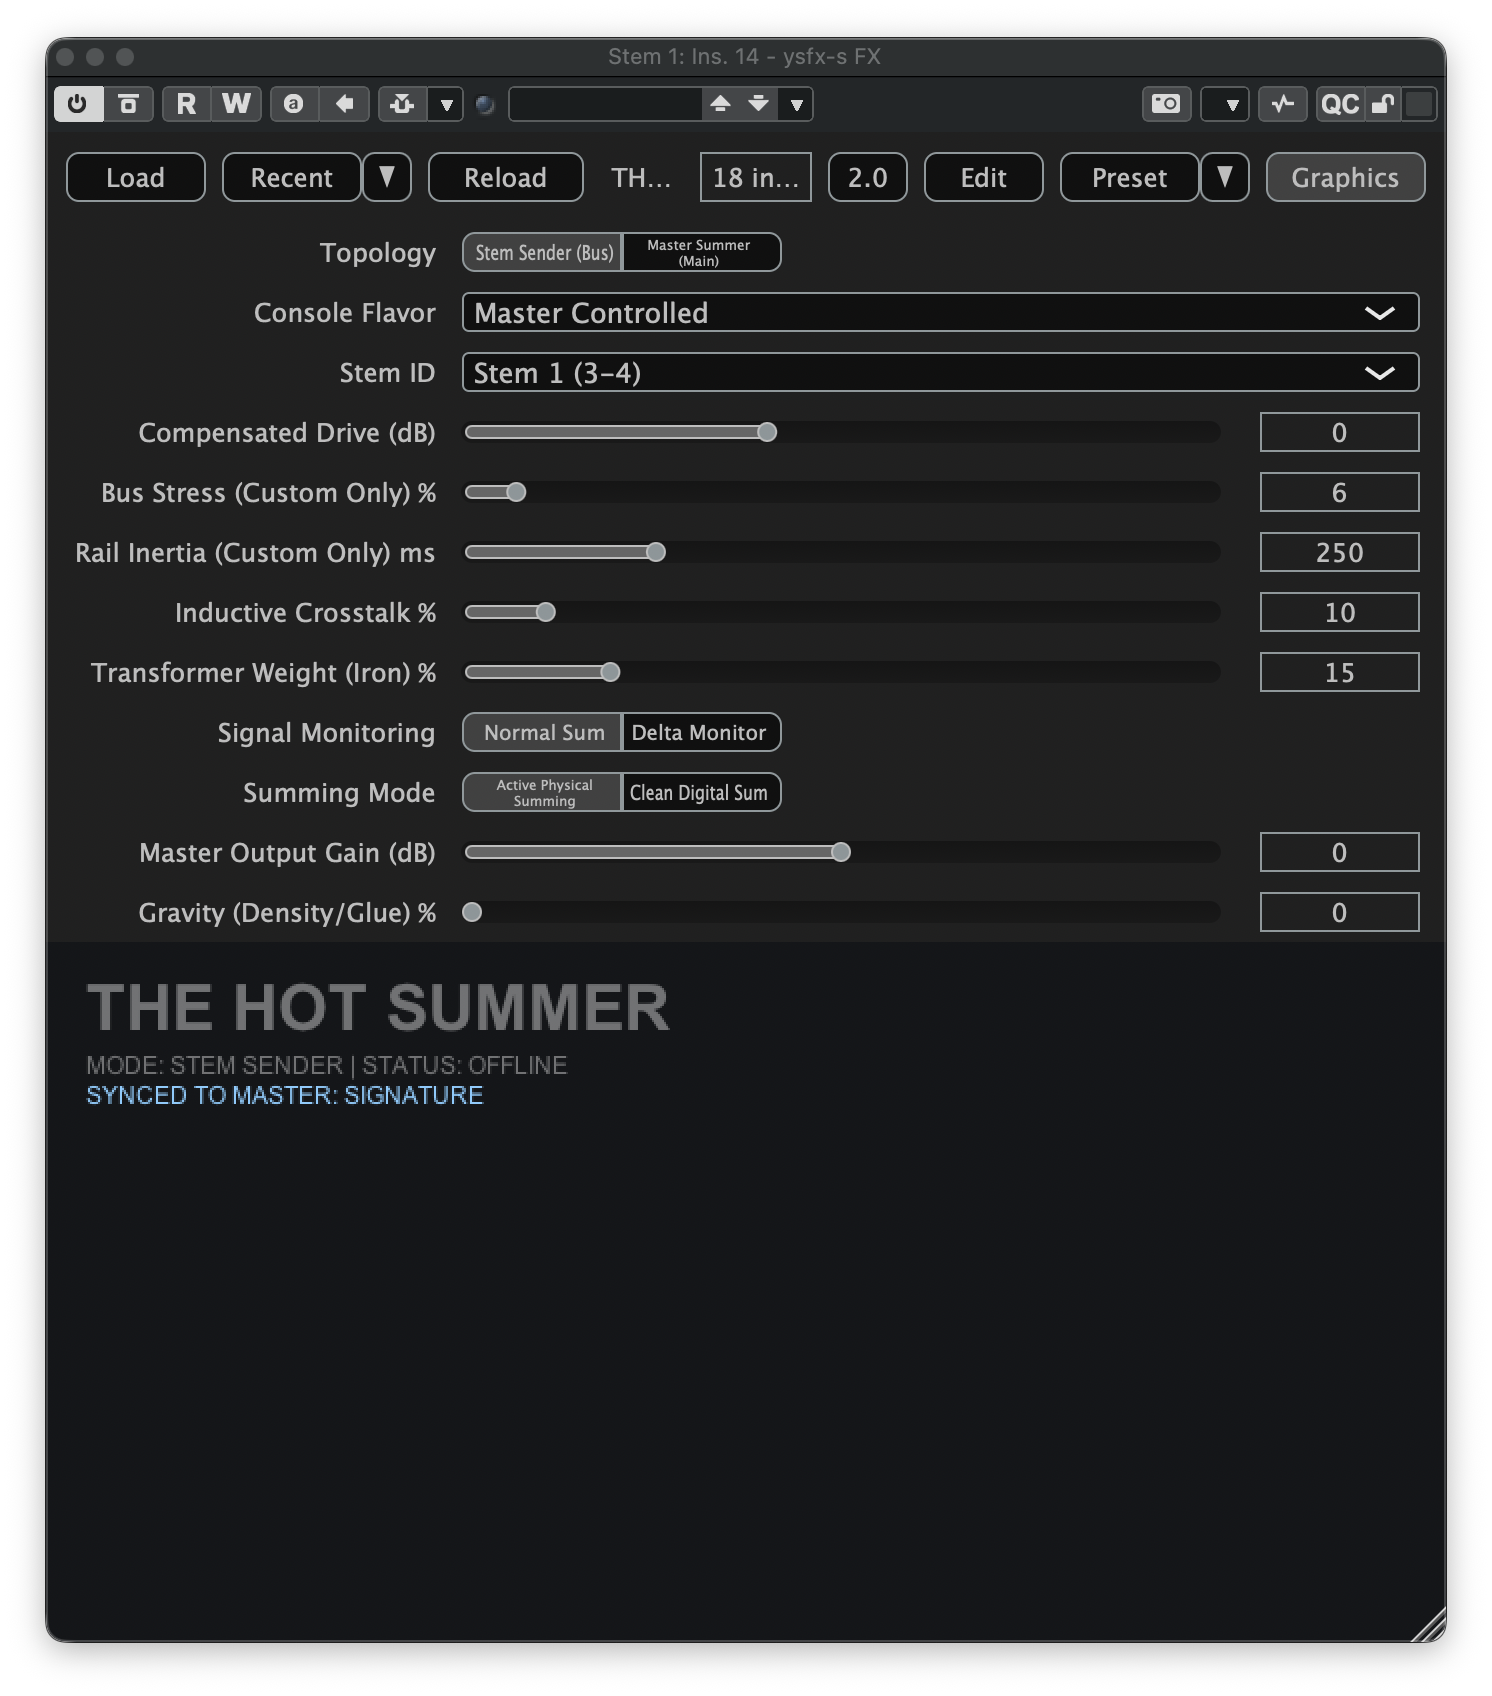
The main parameter to pay attention to at this stage is the Stem ID. THS supports summing for up to 8 stem busses, and for the plugin to function correctly, each stem must be set to a unique ID. As you load THS on your stem busses, make sure to update the Stem ID parameter so each bus is assigned a unique value.
7.2 Router Plugin
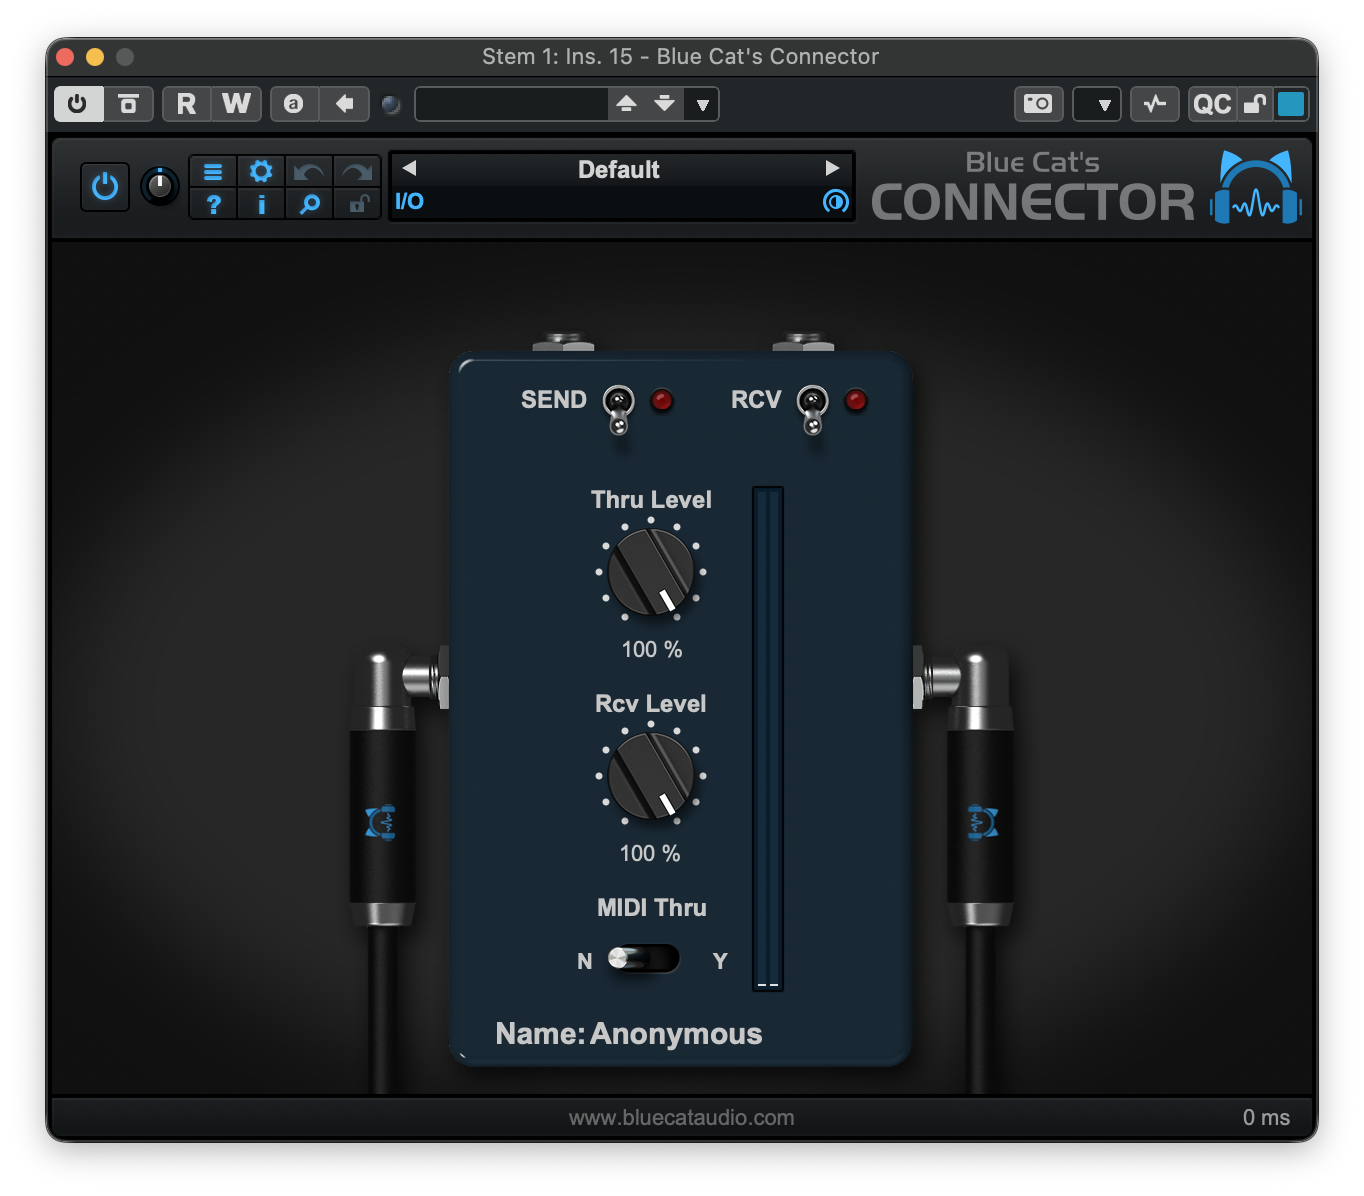
Next, open Blue Cat's Connector. By default, it will look like the following:
Since we are currently setting up the stem busses, you will want to enable SEND mode. Once enabled, Connector will look like the following:
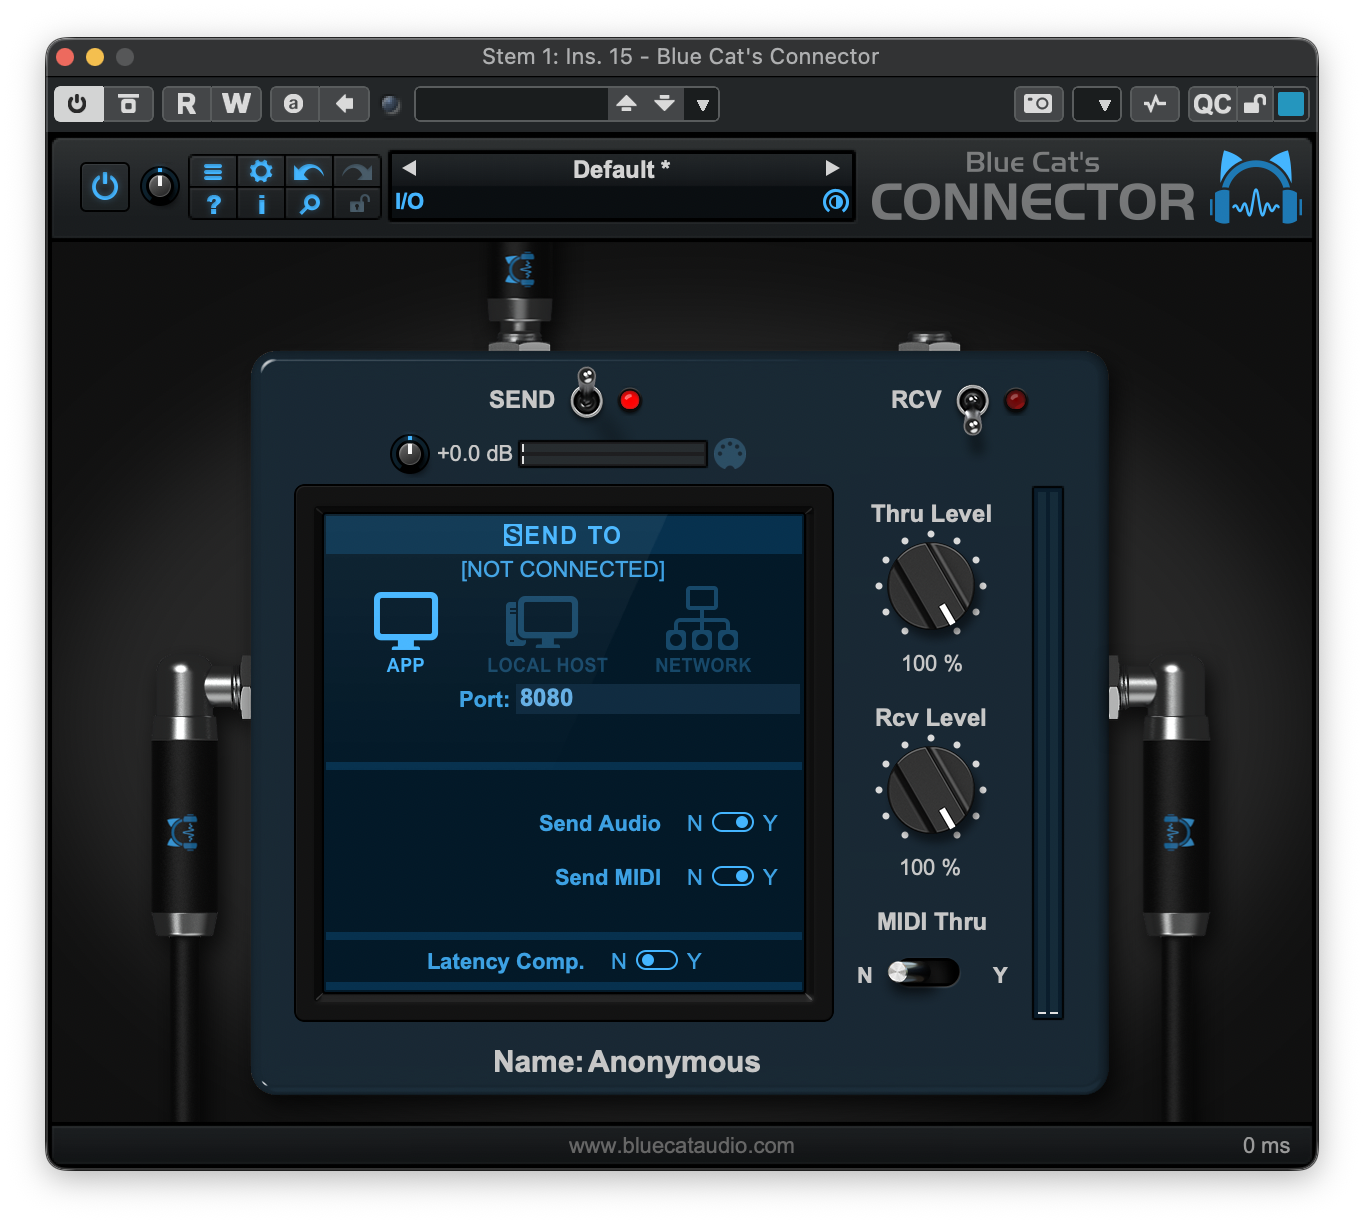
Since we are using Connector within the same application (and not trying to send sound from one application to another), we can leave the mode set to the default of APP.
Connector uses an internal networking system to transmit sound between instances of the plugin. To differentiate between multiple sending instances, Connector uses the Port parameter. Each instance of Connector must be set to a unique Port value for the sender/receiver pairs to function correctly. You can also update the Name parameter at the bottom by double-clicking it. This serves no functional purpose but can help troubleshoot connections between sender and receiver nodes. For example, you might make the following port assignments in a project with 4 stem busses:
| Stem Bus | Port | Name |
|---|---|---|
| 1 | 8080 |
Stem_1_TX |
| 2 | 8081 |
Stem_2_TX |
| 3 | 8082 |
Stem_3_TX |
| 4 | 8083 |
Stem_4_TX |
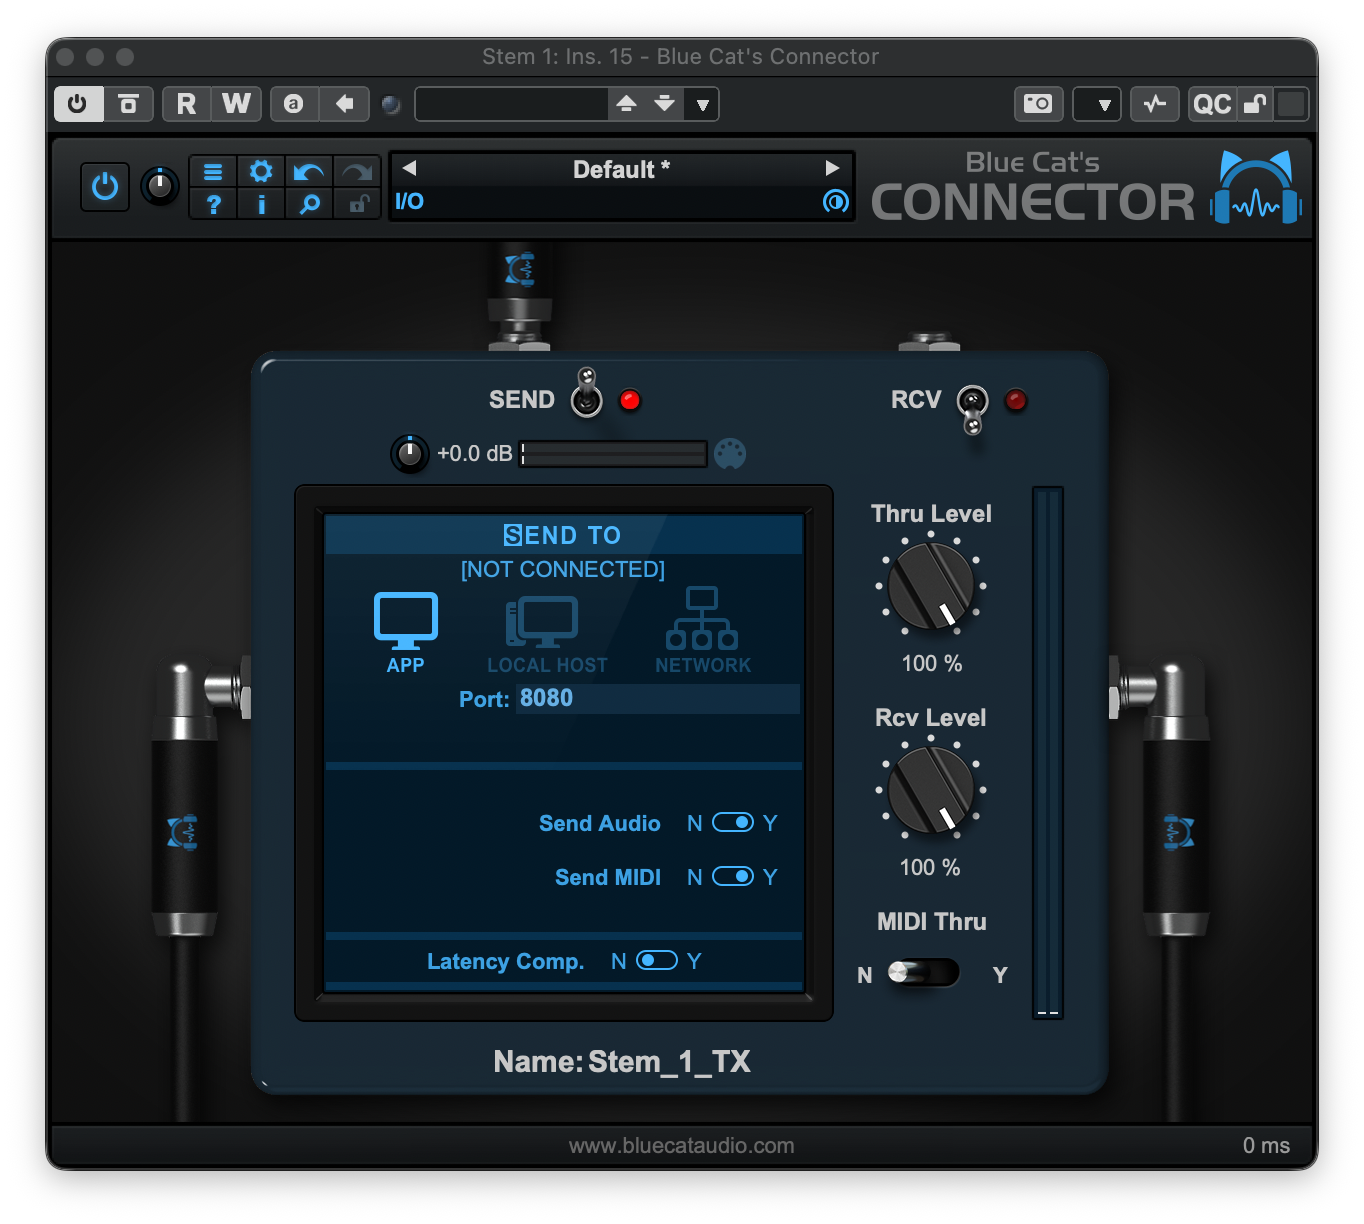
Repeat this process for all stem busses in your project, making sure that each instance of Connector is assigned a unique port value. Make note of the port values selected during this process as you will need them when setting up the master instance of THS. In my example, my configured Stem 1 sender appears as follows:
Connector Presets – Sender
To simplify the process of setting up THS in future projects, you can save the configurations you set for your sender instances of Connector as presets. That way, you can simply instantiate Connector on your stem busses, load each TX preset, and all your senders will be automatically configured.
Next, load a second instance of YSFX after the THS stem bus instance. By default, it will look similar to the following:
To load the audio router, click Load and navigate to the folder where you saved your copy of the plugin. Select the JSFX file for the audio router, and then click Open. Once loaded, YSFX should look similar to the following:
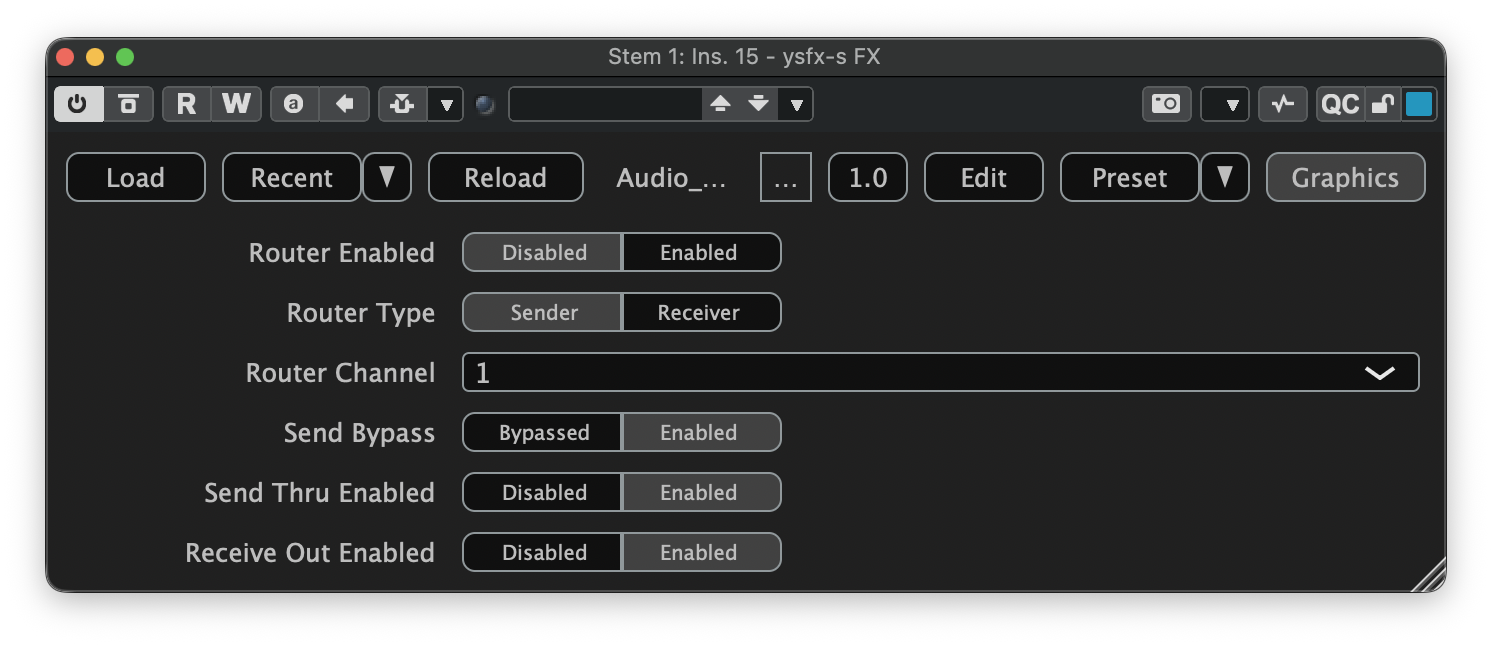
This router is intended to be very quick and easy to configure. The main options we need to focus on are the Router Channel, Router Type, and the Router Enabled toggle. The router heavily utilizes JSFX's gmem[] to write the audio output of each stem bus using a sender, and reads the corresponding audio data back out of gmem[] using a receiver.
To setup the sender for your first stem bus, make sure that the Router Type is set to Sender and the Router Channel is set to 1. Then set the Router Enabled toggle to Enabled. When finished, the plugin should look like the following:

This is all that is needed to setup the sender for the first stem bus. Repeat this process for all stem busses in your project, making sure to assign each bus a unique Router Channel.
When a new router plugin is identified, it will be documented here!
7.3 Output Routing
Based upon testing performed across several DAWs, I recommend routing the output of each stem bus to the track that will host your session's THS master. The audio engines in some DAWs, like Bitwig and Logic Pro, do not behave well when there is no direct route between the stem busses and the master track. Making this connection will have no effect on the output of your session's THS master as we will setup the plugin wrapper in a way that prevents the DAW's normal summed input from reaching THS.