21. Master Bus
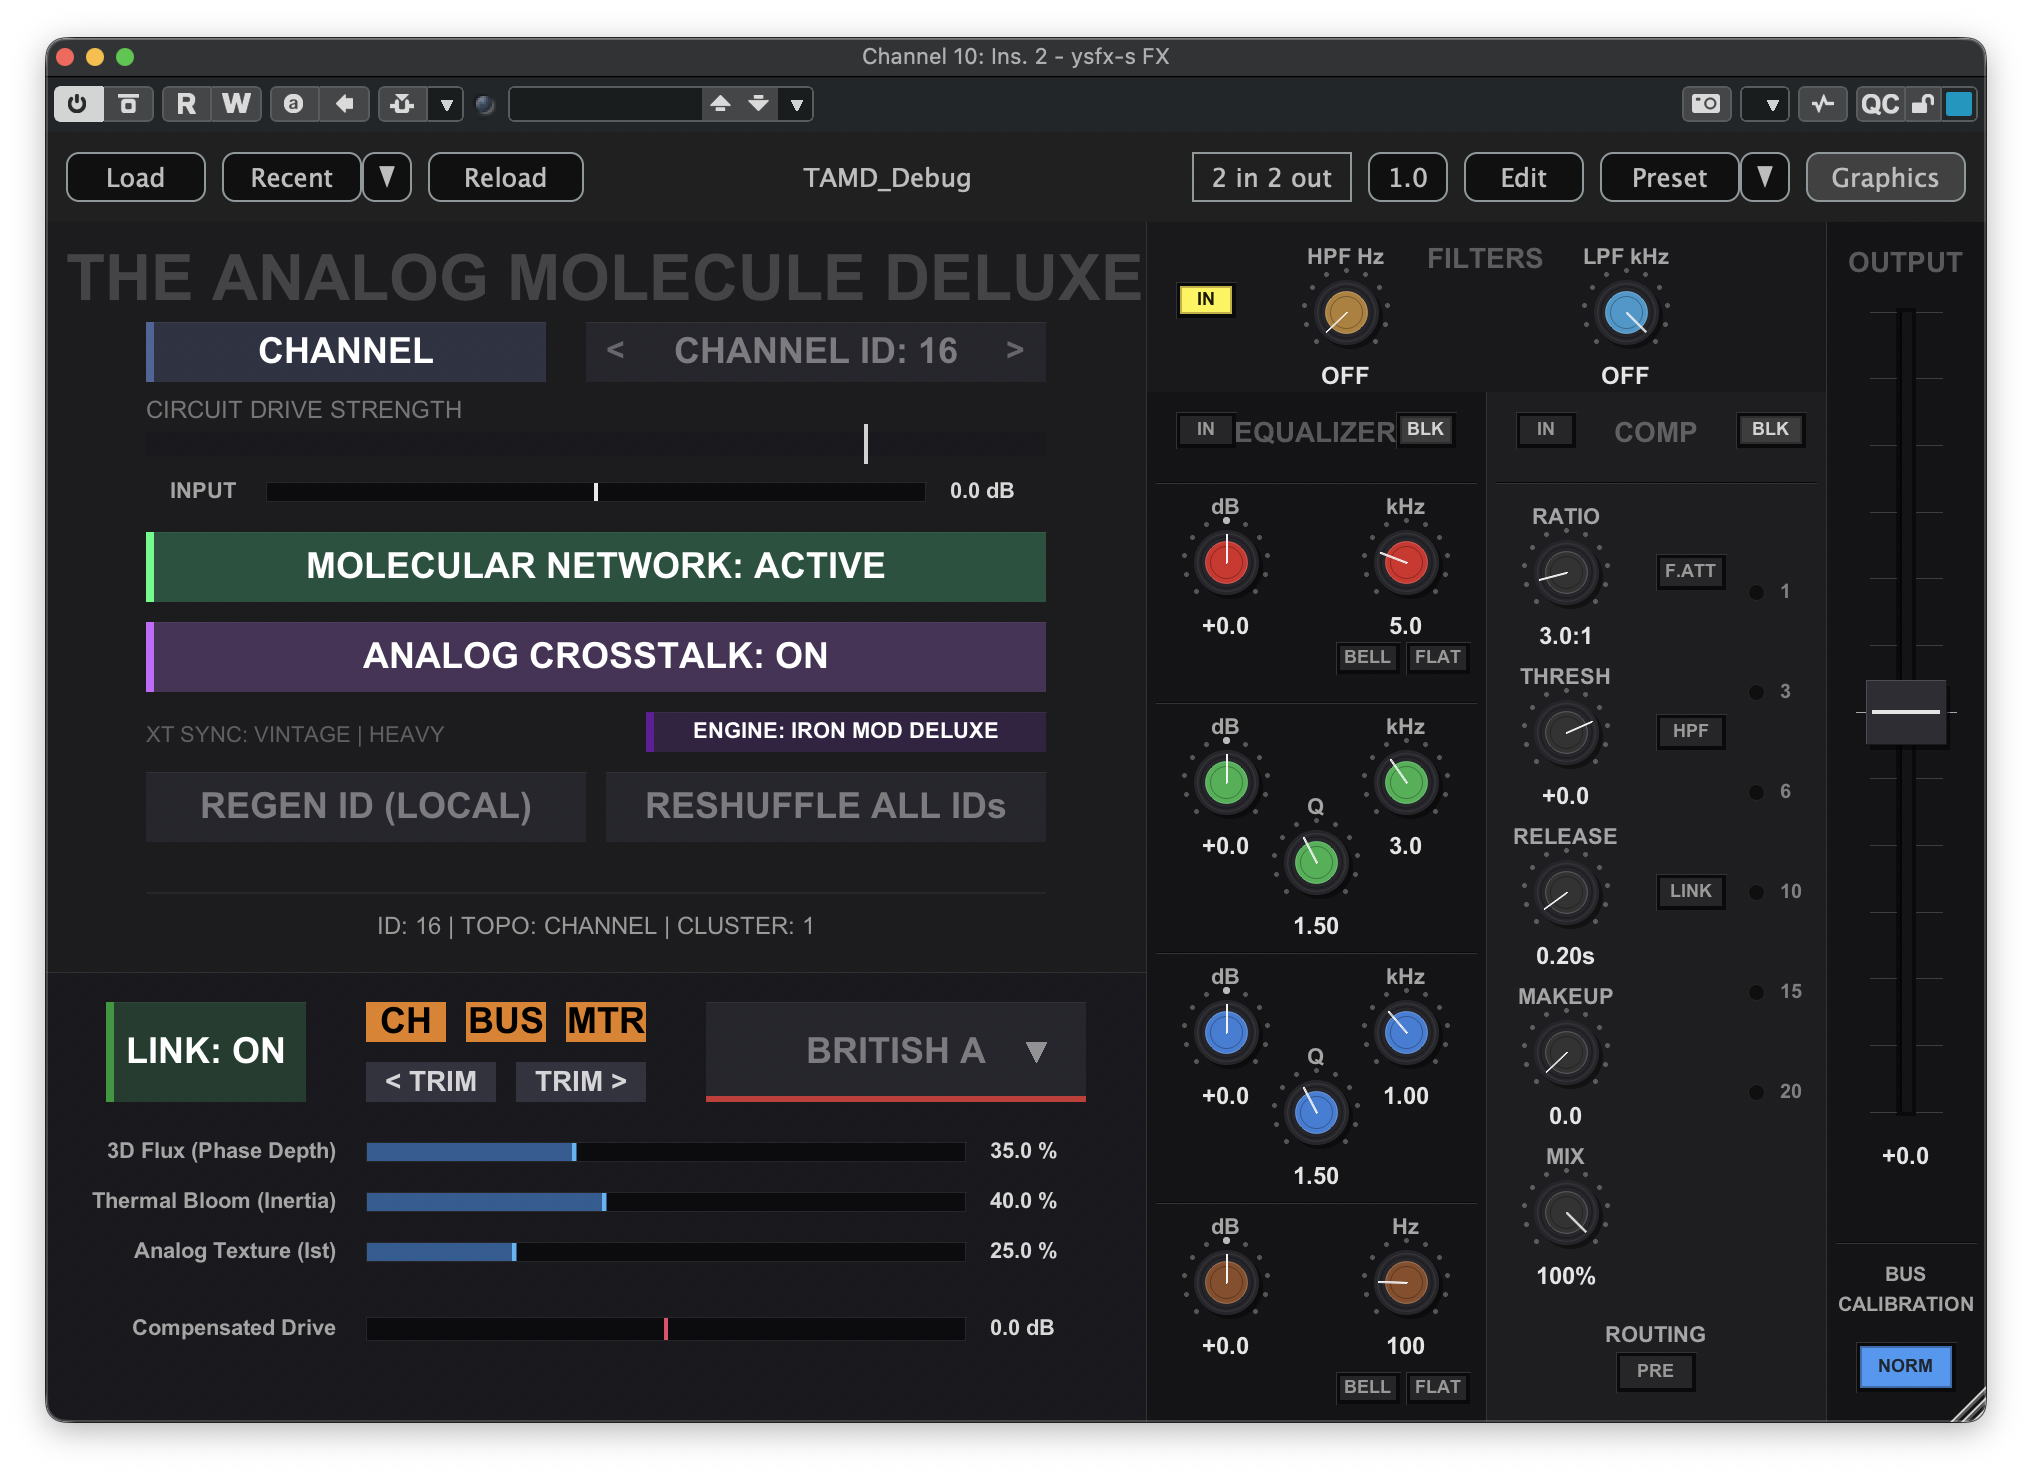
To apply TAM or TAMD to your master bus, you will want to load an instance of YSFX as the second insert on the master bus, following your master instance of THS. Then, load the JSFX file for TAM or TAMD. By default, it will look like the following:

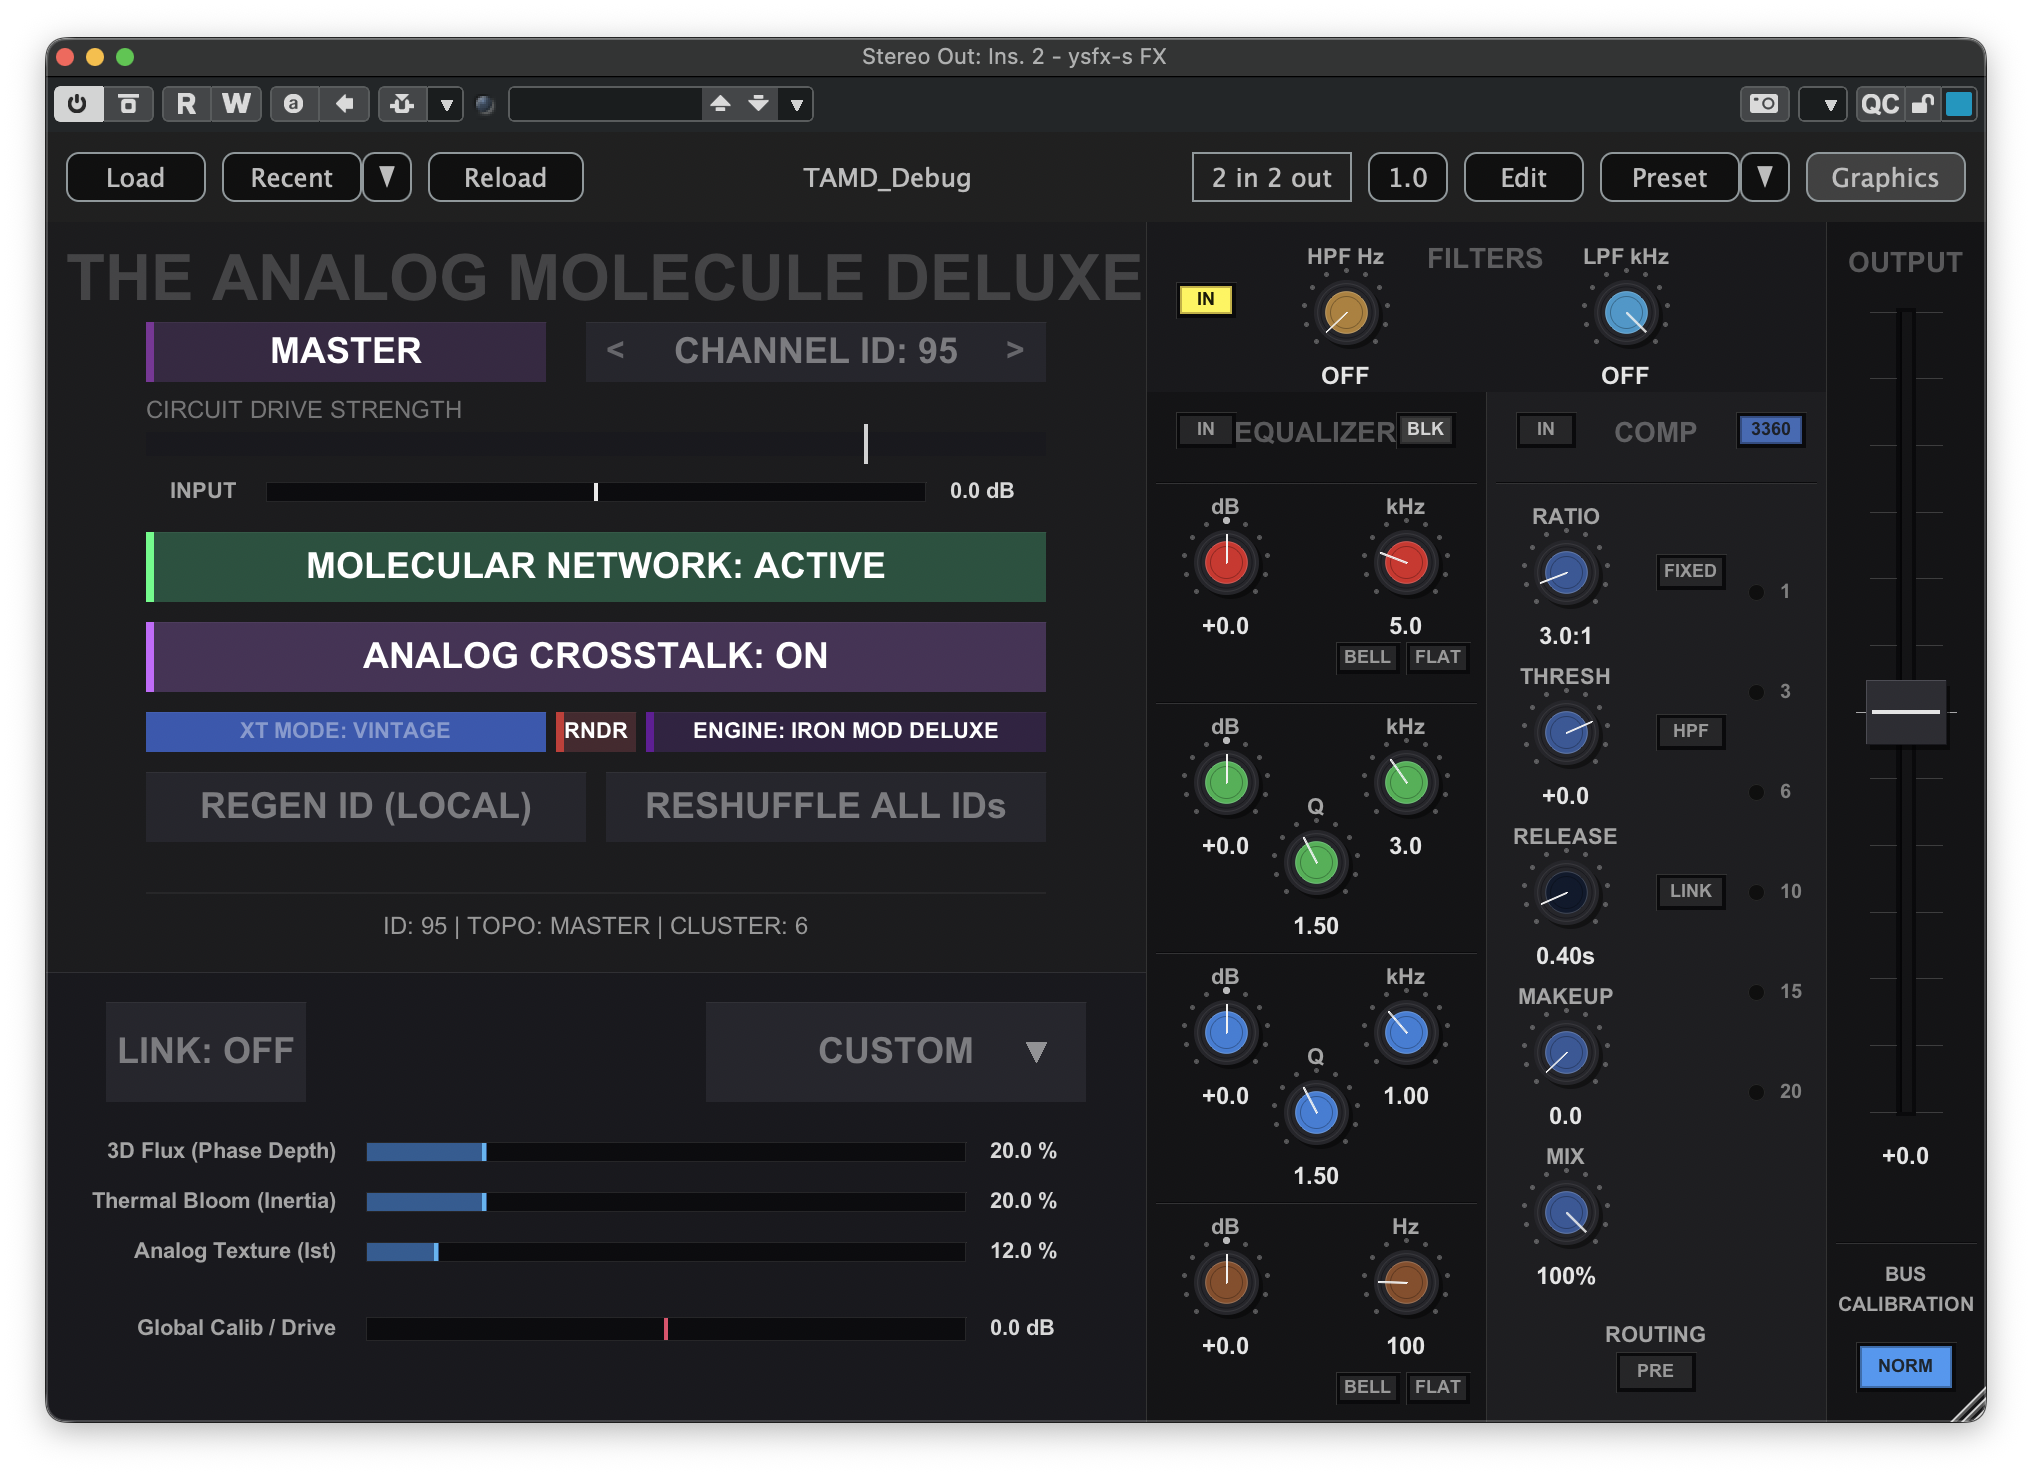
The instance of TAM or TAMD on your master bus is the only instance in the entire project whose topology should be set to Master. To make this change, click the CHANNEL button near the top of the plugin GUI, then click Master. This will update the topology of the instance to the master, and the plugin will now appear like the following:
At this point, the basic configuration for TAM or TAMD is complete.
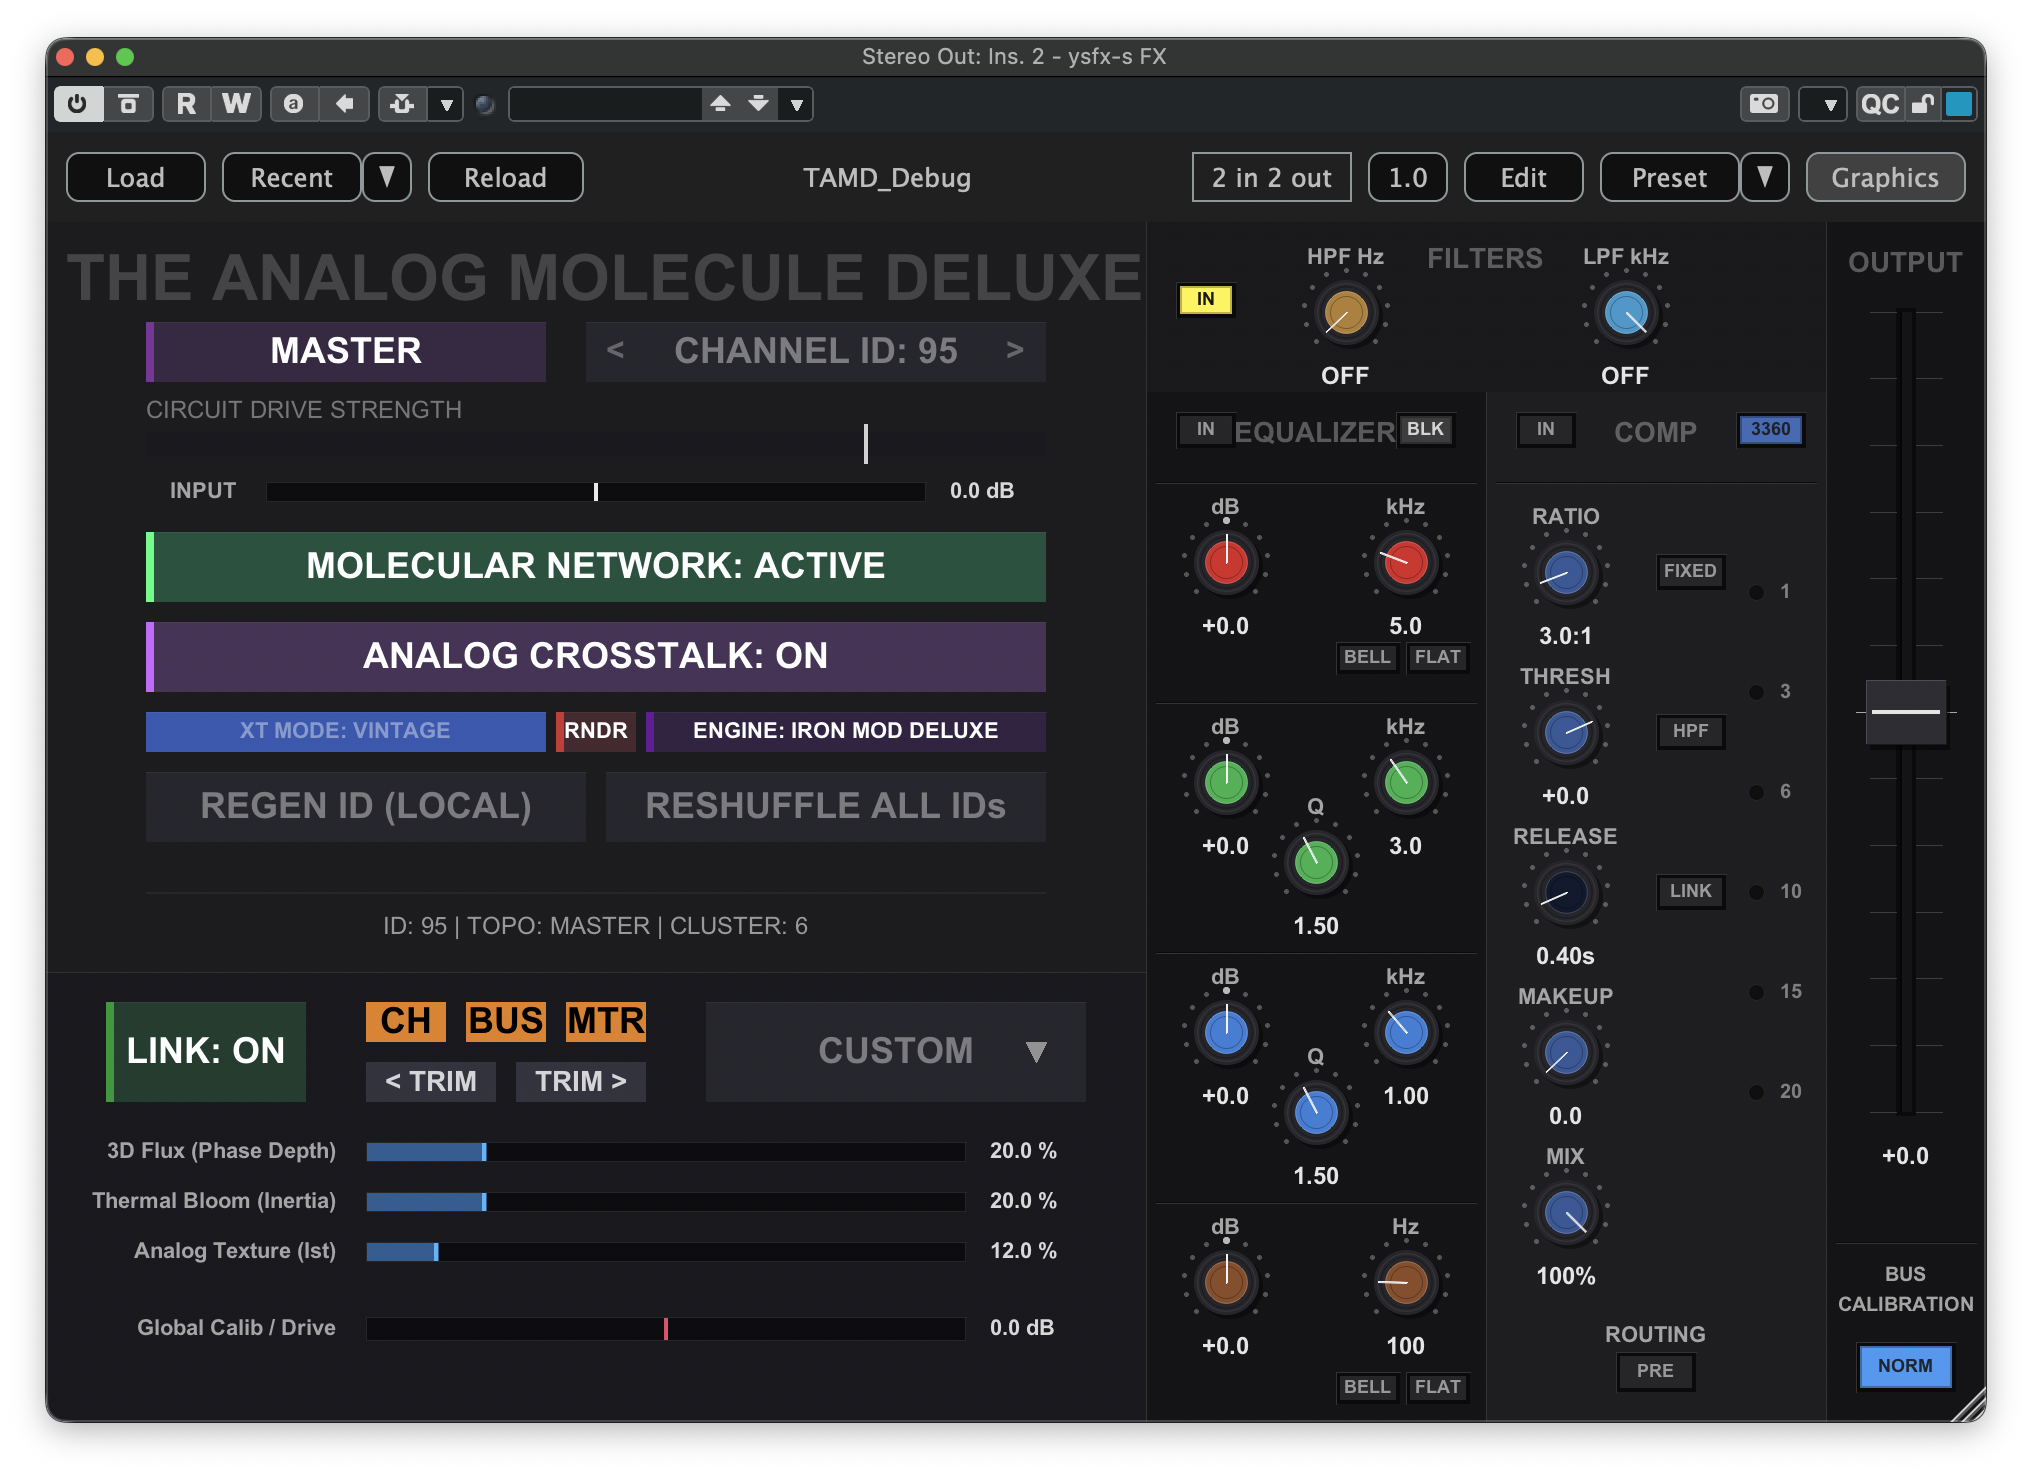
If you wish to link all the instances of TAM or TAMD in your project so they follow the console settings specified by the master instance, click the LINK: OFF button. TAM or TAMD will then appear like the following:

If you would like all the individual channels and busses to follow the console selection of the master, click the new CH and BUS buttons. TAM or TAMD will then appear like the following:
Now, you can click the CUSTOM dropdown and select a console flavor for your TAM or TAMD network. For example, when selecting the British Class A option, the master instance will resemble the following:
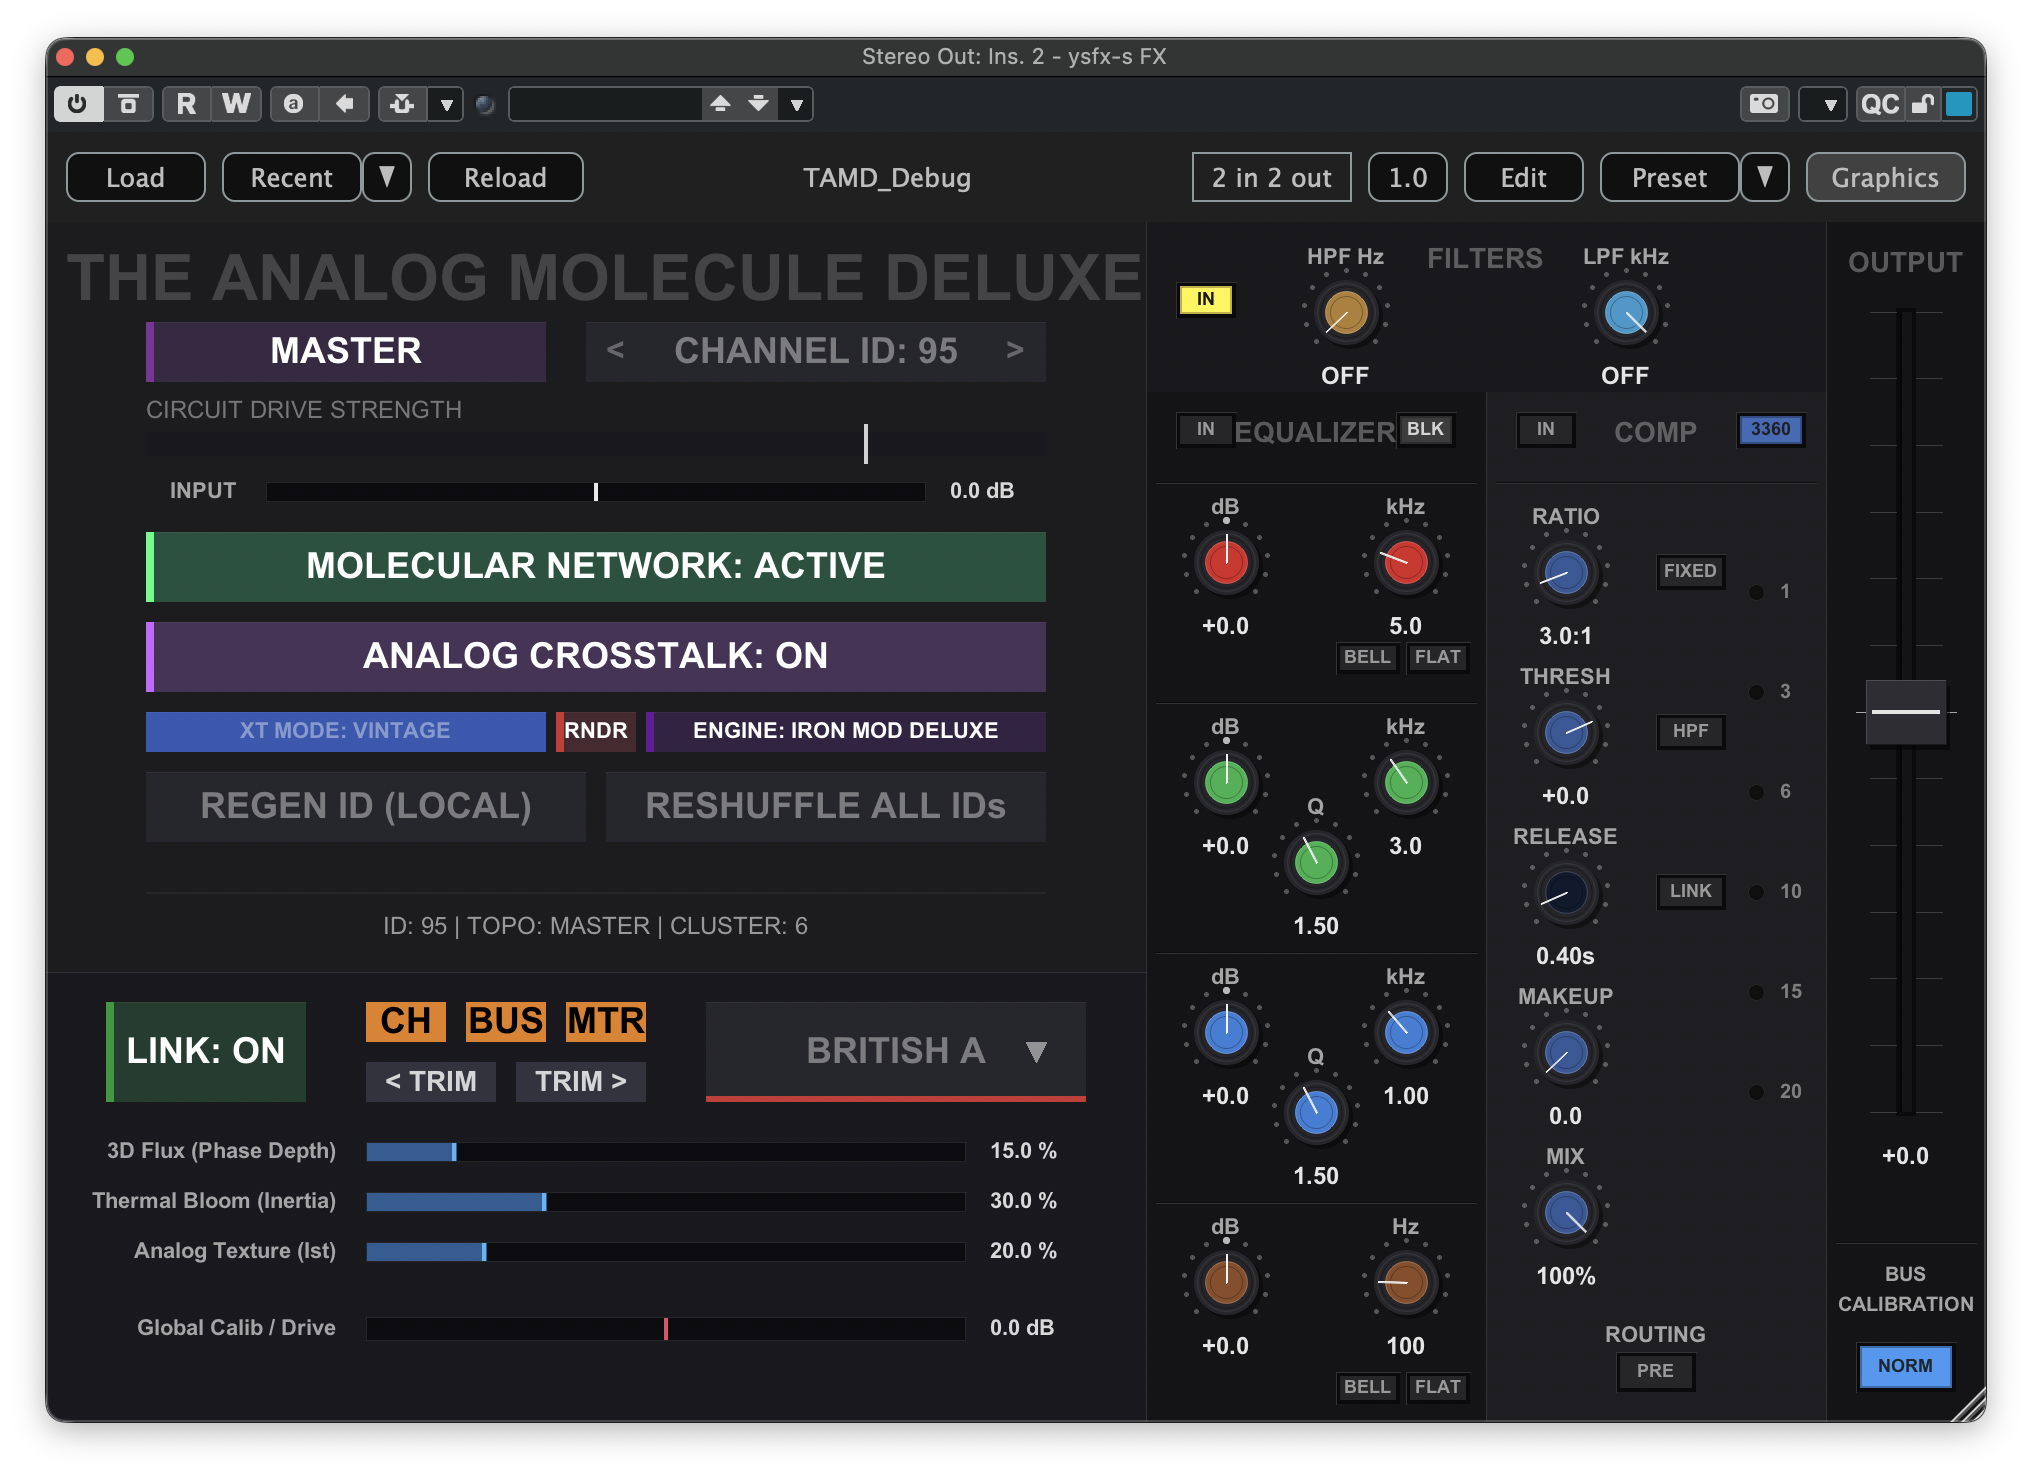
Note how the 3D Flux, Thermal Bloom, and Analog Texture parameters have changed. If we now open an instance of YSFX on one of the individual channels, we will see that it is linked to the rest of the network, and the same parameters will have updated to reflect the console flavor selection: