8. Master Bus
8.1 General Setup
To use THS on the master bus, you will need to begin by instantiating your plugin wrapper as the first insert on your master bus.
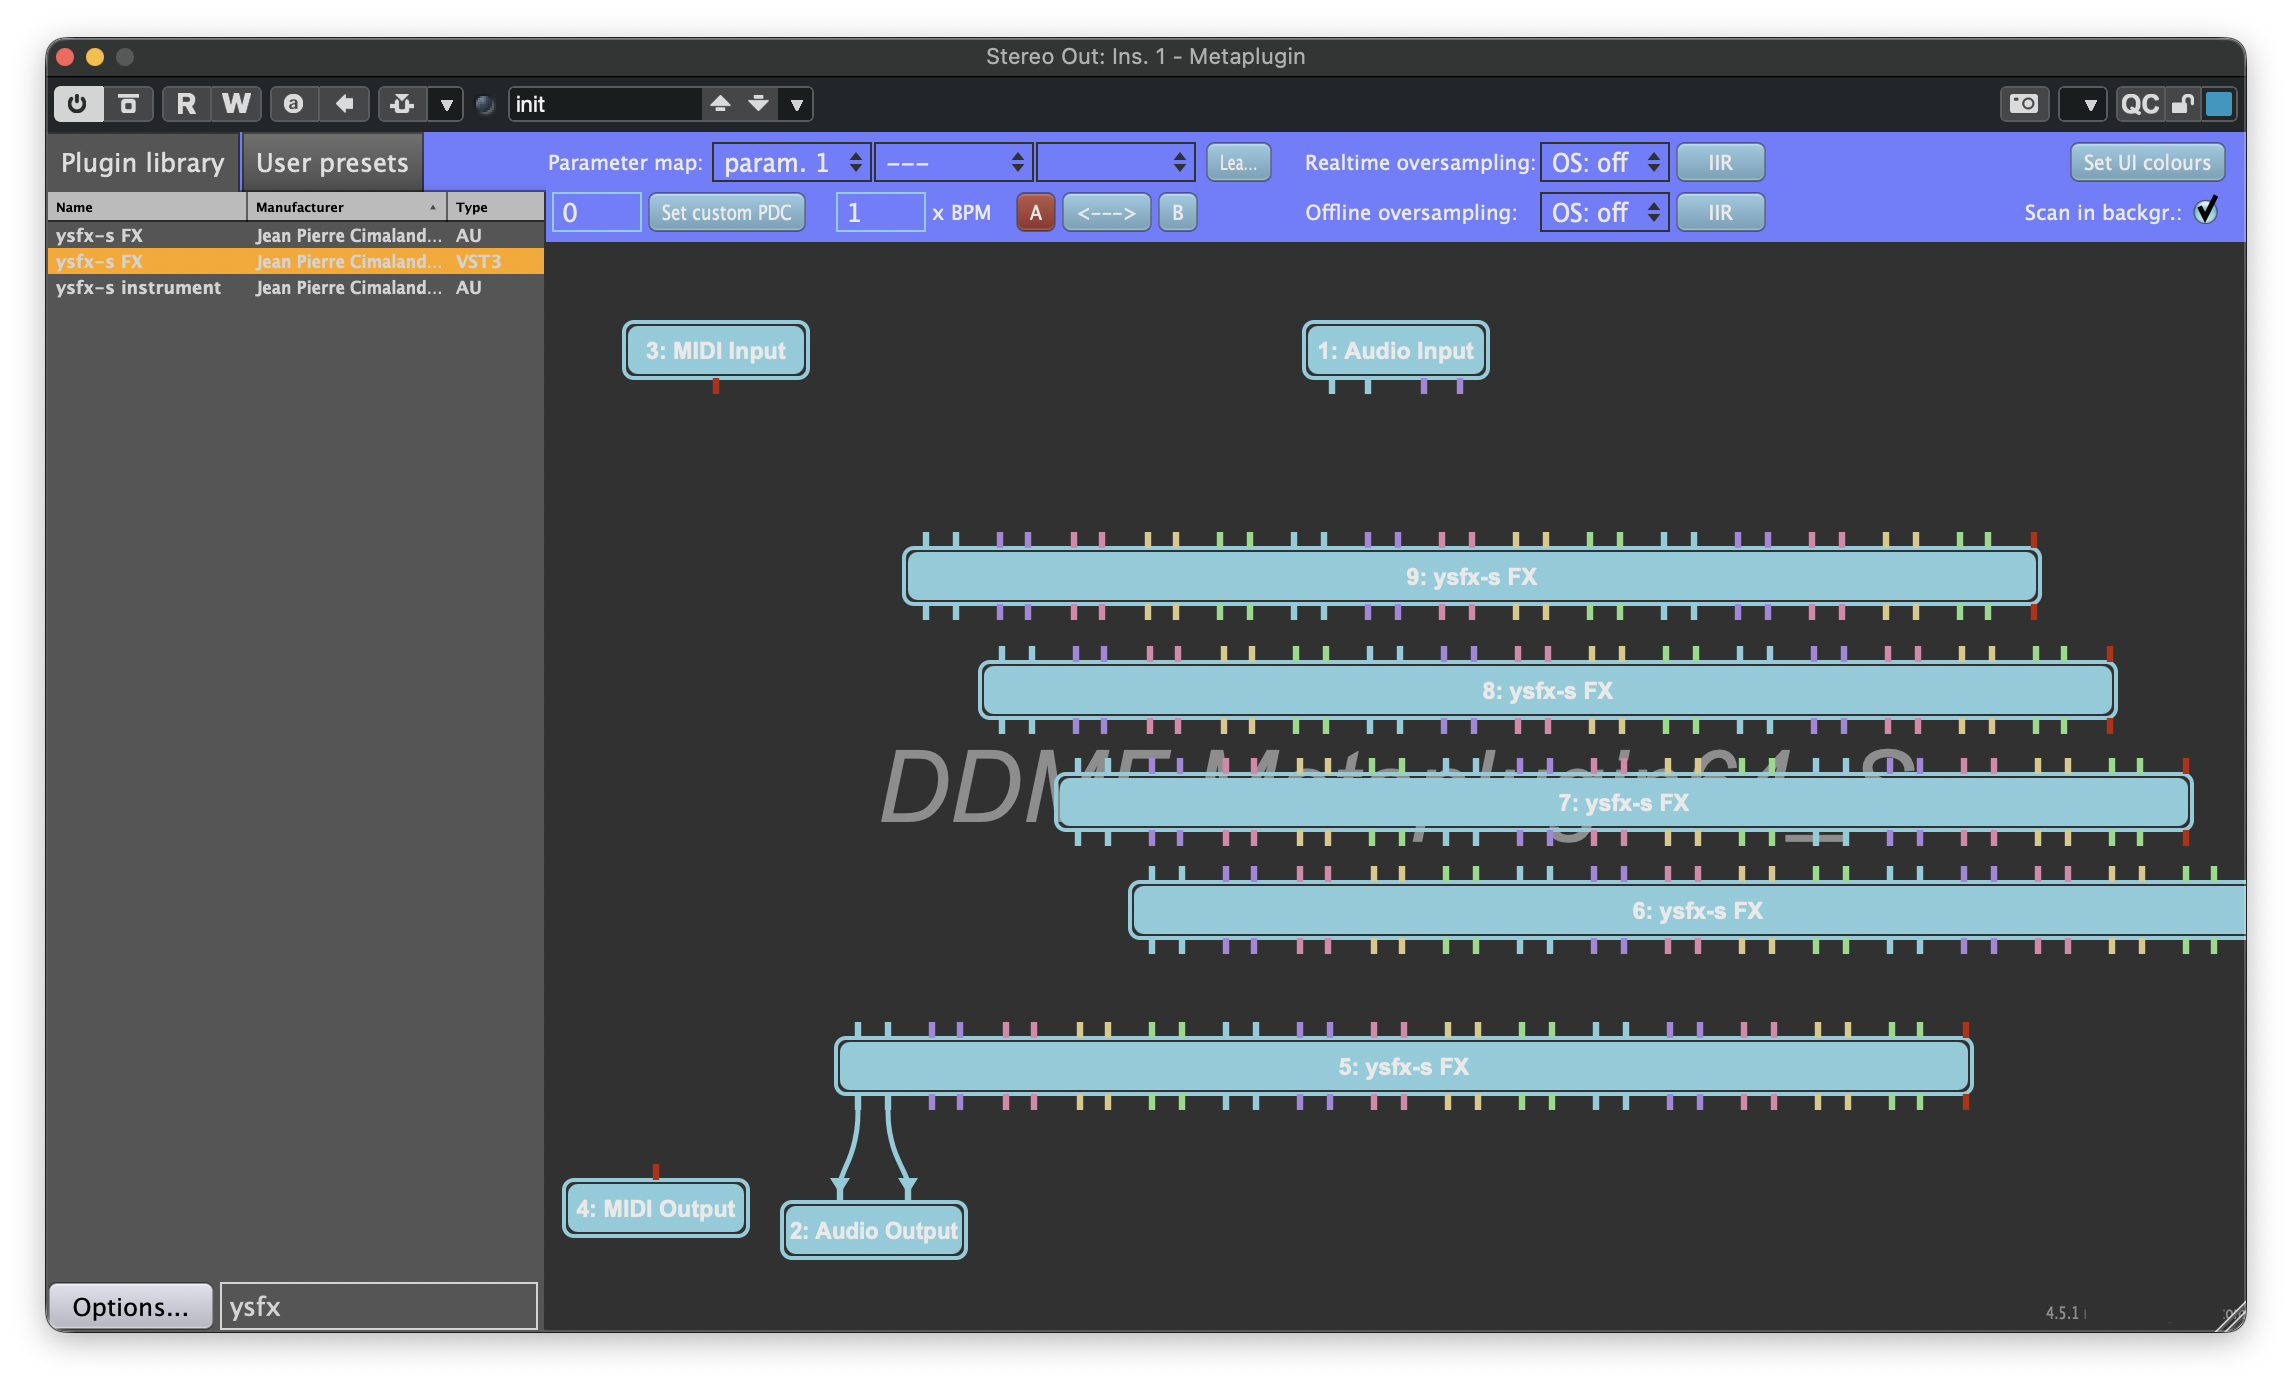
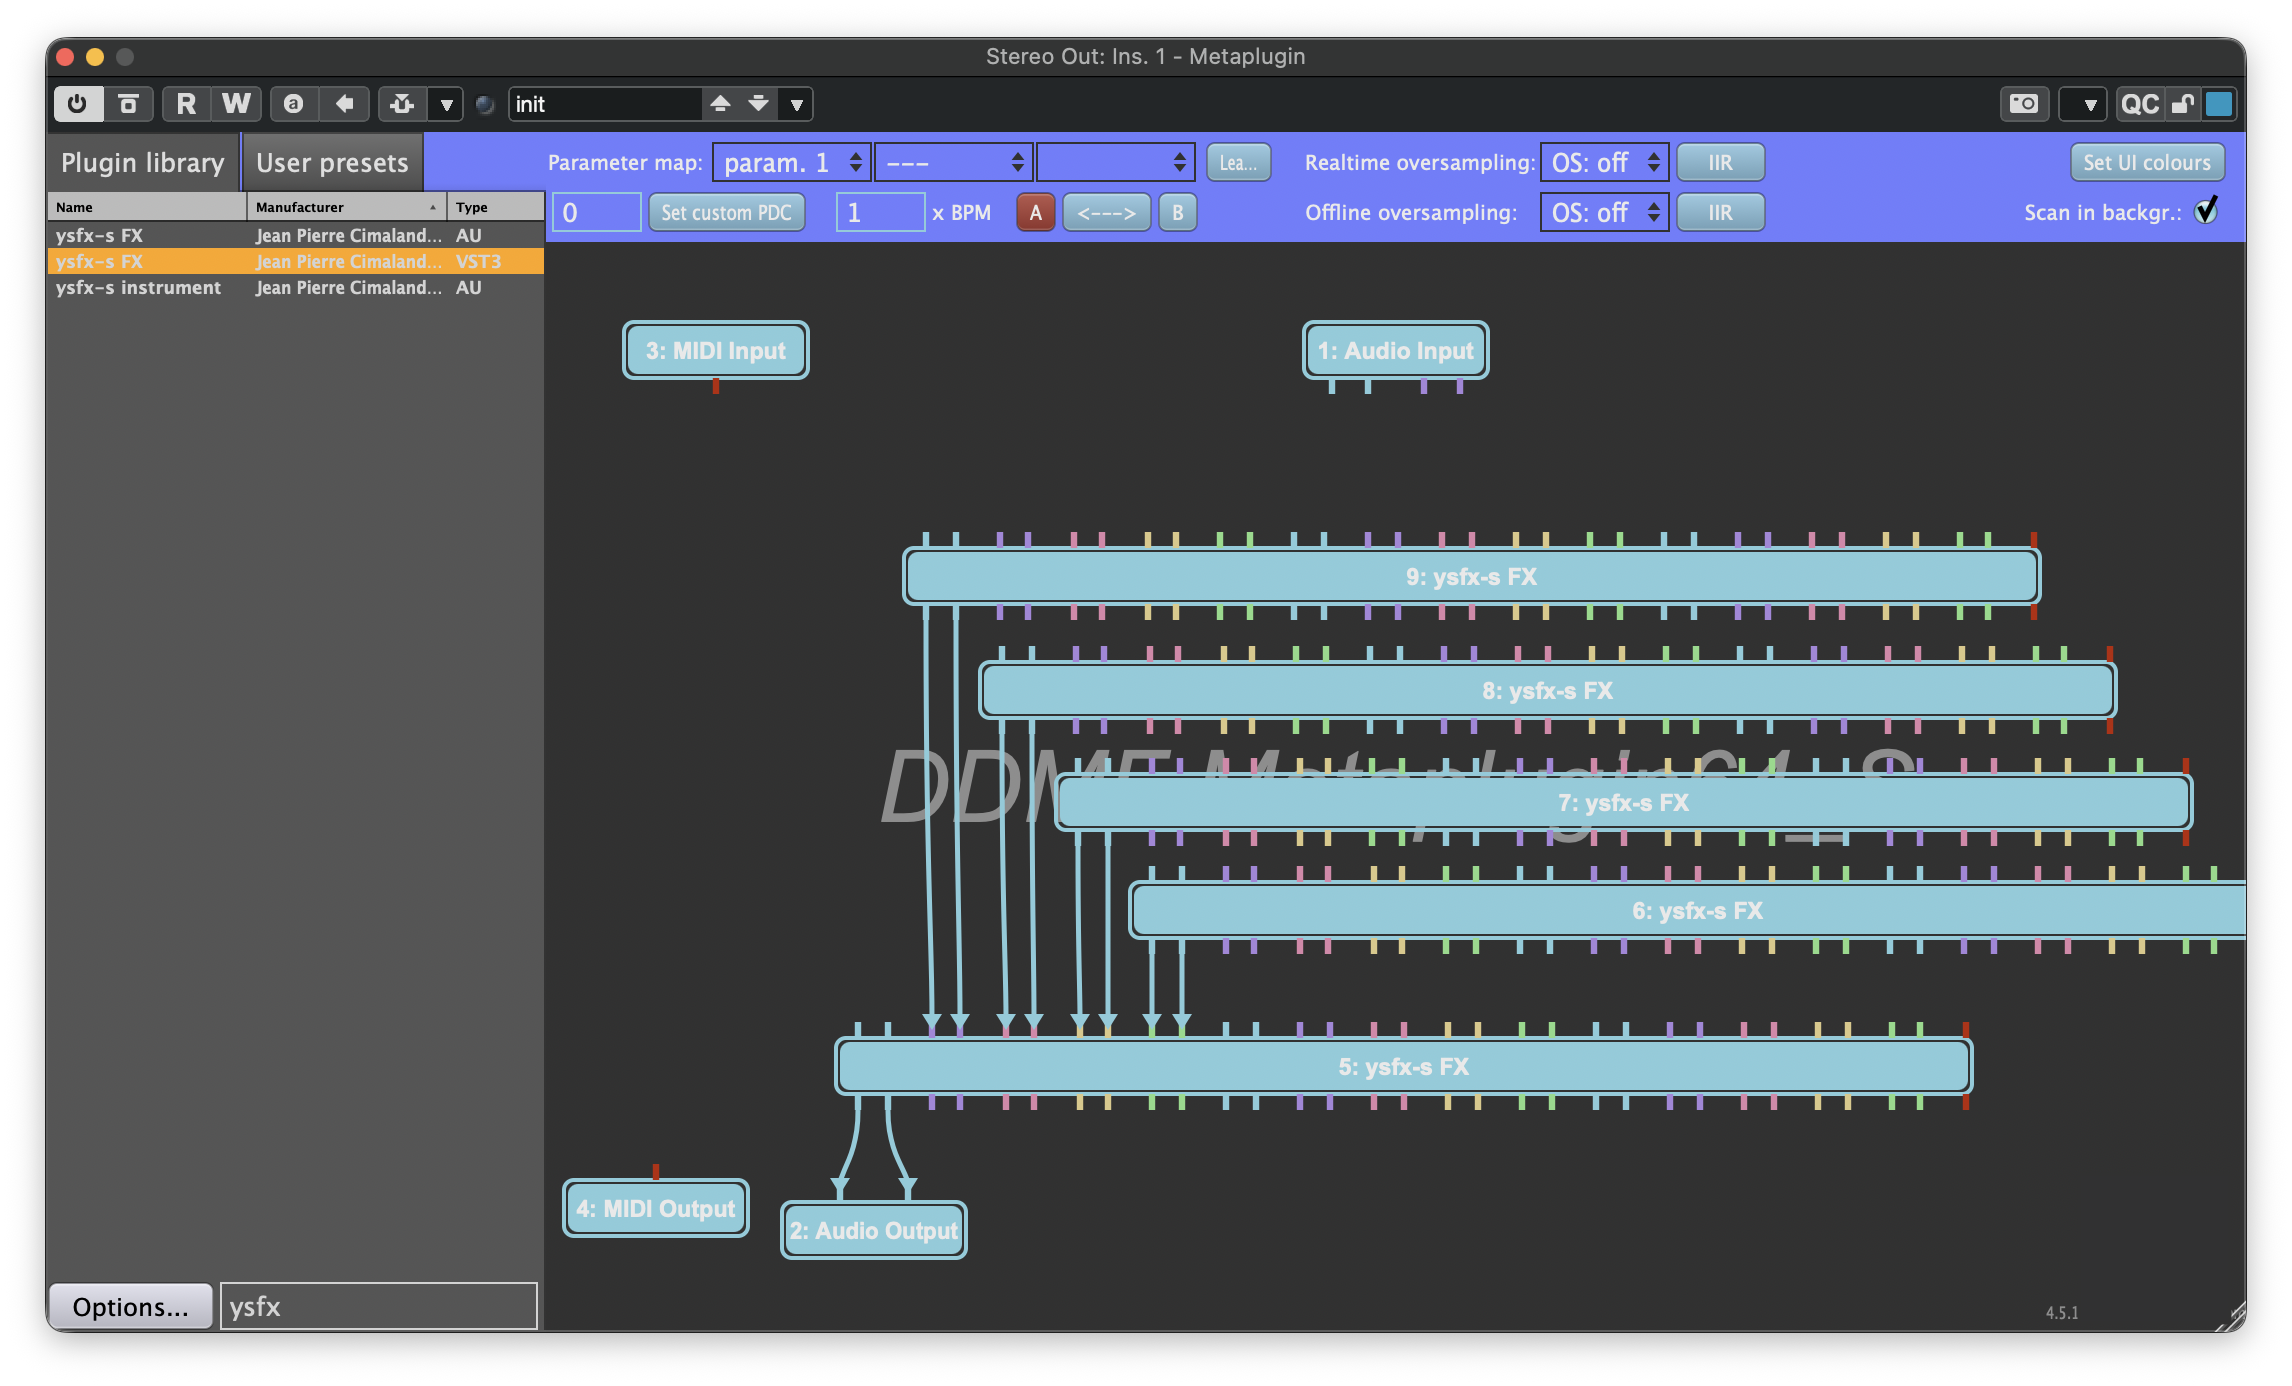
When you first open Metaplugin, it will resemble the following:
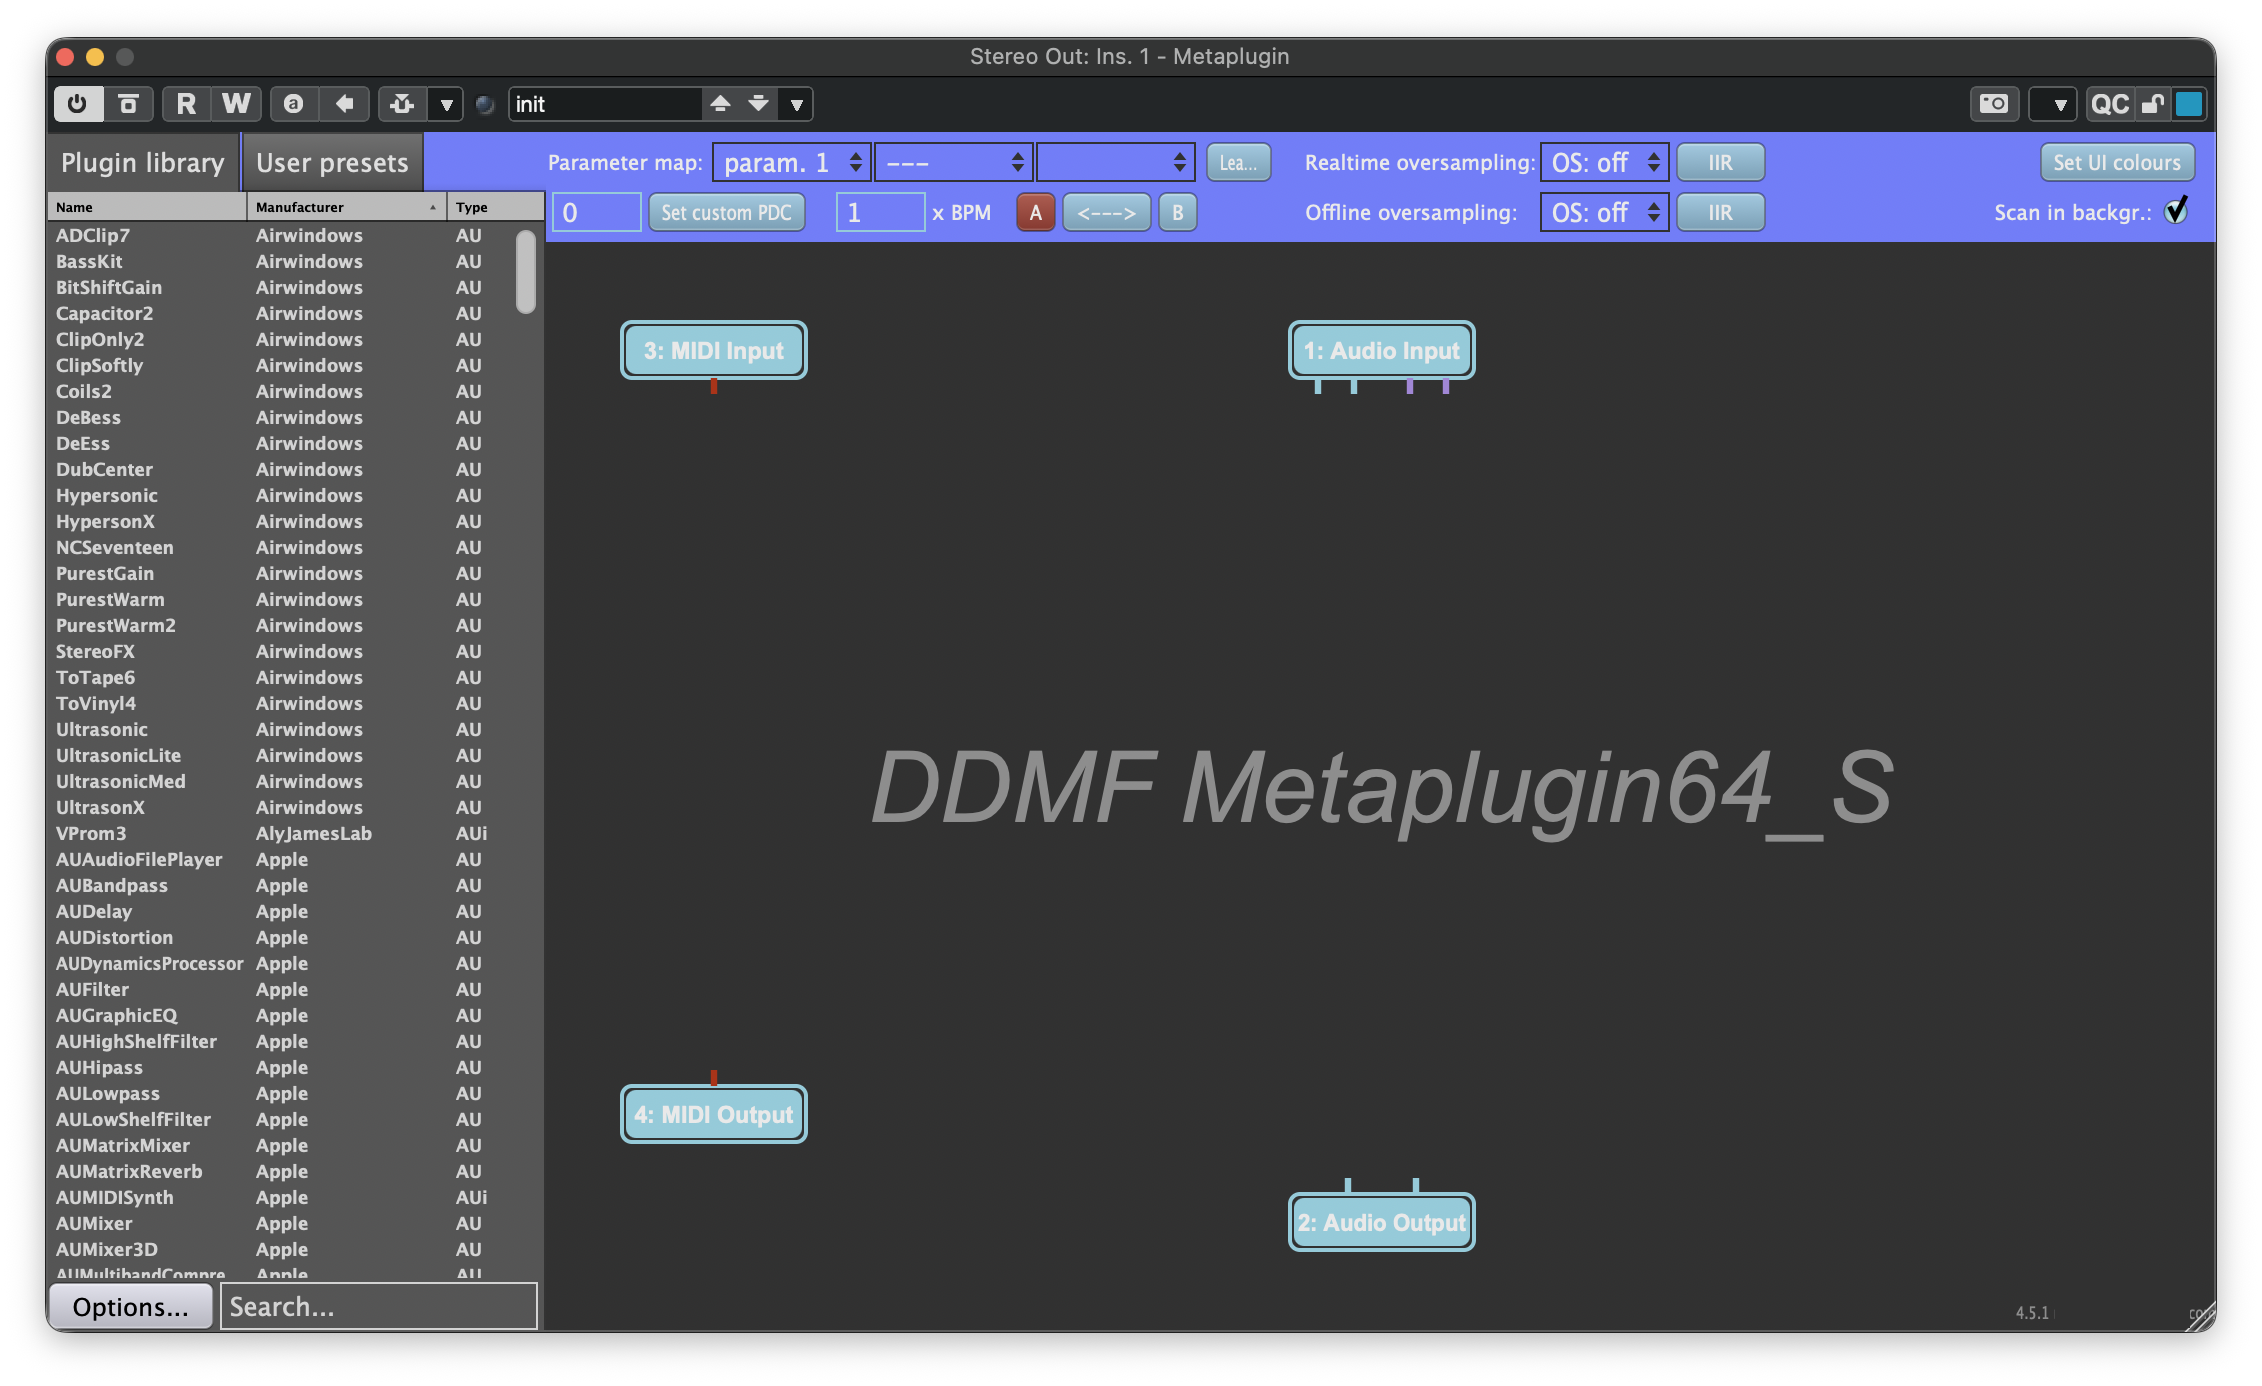
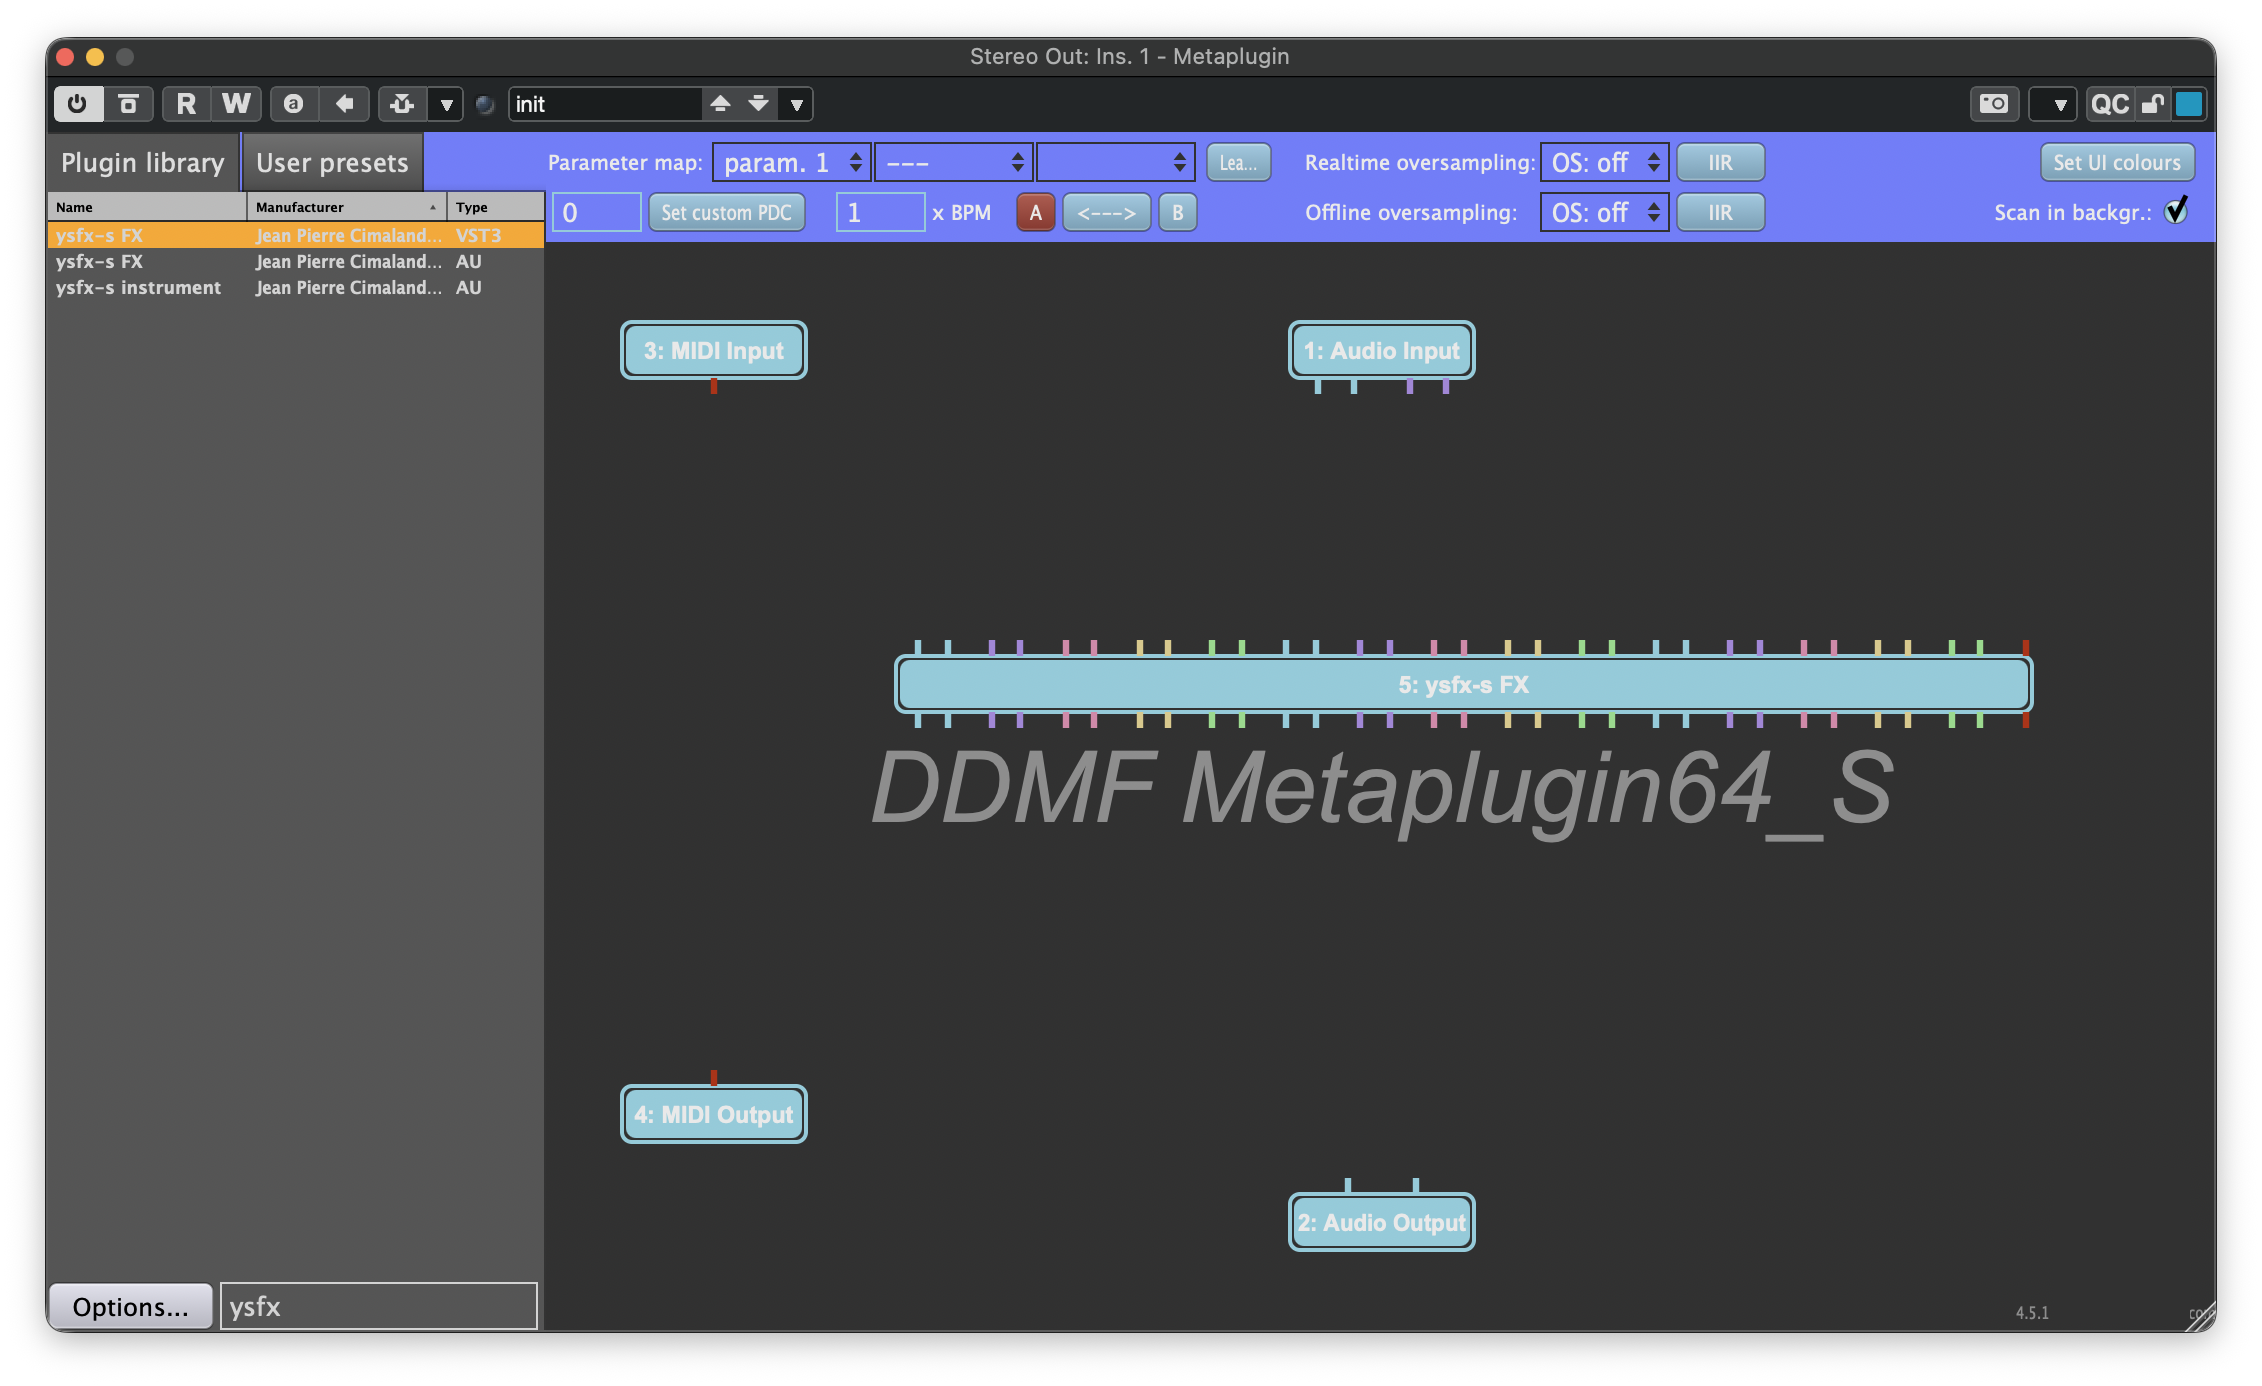
Begin by loading YSFX. You can do this manually by right-clicking anywhere in the grey area of Metaplugin, then clicking Load plugin from file..., or by clicking Options... in the bottom-left corner of the plugin and selecting any of the available scan options to populate the Plugin library. Then search for YSFX in the plugin list and drag-and-drop it onto the canvas. Once loaded, YSFX will appear as follows:
Mixing Plugin Formats
When adding your wrapper and router plugins to Metaplugin, make sure to select the same format as the plugins used by your host DAW. For example, if you are using Cubase, make sure you select VST3 plugins. If you are using Logic, select AU plugins instead. Mixing plugin formats can cause synchronization issues.
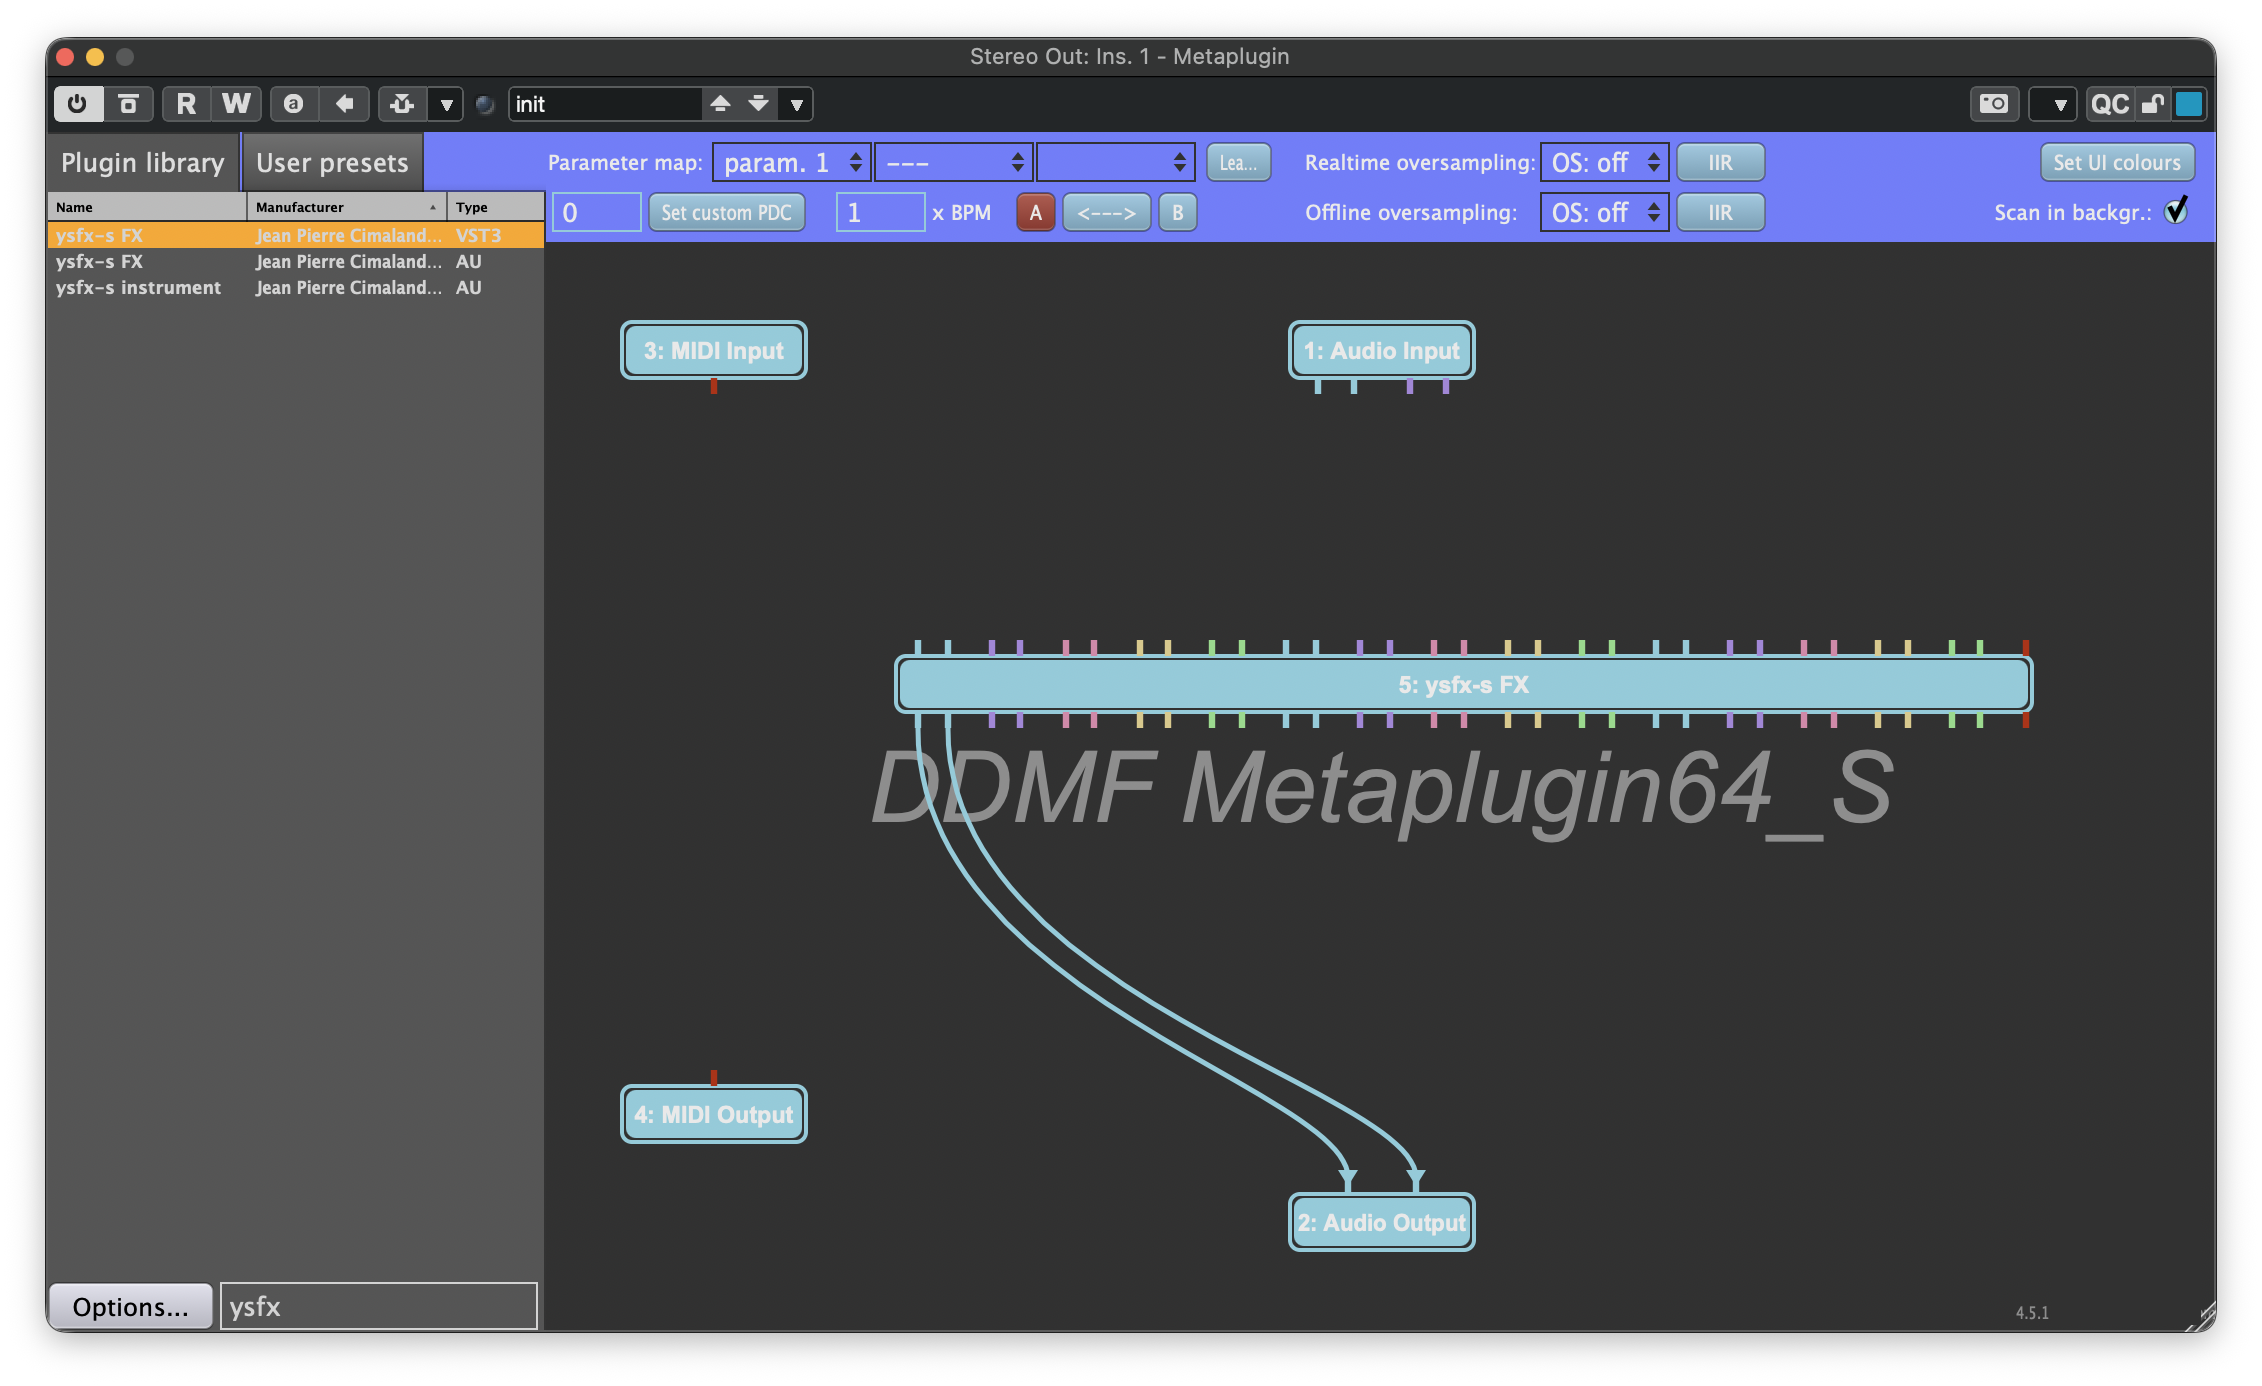
In Metaplugin, the pins on the top of all plugin nodes are considered to be the inputs, and the pins on the bottom are the outputs. The channel numbers increase from left to right, so the first two pins on the top and bottom are your "normal" stereo input and output pins. We can begin by connecting the first two pins on the bottom of YSFX to the two pins of the Audio Output node to connect what will eventually be the output of THS to the output of Metaplugin:
Moving Nodes in Metaplugin
Nodes can be rearranged and moved within Metaplugin at any time. Feel free to rearrange and move them as desired to improve the legibility of the connectivity graph.
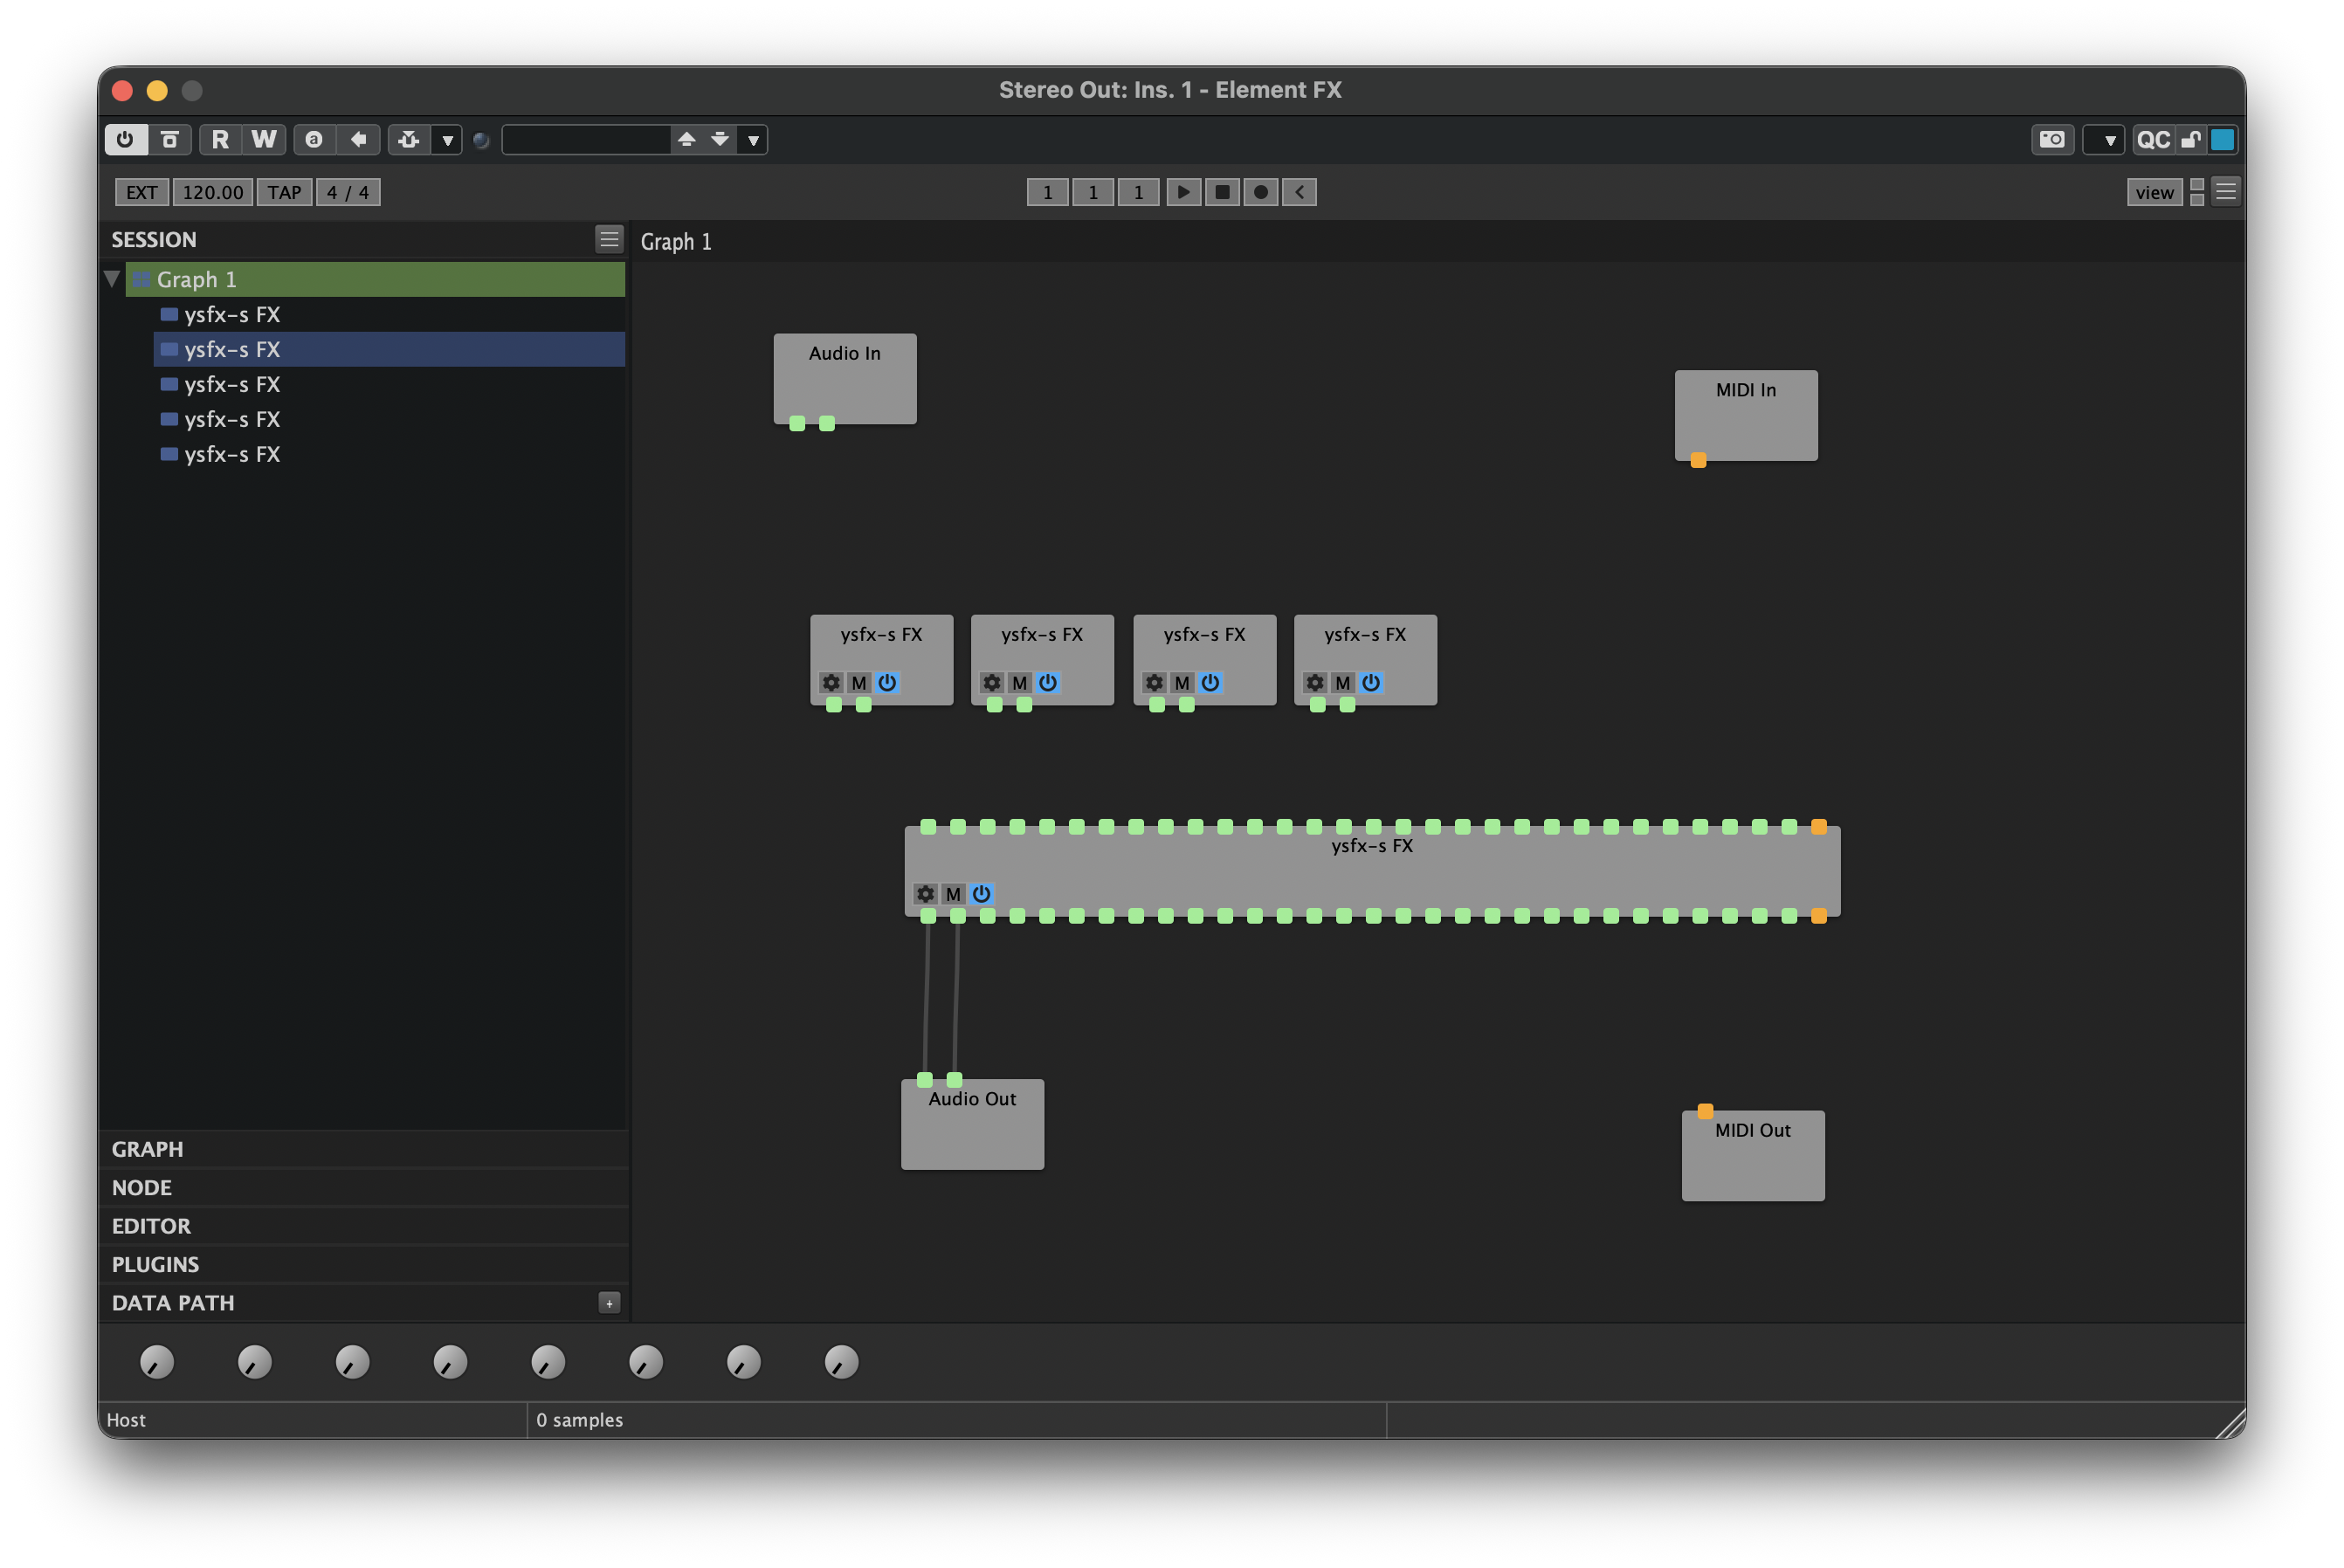
When you first open Element, it will resemble the following:
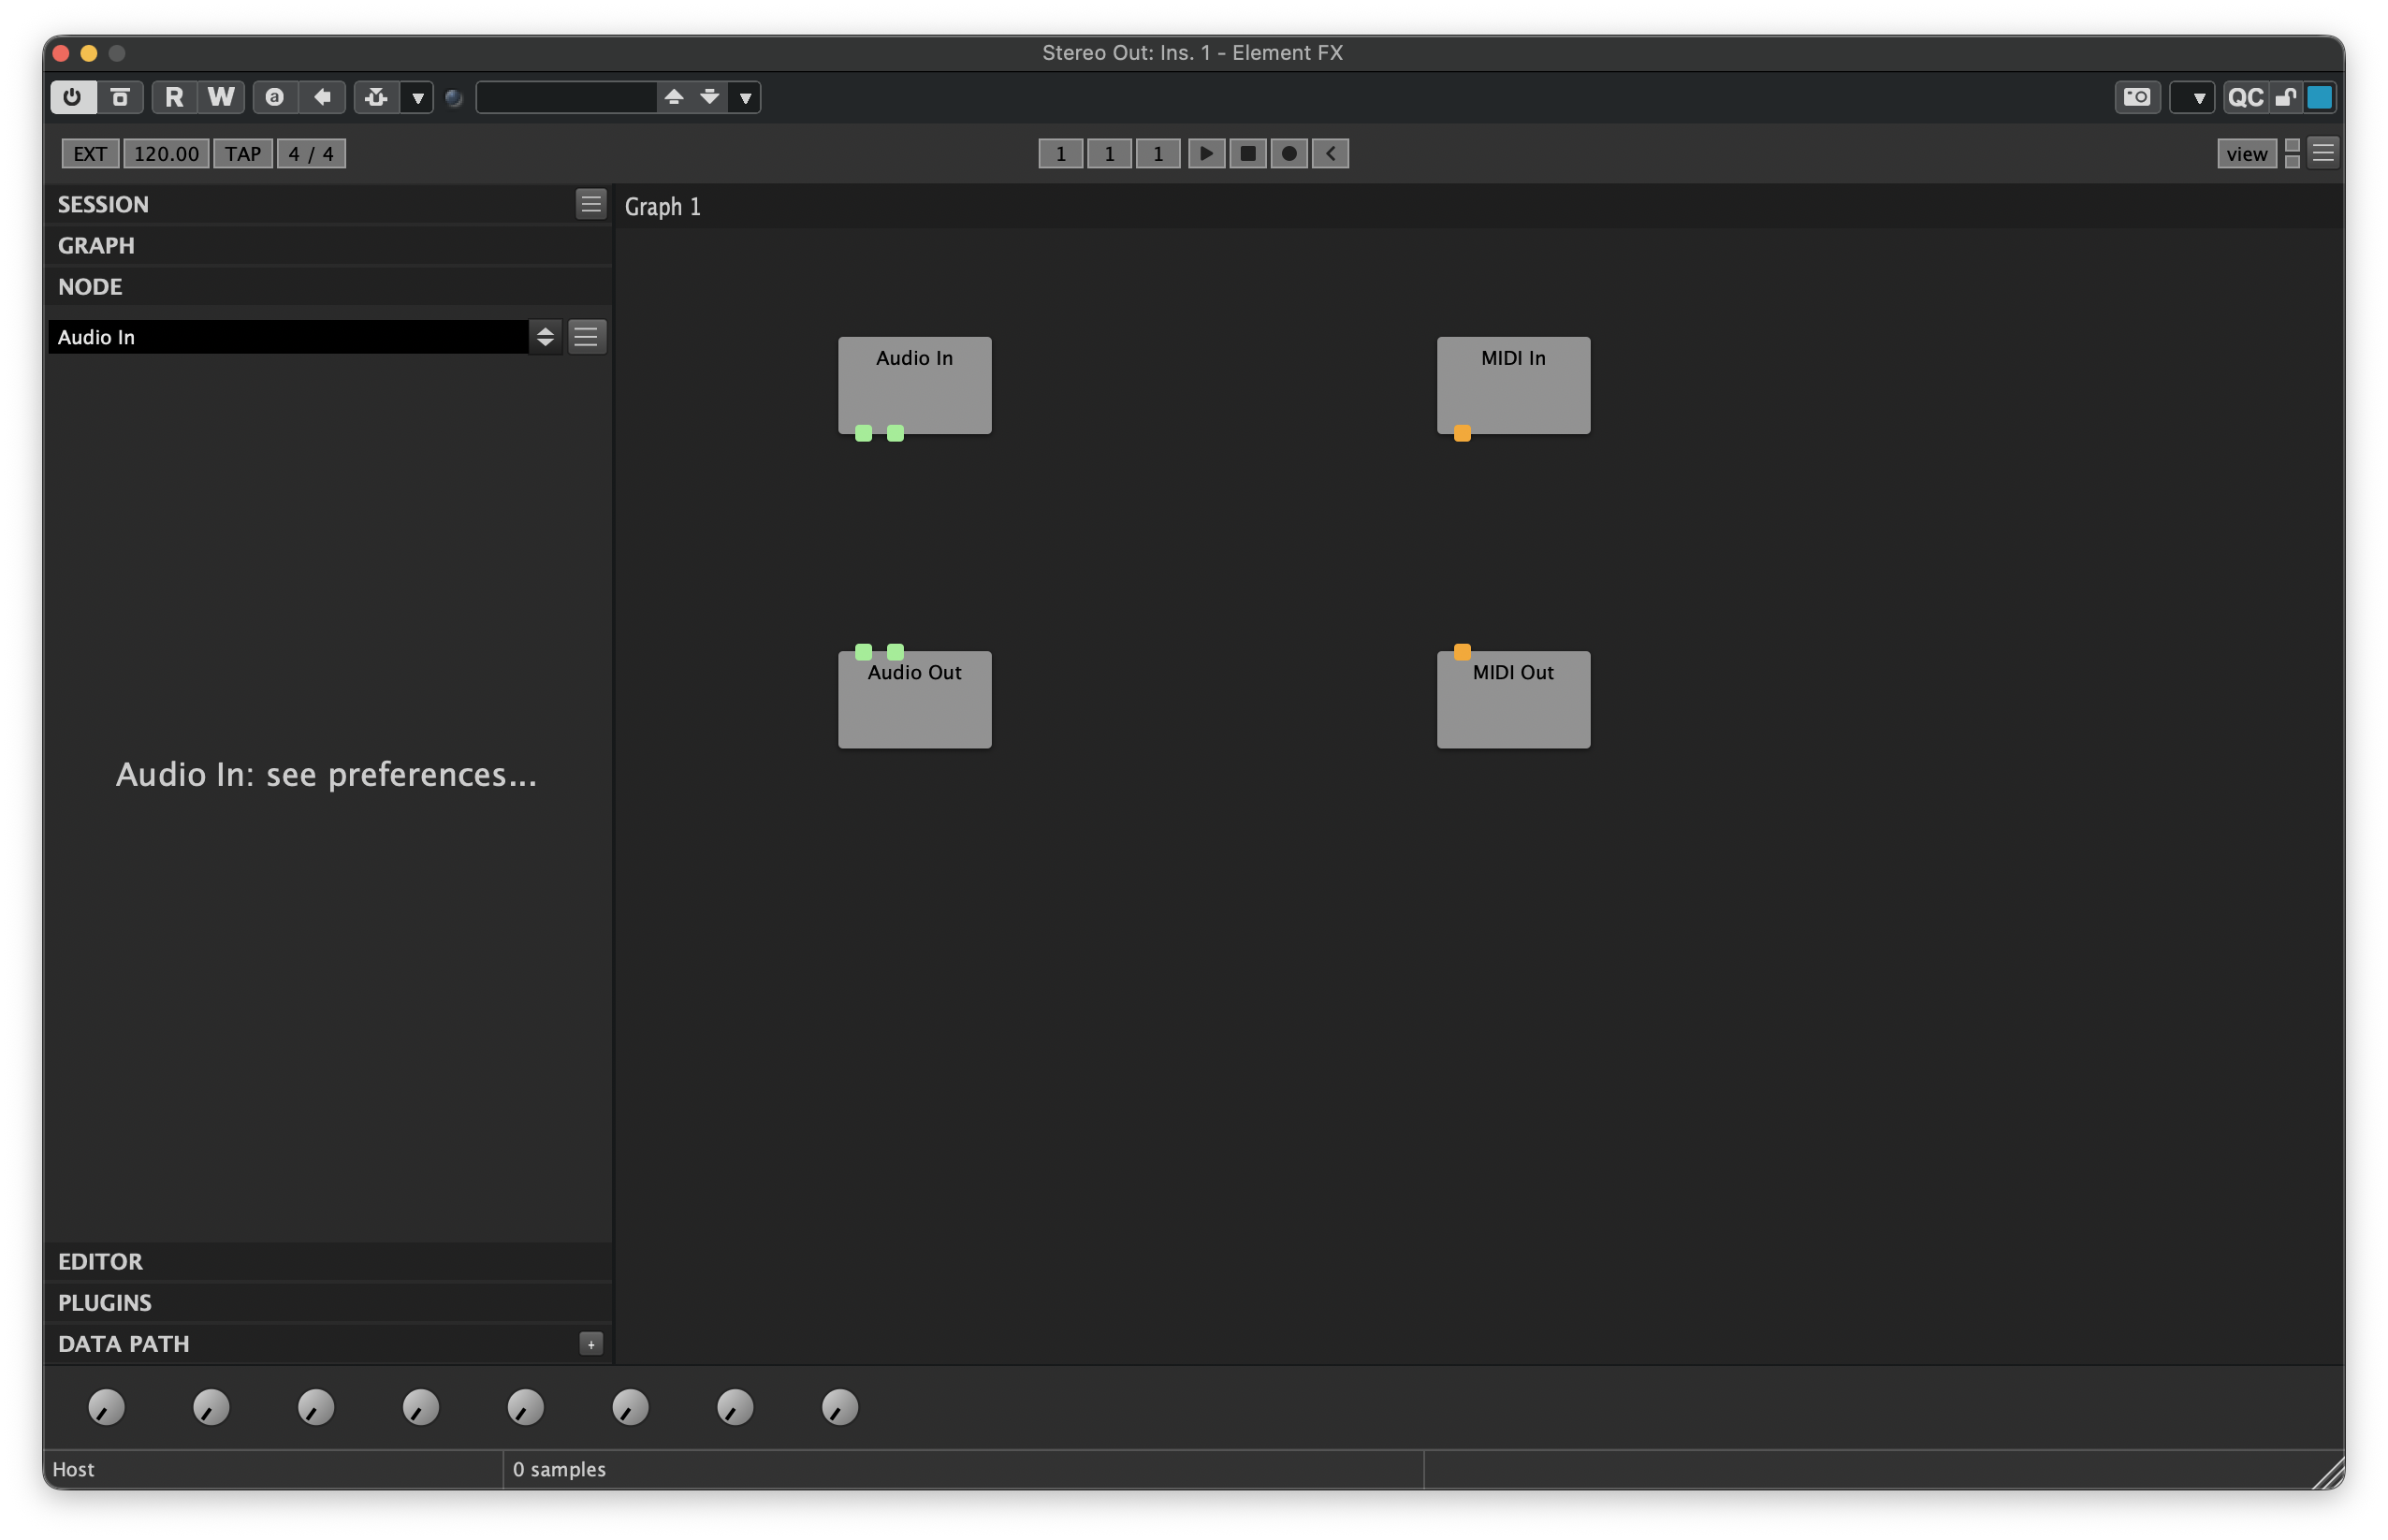
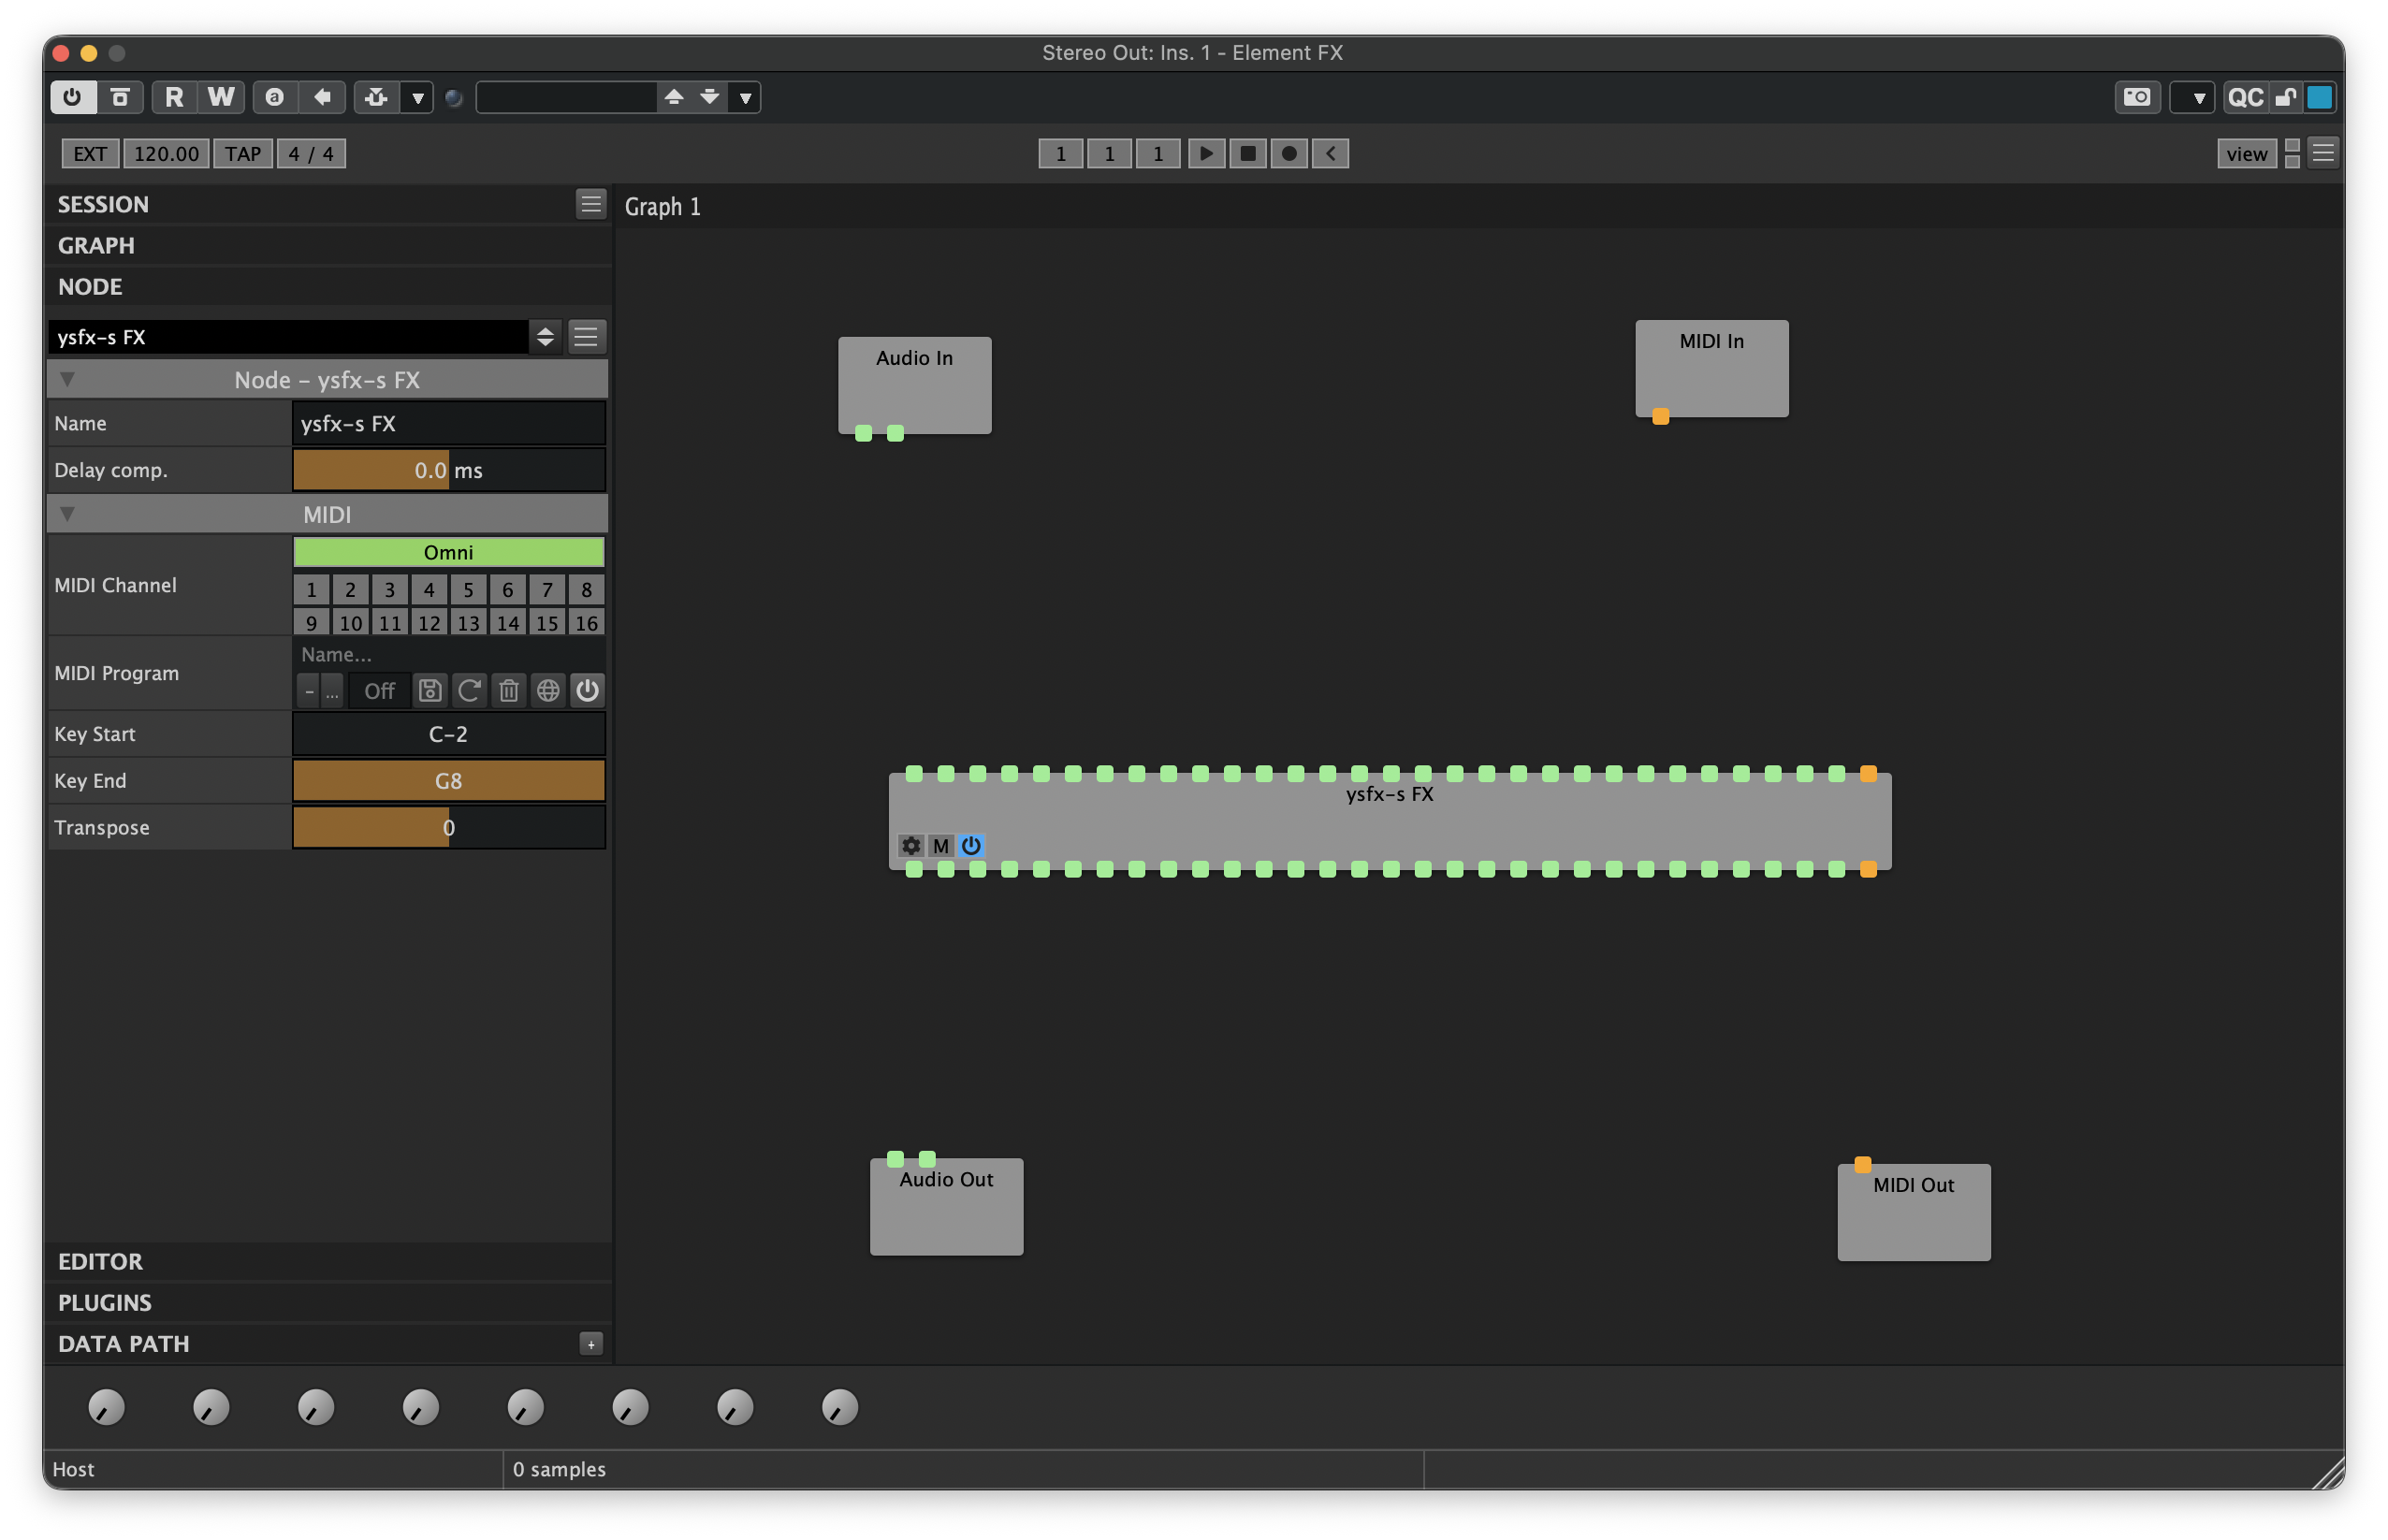
Begin by loading YSFX. If this is your first time using Element, you can load YSFX by right-clicking anywhere in the grey area of Element, then hover over Unverified. Then hover over the plugin format that matches your host DAW's preferred format. Scroll through the list and search for the ysfx-s FX plugin, then click it. Otherwise, hover over Jean Pierre Cimilando / Joep Vanlier and click the variant of YSFX that matches your host DAW's preferred format. Once loaded, YSFX will appear as follows:
Mixing Plugin Formats
When adding your wrapper and router plugins to Element, make sure to select the same format as the plugins used by your host DAW. For example, if you are using Cubase, make sure you select VST3 plugins. If you are using Logic, select AU plugins instead. Mixing plugin formats can cause synchronization issues.
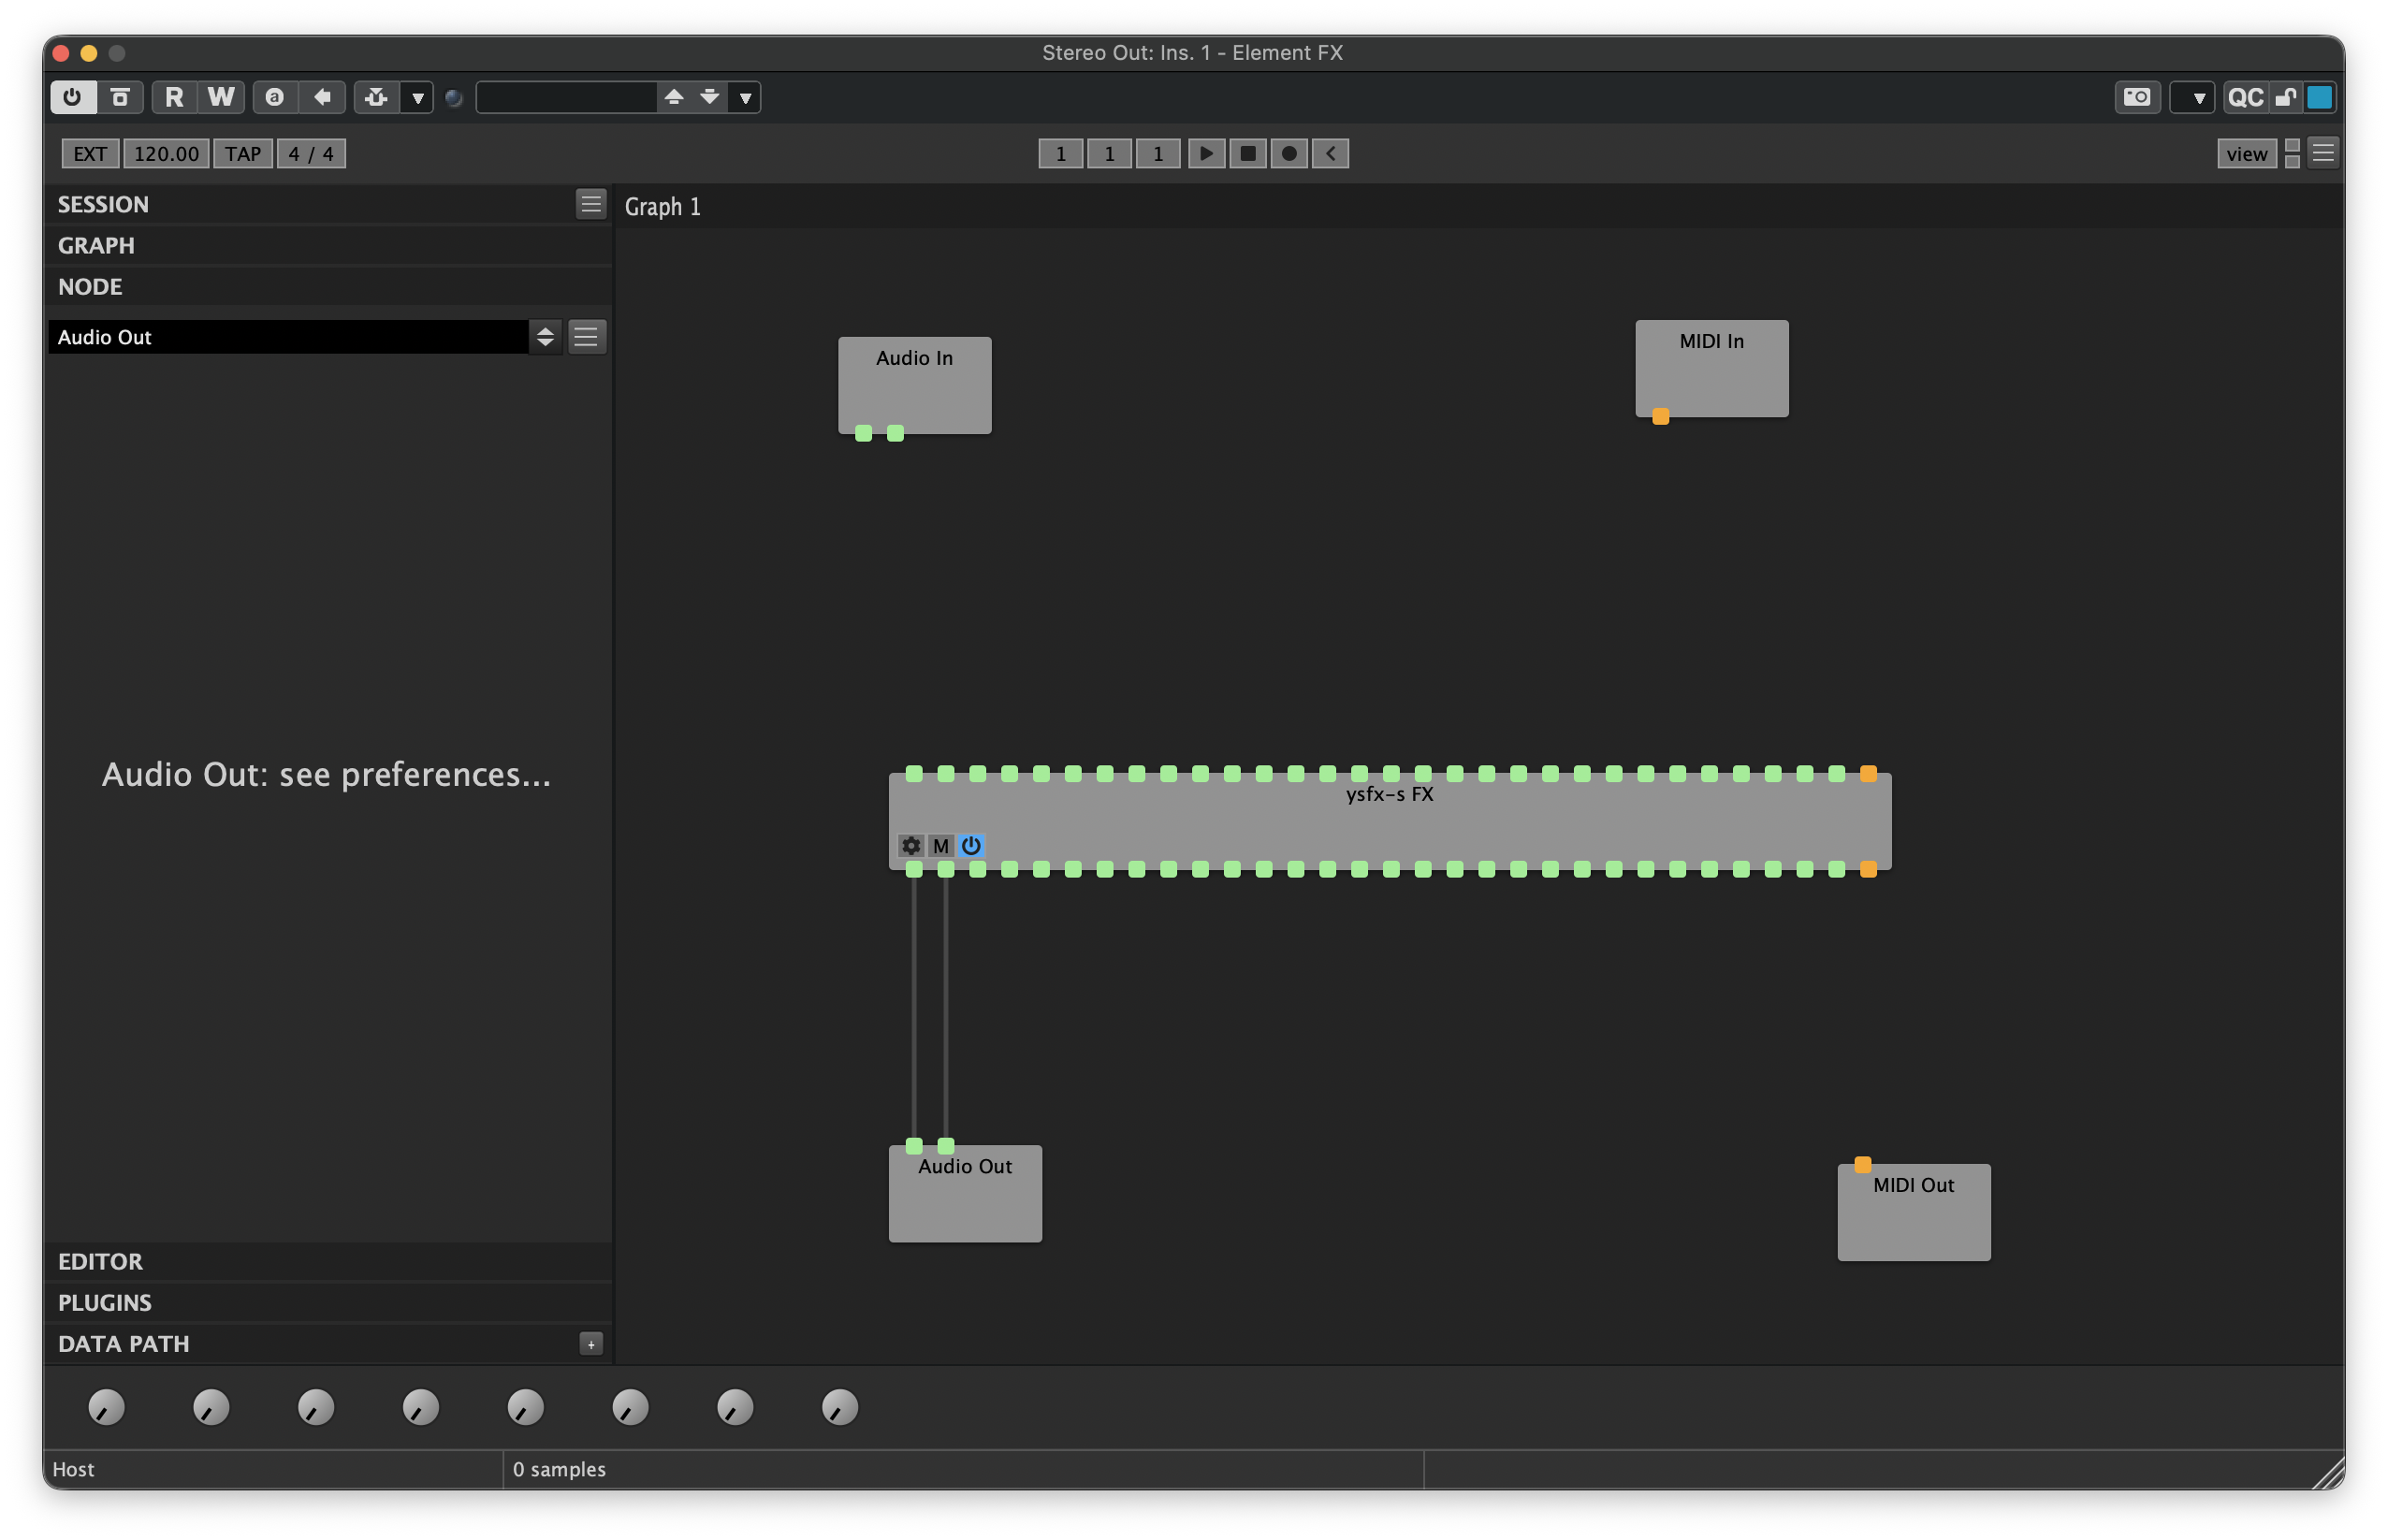
In Element, the pins on the top of all plugin nodes are considered to be the inputs, and the pins on the bottom are the outputs. The channel numbers increase from left to right, so the first two pins on the top and bottom are your "normal" stereo input and output pins. We can begin by connecting the first two pins on the bottom of YSFX to the two pins of the Audio Out node to connect what will eventually be the output of THS to the output of Element:
Moving Nodes in Element
Nodes can be rearranged and moved within Element at any time. Feel free to rearrange and move them as desired to improve the legibility of the connectivity graph.
8.2 Router Plugin
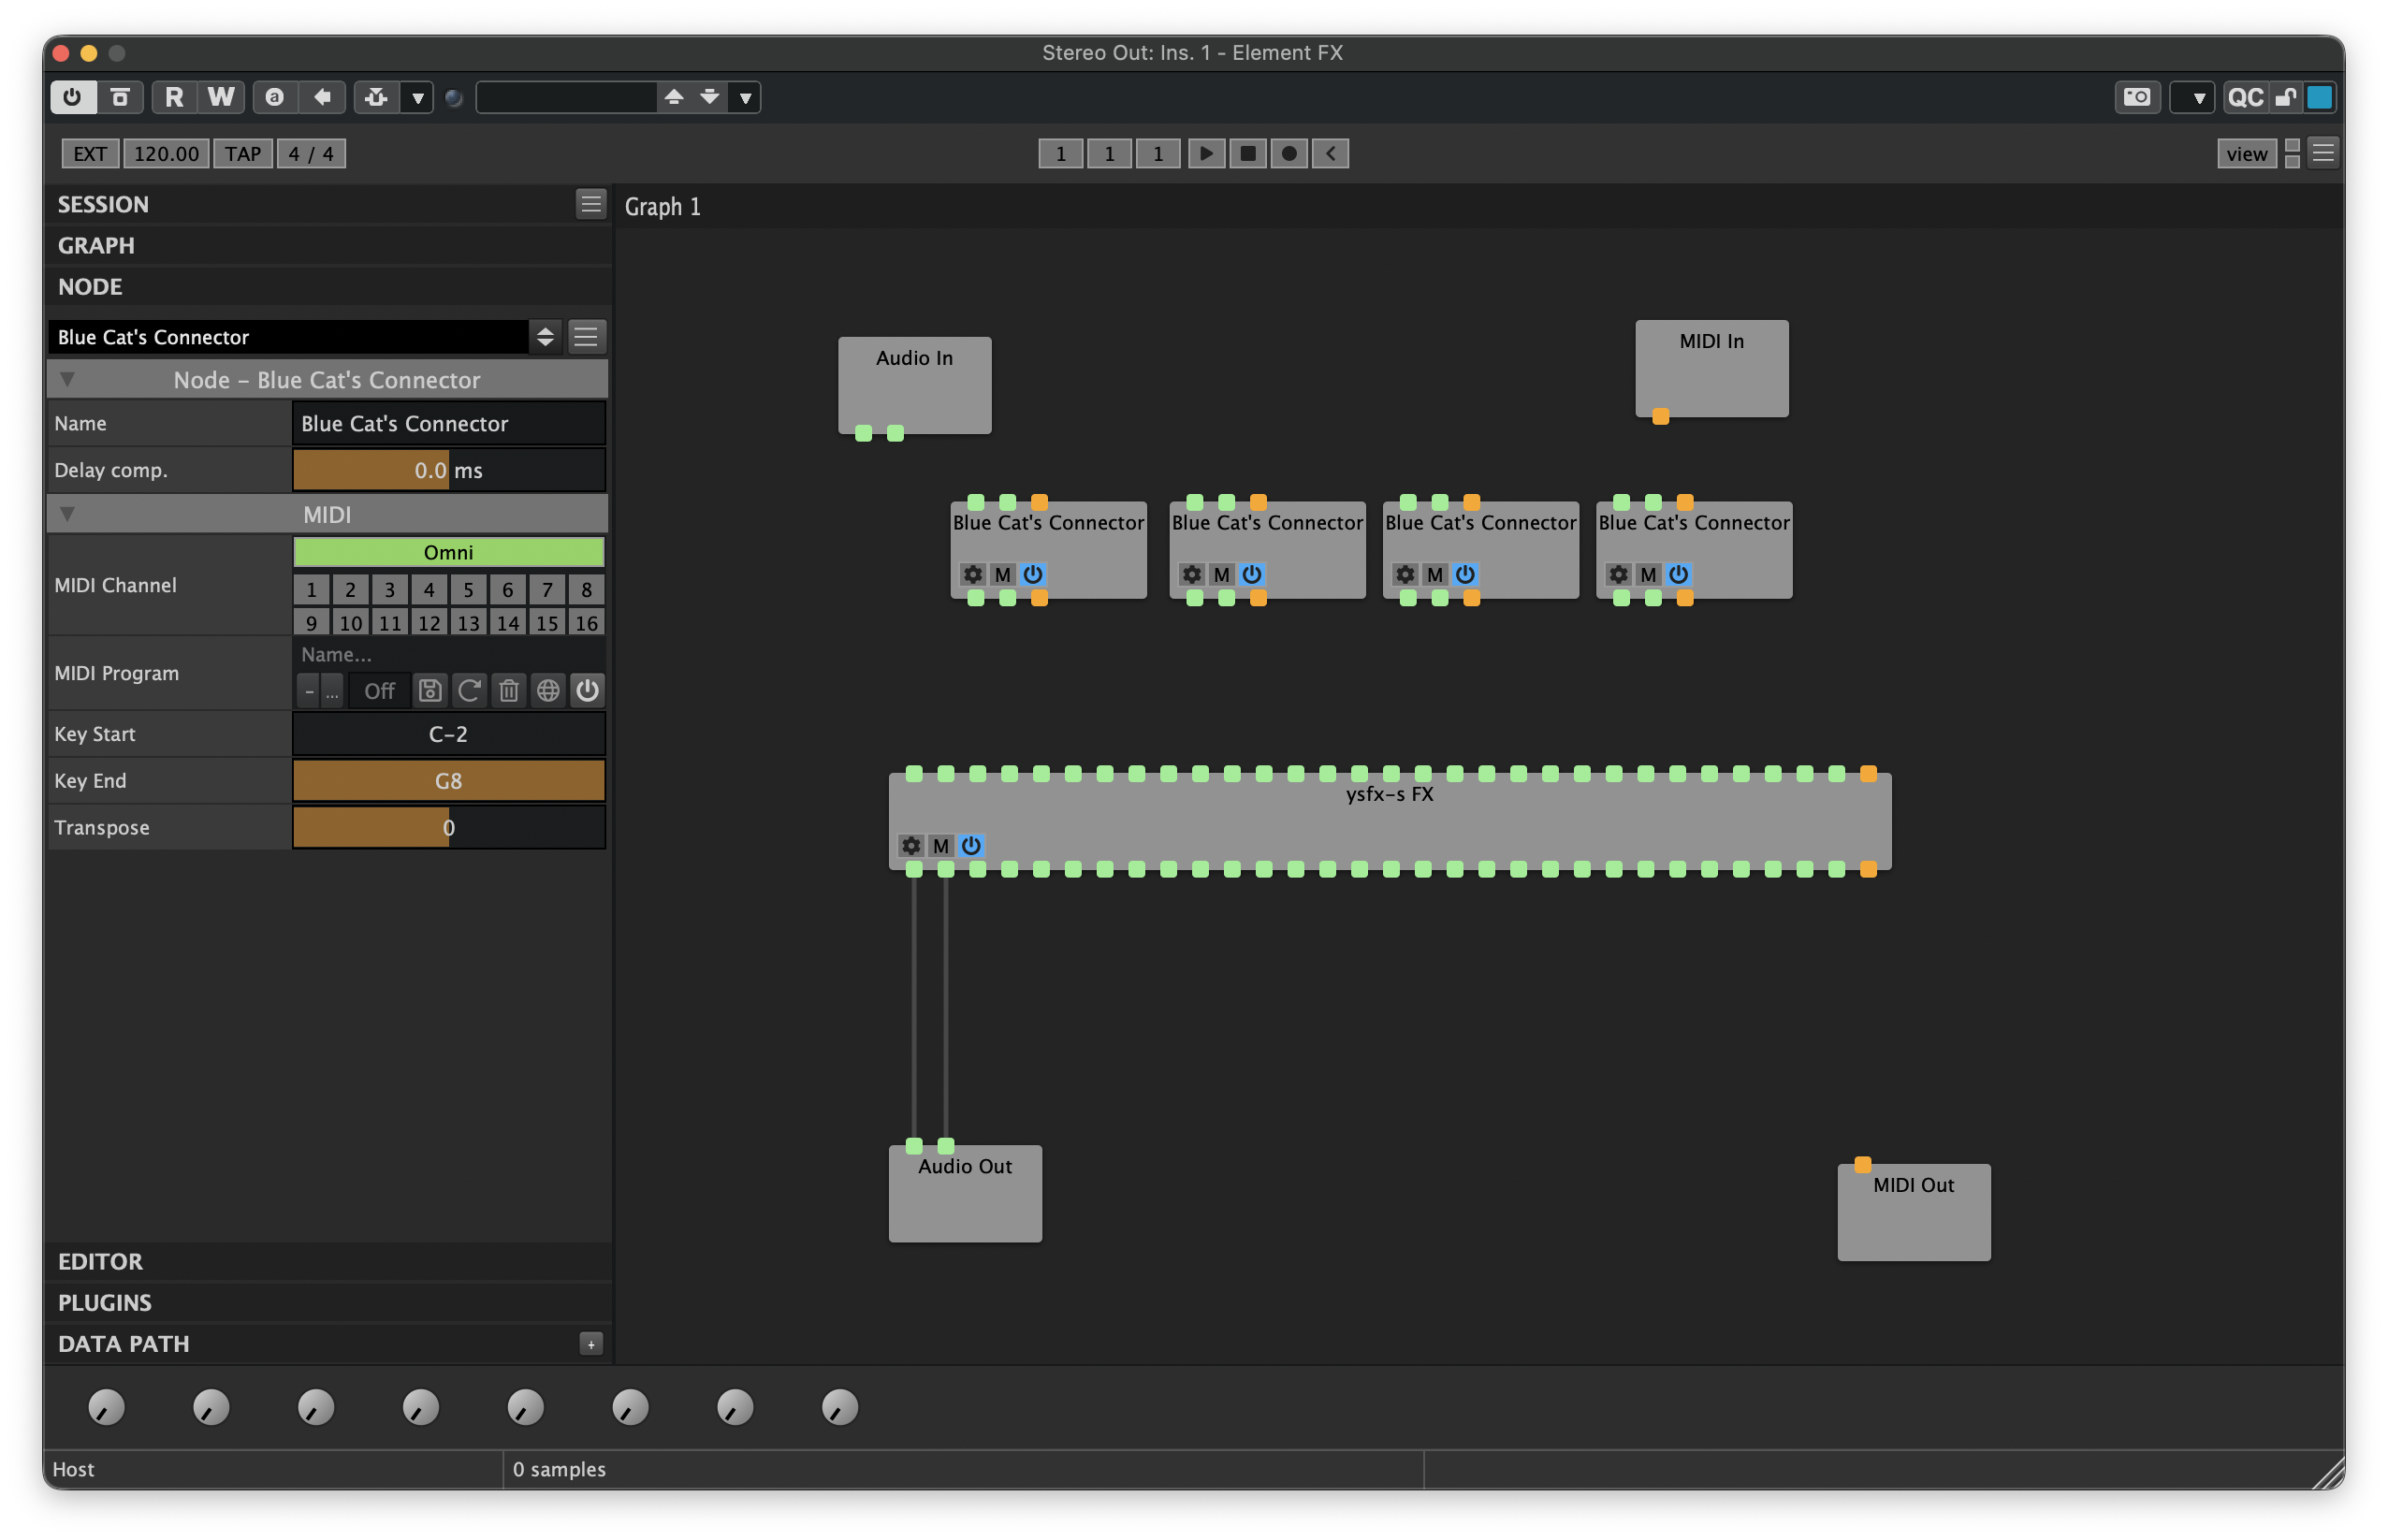
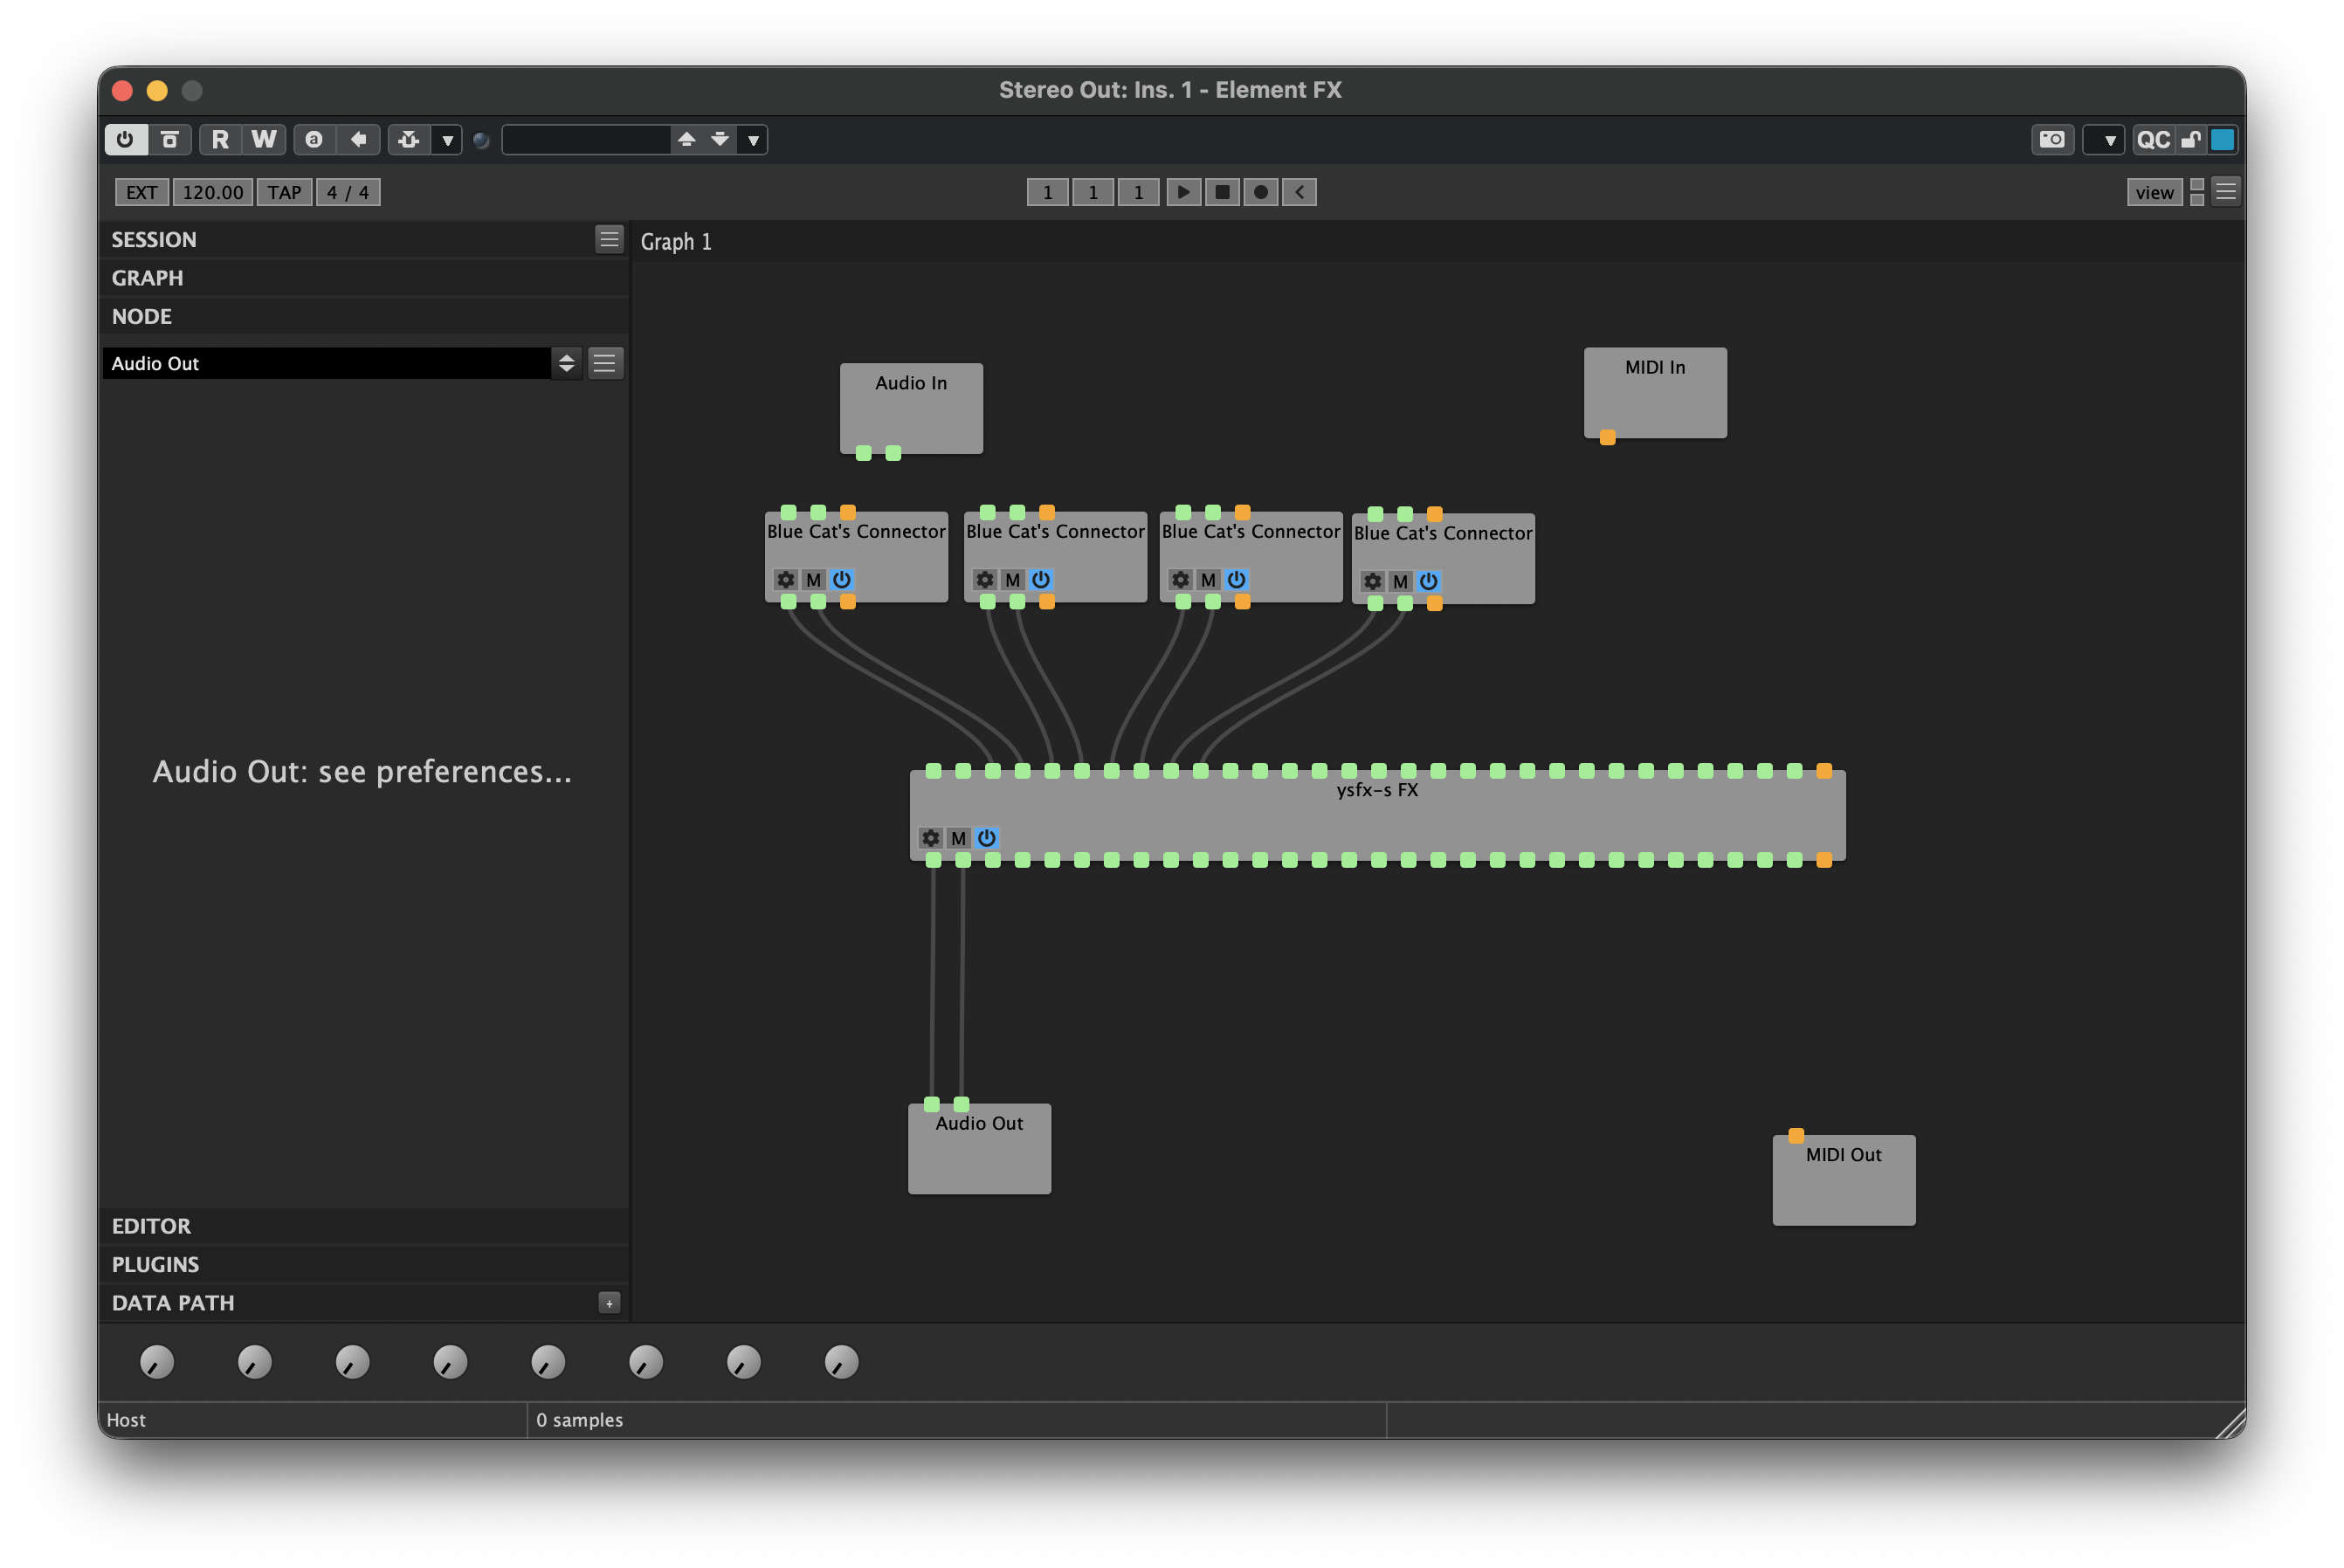
Next, load enough instances of Blue Cat's Connector to receive sound from all the stem busses in your project. I have four stem busses in my example, so I will load four instances of Connector:

Next, load enough instances of YSFX to receive sound from all the stem busses in your project. I have four stem busses in my example, so I will load four additional instances of YSFX:
Next, load a second instance of YSFX in Element:
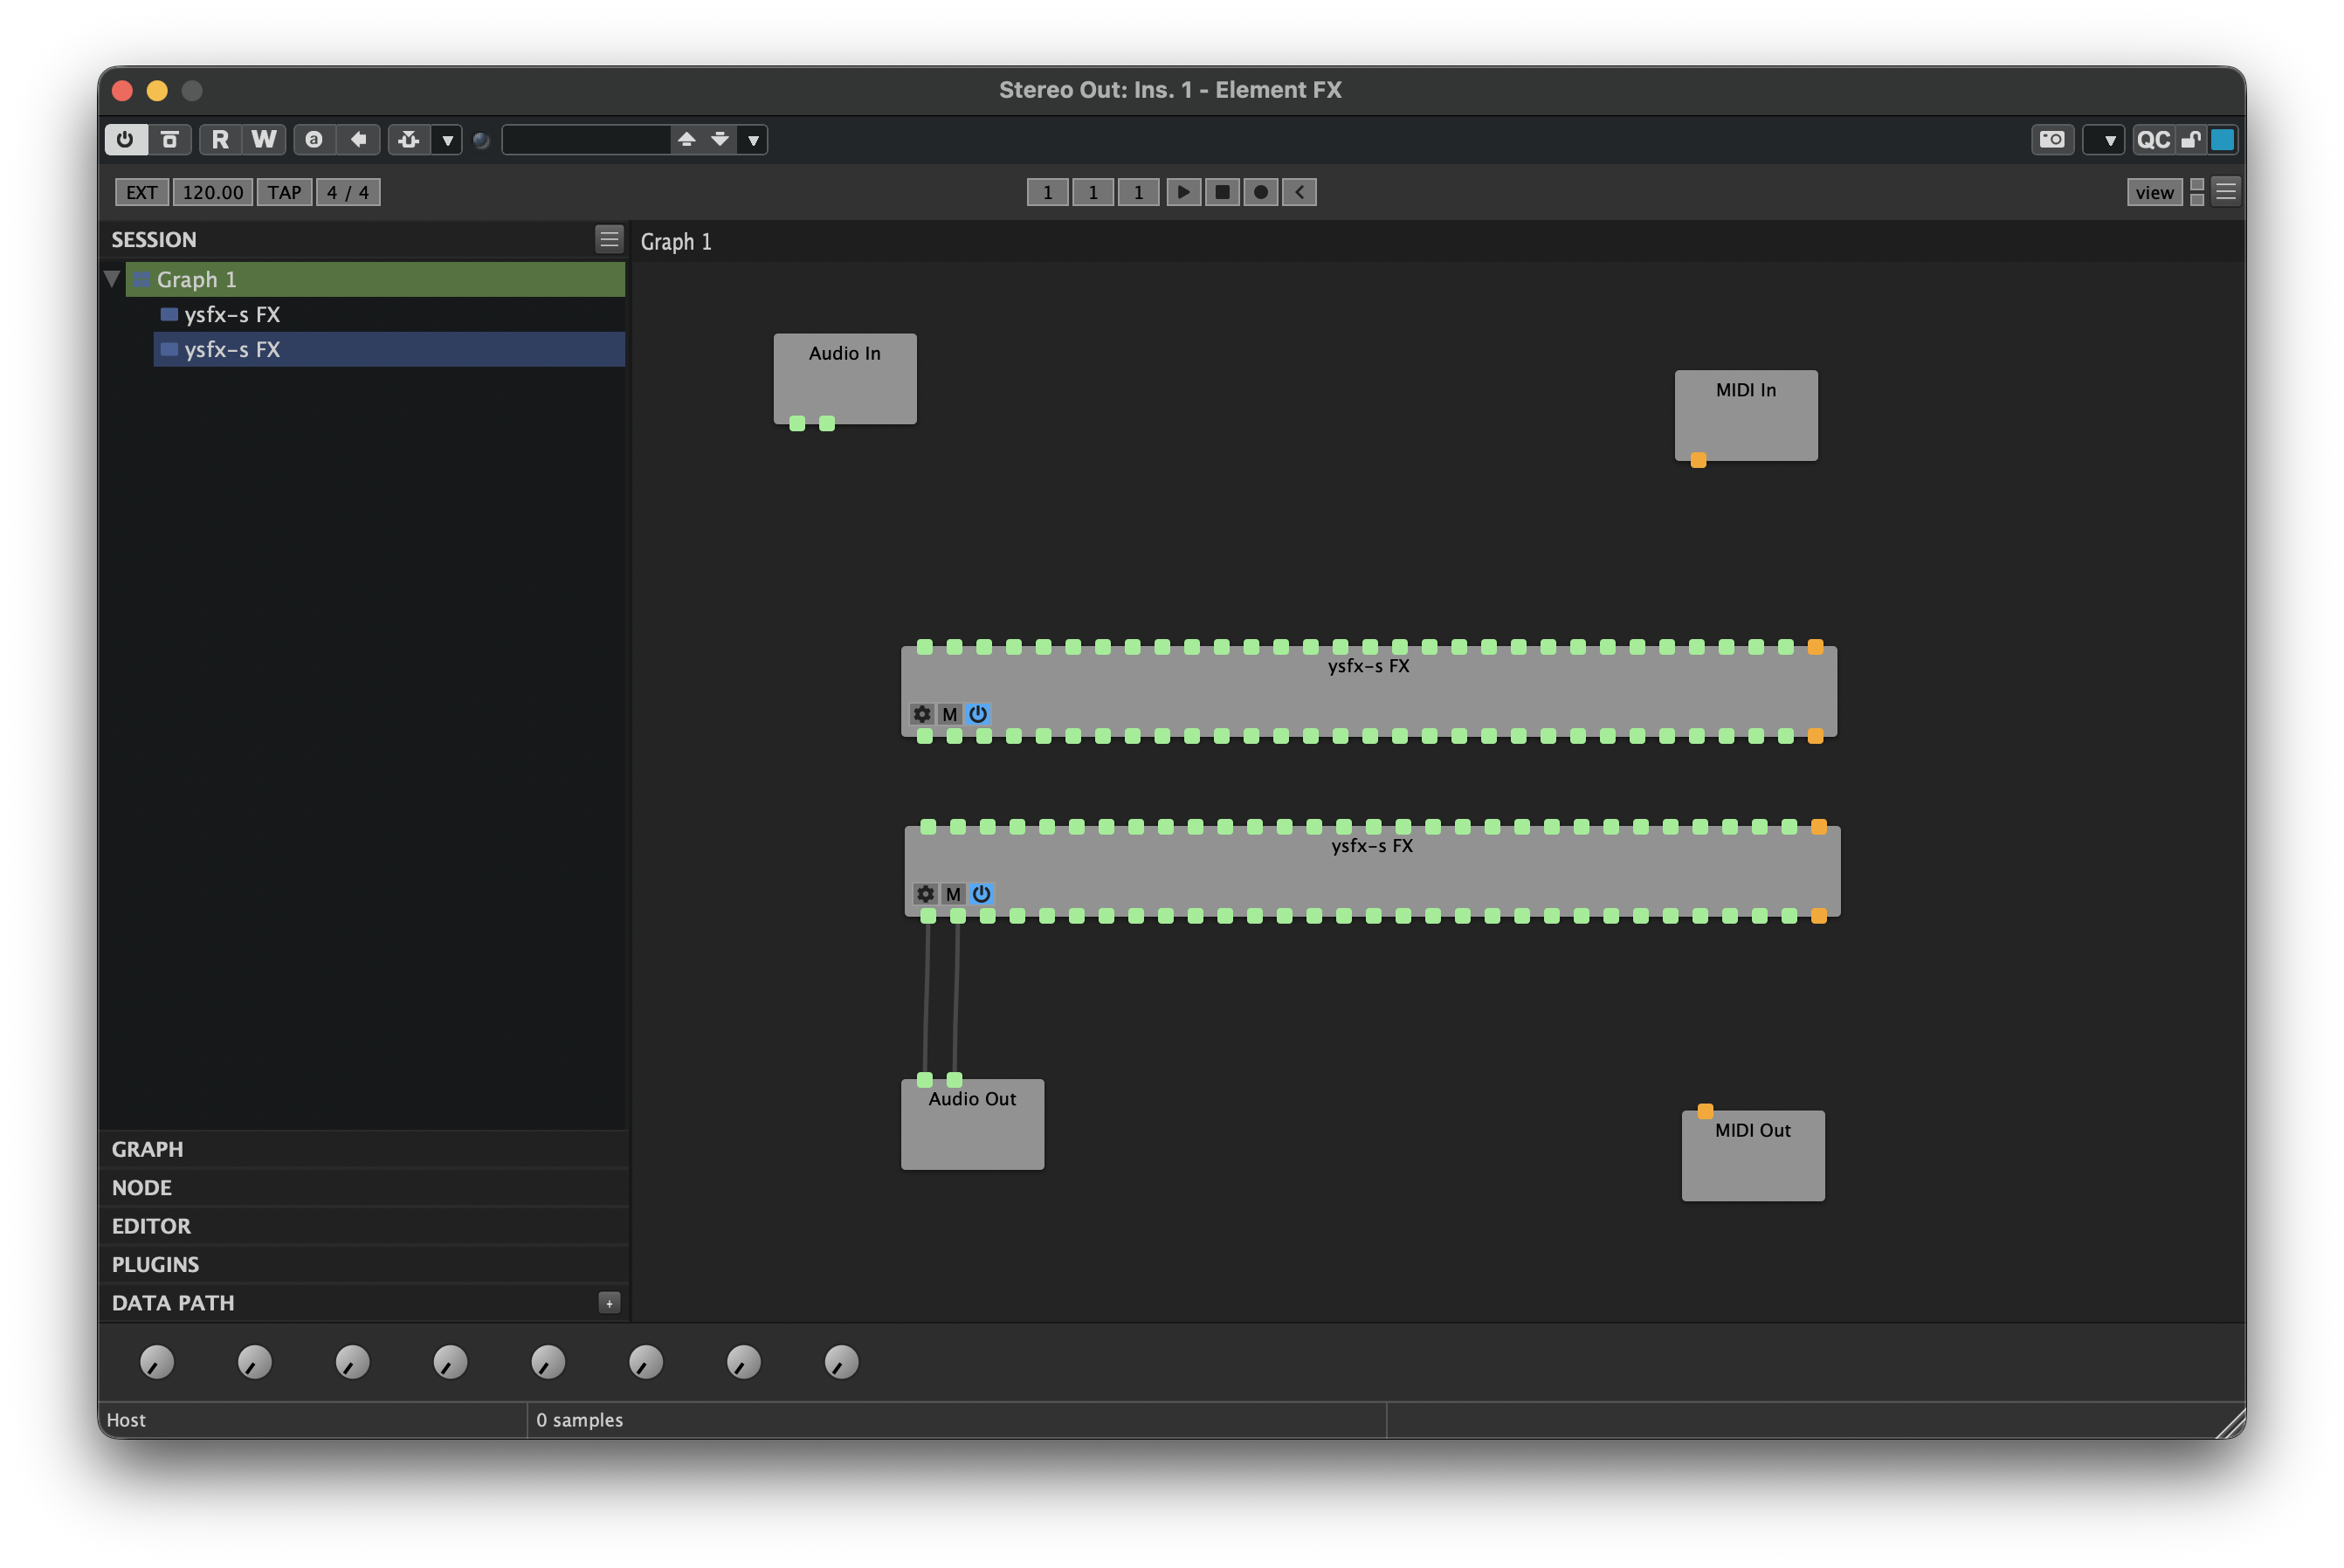
To improve the legibility of the node graph, we will adjust the number of pins displayed on the new instance of YSFX. Right-click the new YSFX node, then click the Ports... option. The following pane will appear:
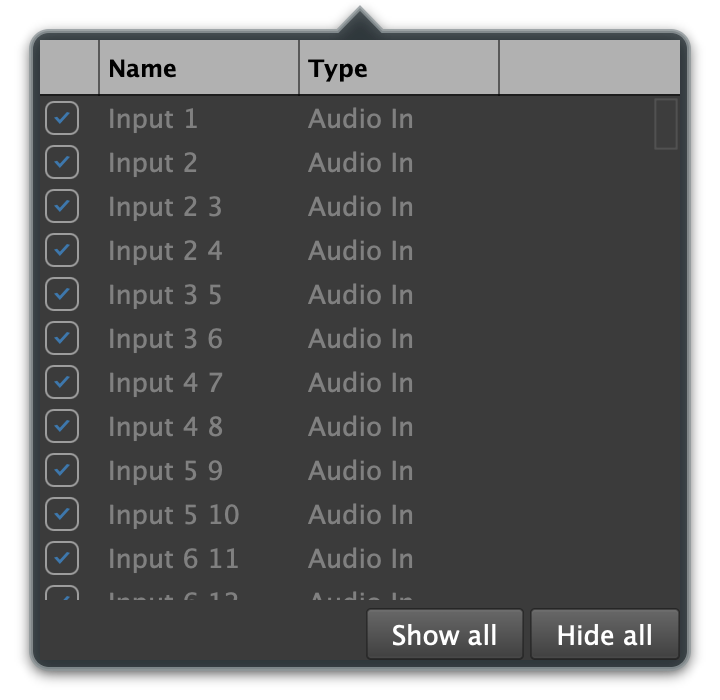
Click Hide all to hide all the currently visible pins on the YSFX node. Then, scroll down in the list to locate the Output 1 and Output 2 options. Check their boxes:
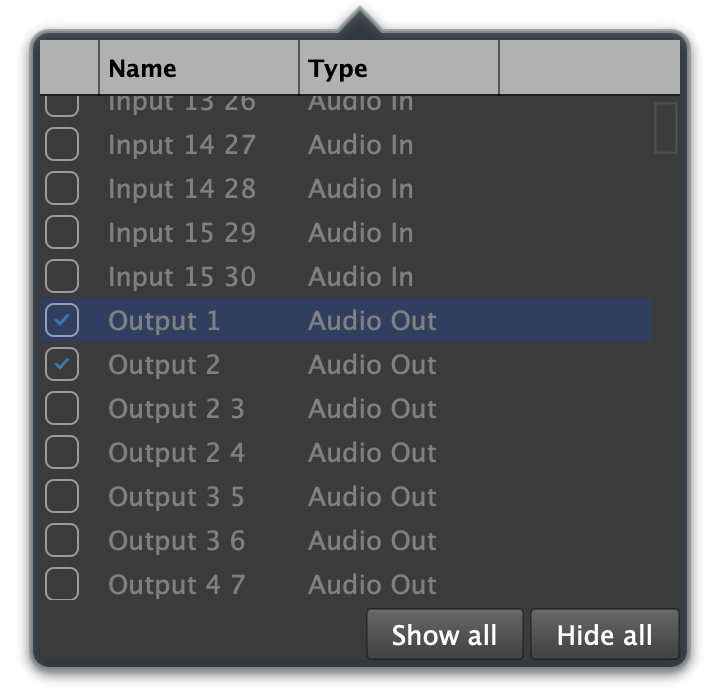
When finished, your second YSFX node should look like the following:
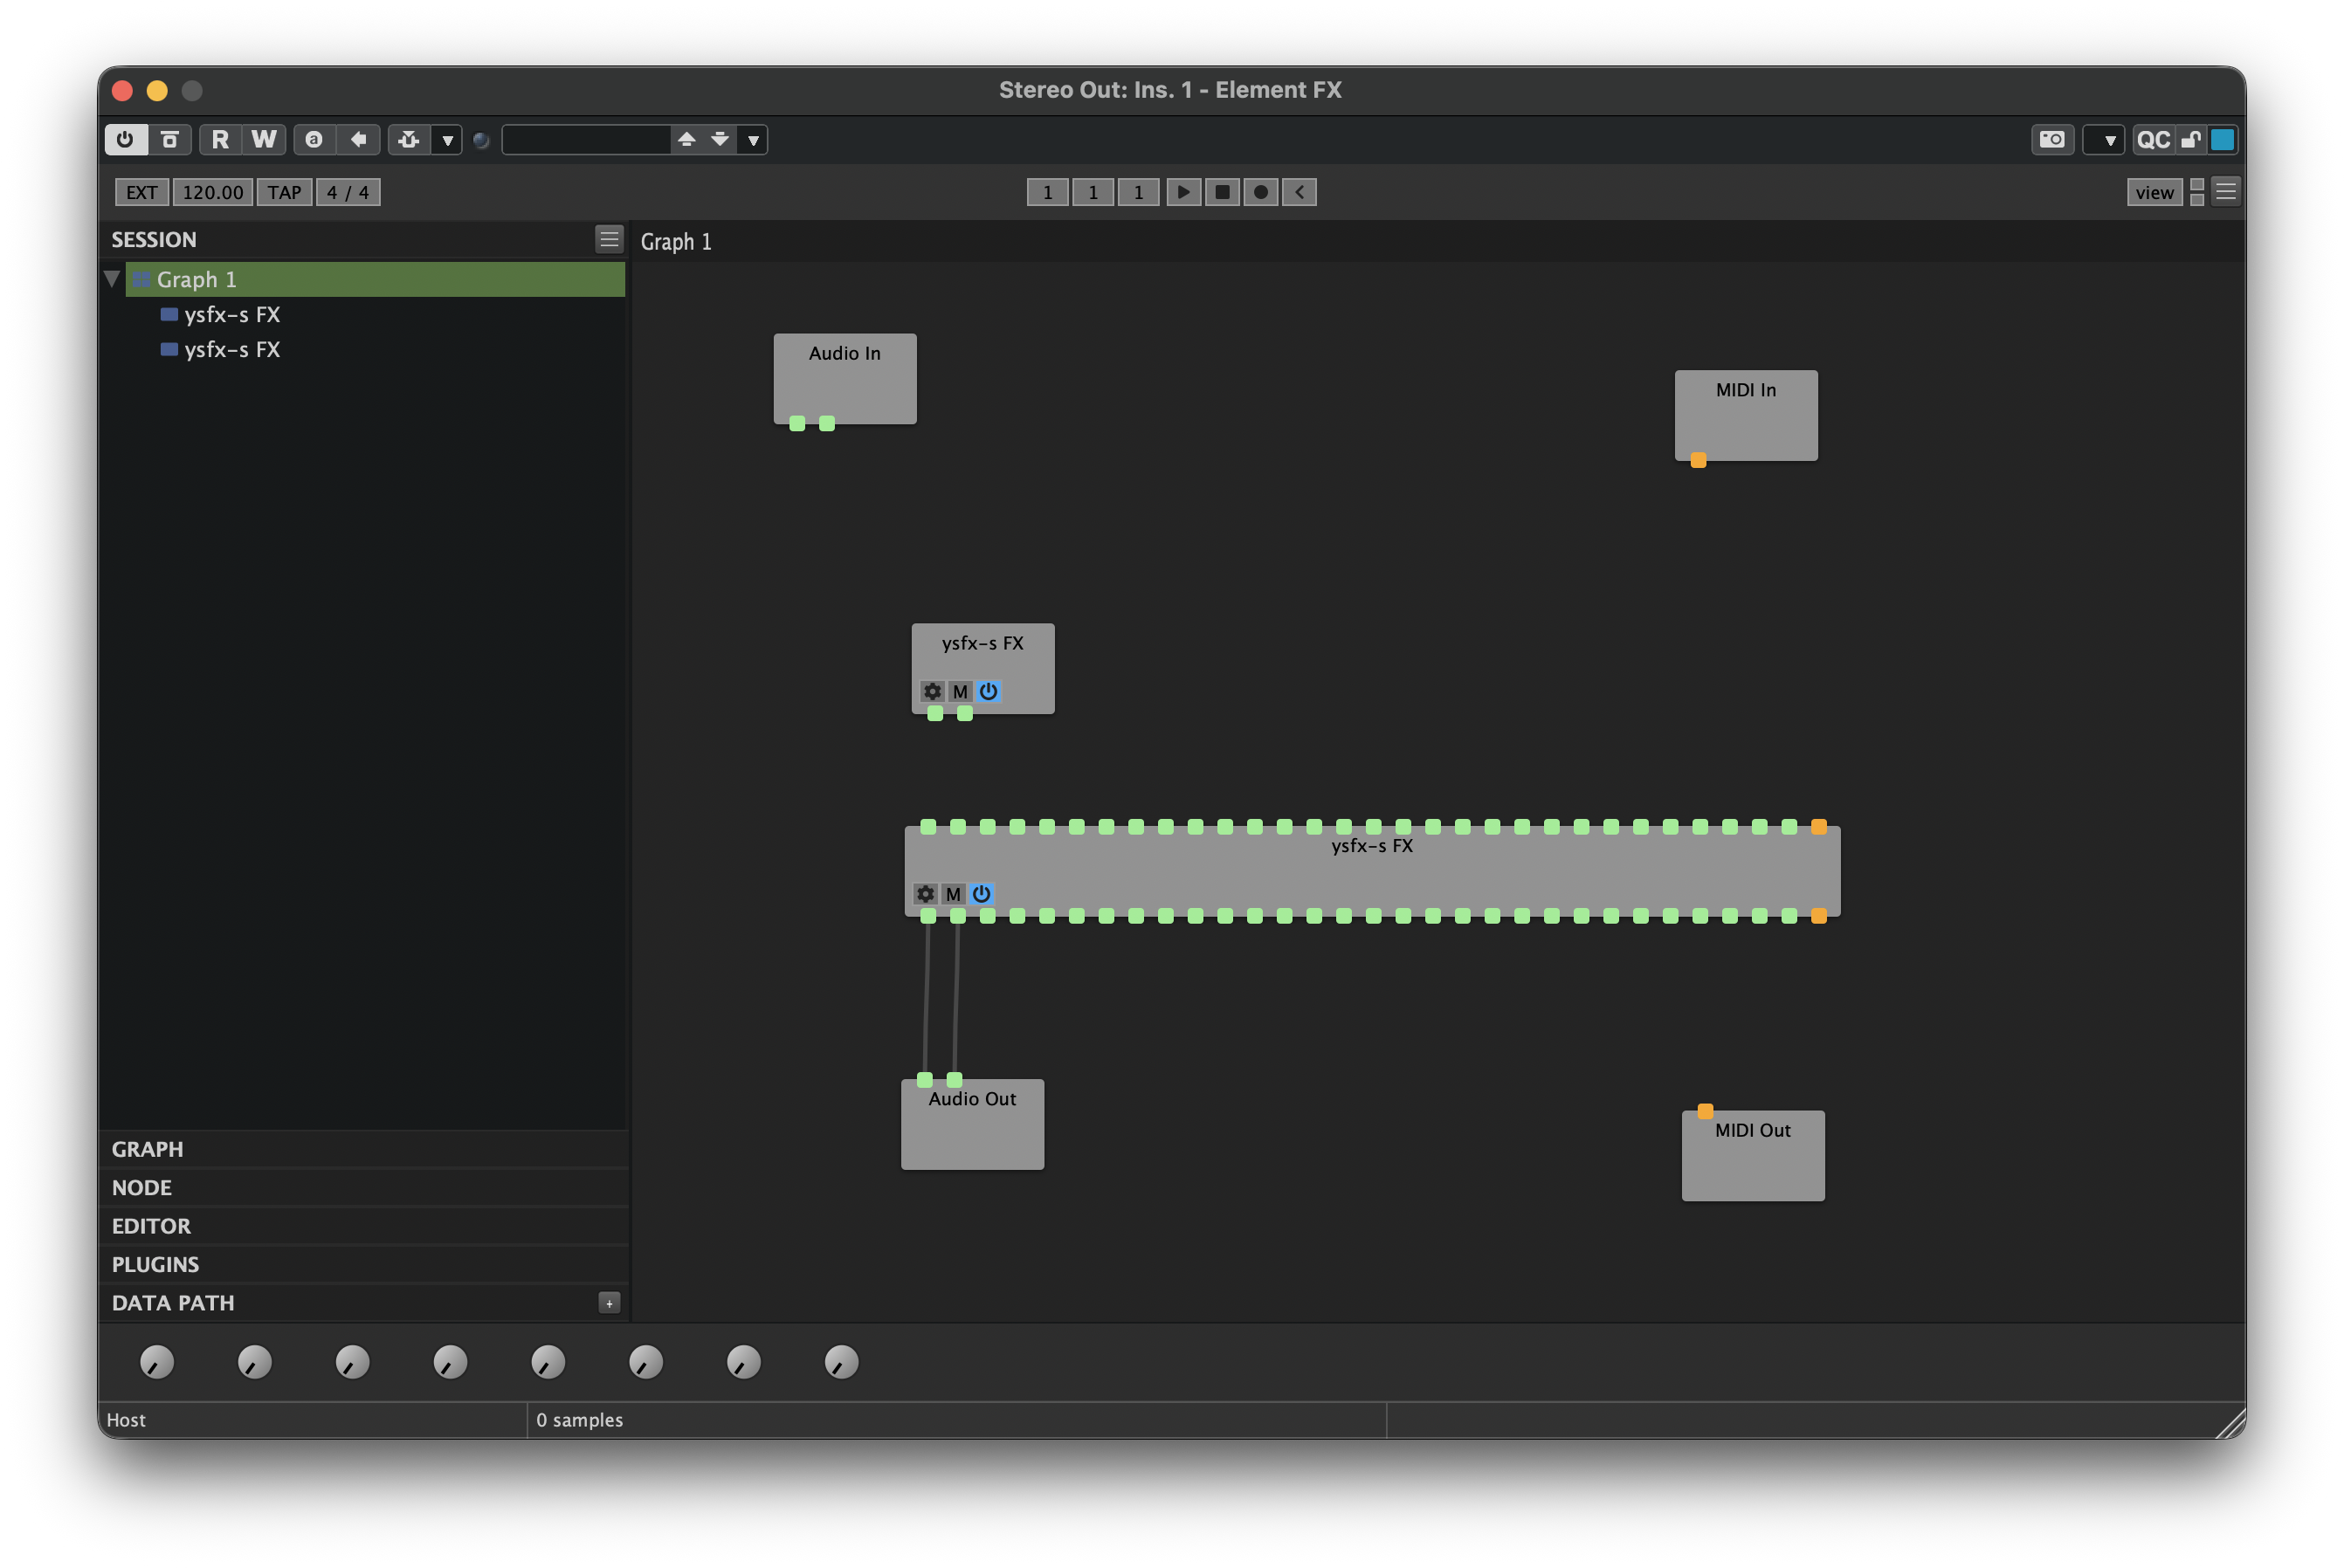
Next, right-click the compact YSFX node and click Duplicate. This will create a new copy of the YSFX node with the same compact pinout. Repeat this process until you have created enough instances for your project's stem bus senders. I have four stem busses in my example, so I will create enough copies until I have four additional instances of YSFX:
When a new router plugin is identified, it will be documented here!
Next, we will connect the outputs of the router plugin instances to the appropriate inputs of the YSFX instance that will host THS. This is the step that enables use of THS outside of Reaper as most DAWs do not allow for arbitrary routing of many channels the way we can in wrappers like Metaplugin and Element. It's also important to note that THS expects the stem bus inputs to begin on Channels 3-4, not Channels 1-2. This means that when we connect the router instances to the YSFX that will host THS, we will skip the first two input pins and begin our connections with the second set of pins:

When a new router plugin is identified, it will be documented here!

When a new router plugin is identified, it will be documented here!
We can now begin to configure the router instances to receive sound from the senders we previously instantiated on the stem busses. Before proceeding, it's critical to understand the channel assignments THS expects the stem busses to follow:
| Stem | Channel Assignment |
|---|---|
| 1 | 3-4 |
| 2 | 5-6 |
| 3 | 7-8 |
| 4 | 9-10 |
| 5 | 11-12 |
| 6 | 13-14 |
| 7 | 15-16 |
| 8 | 17-18 |
Based on the connection diagram we've created, this means that, from left to right, our router instances will be used for stems 1, 2, 3, and 4.
Begin by opening the router connected to input pins 3-4 of the YSFX instance that will host THS. This will be the Stem 1 receiver.
By default, Connector will appear similar to the following:
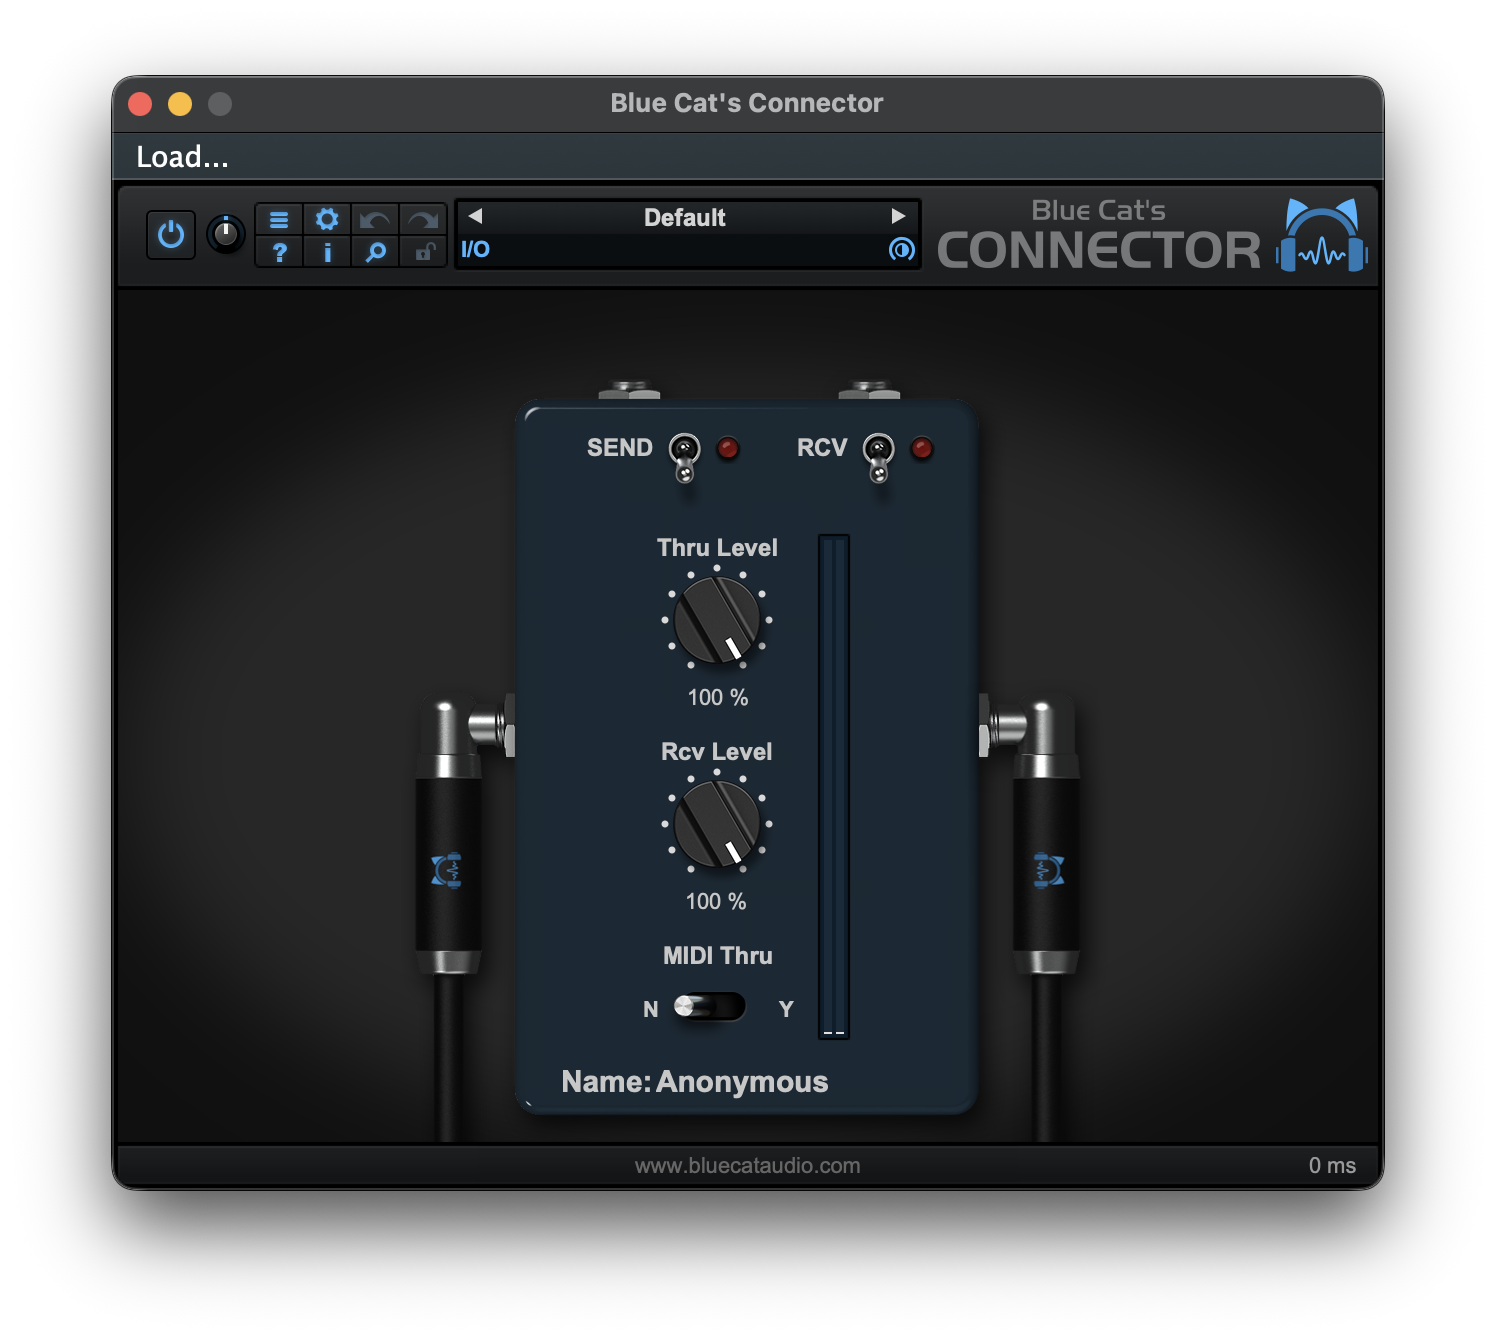
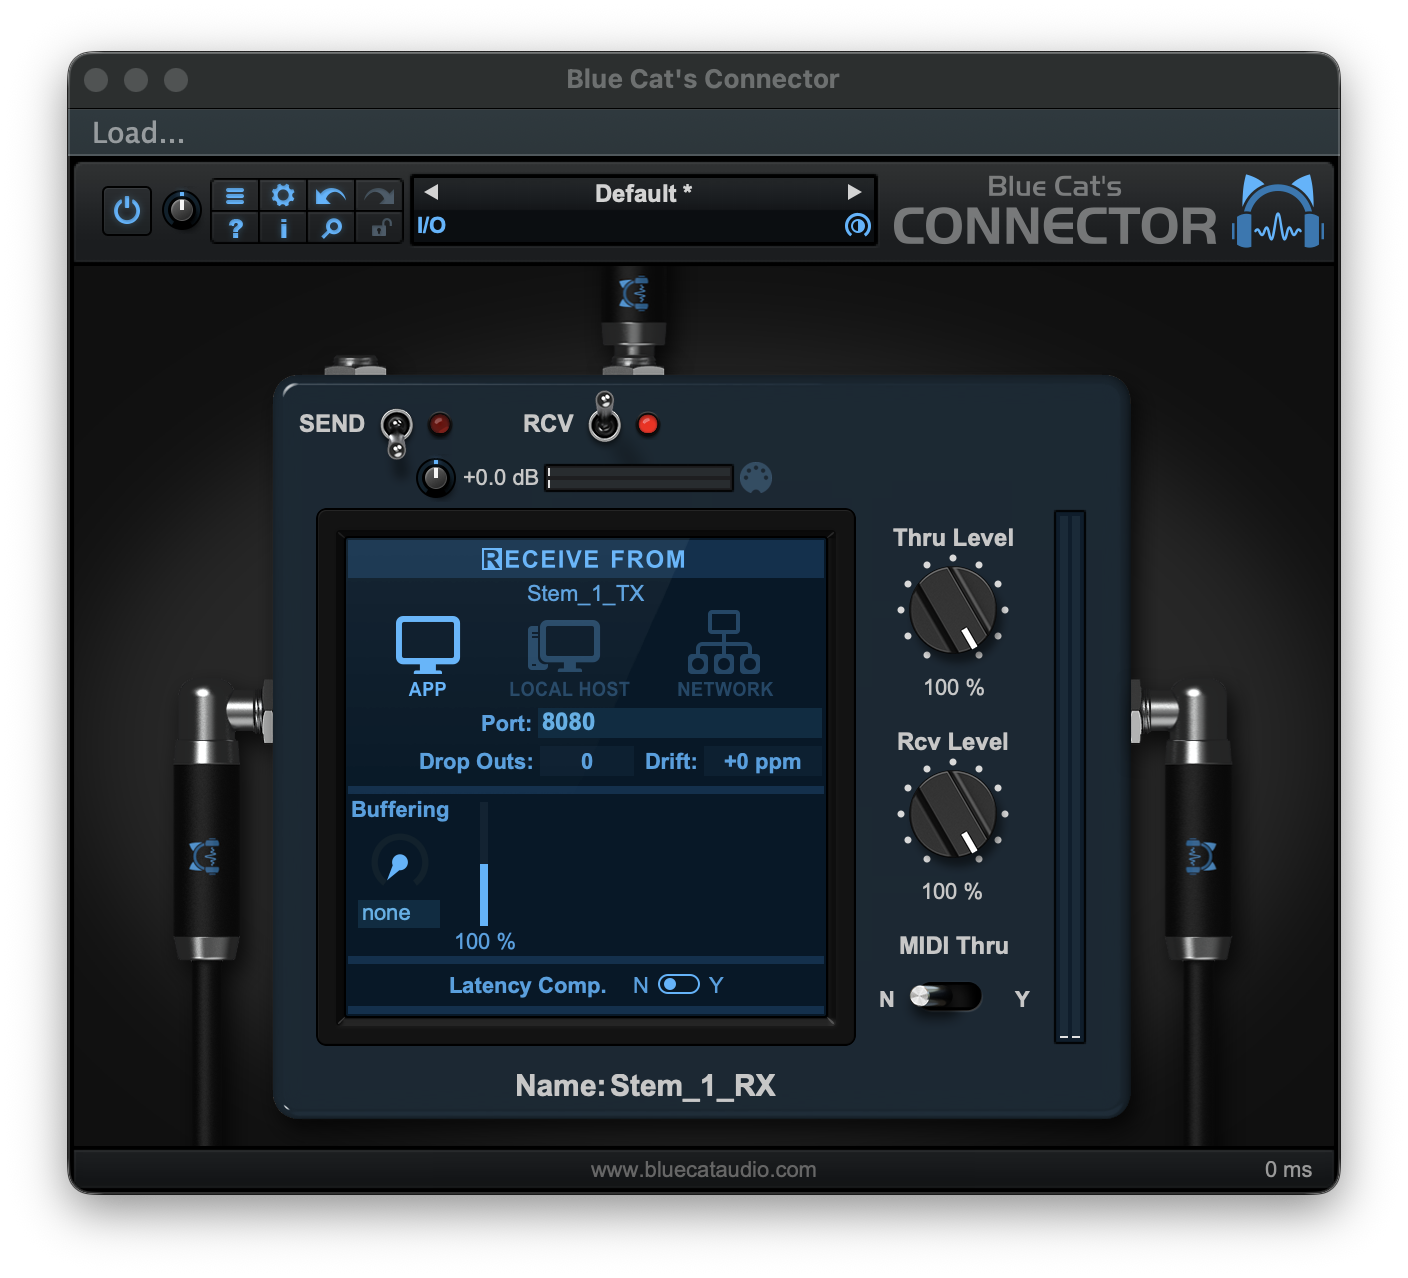
Begin by enabling RCV mode. Connector will then appear similar to the following:

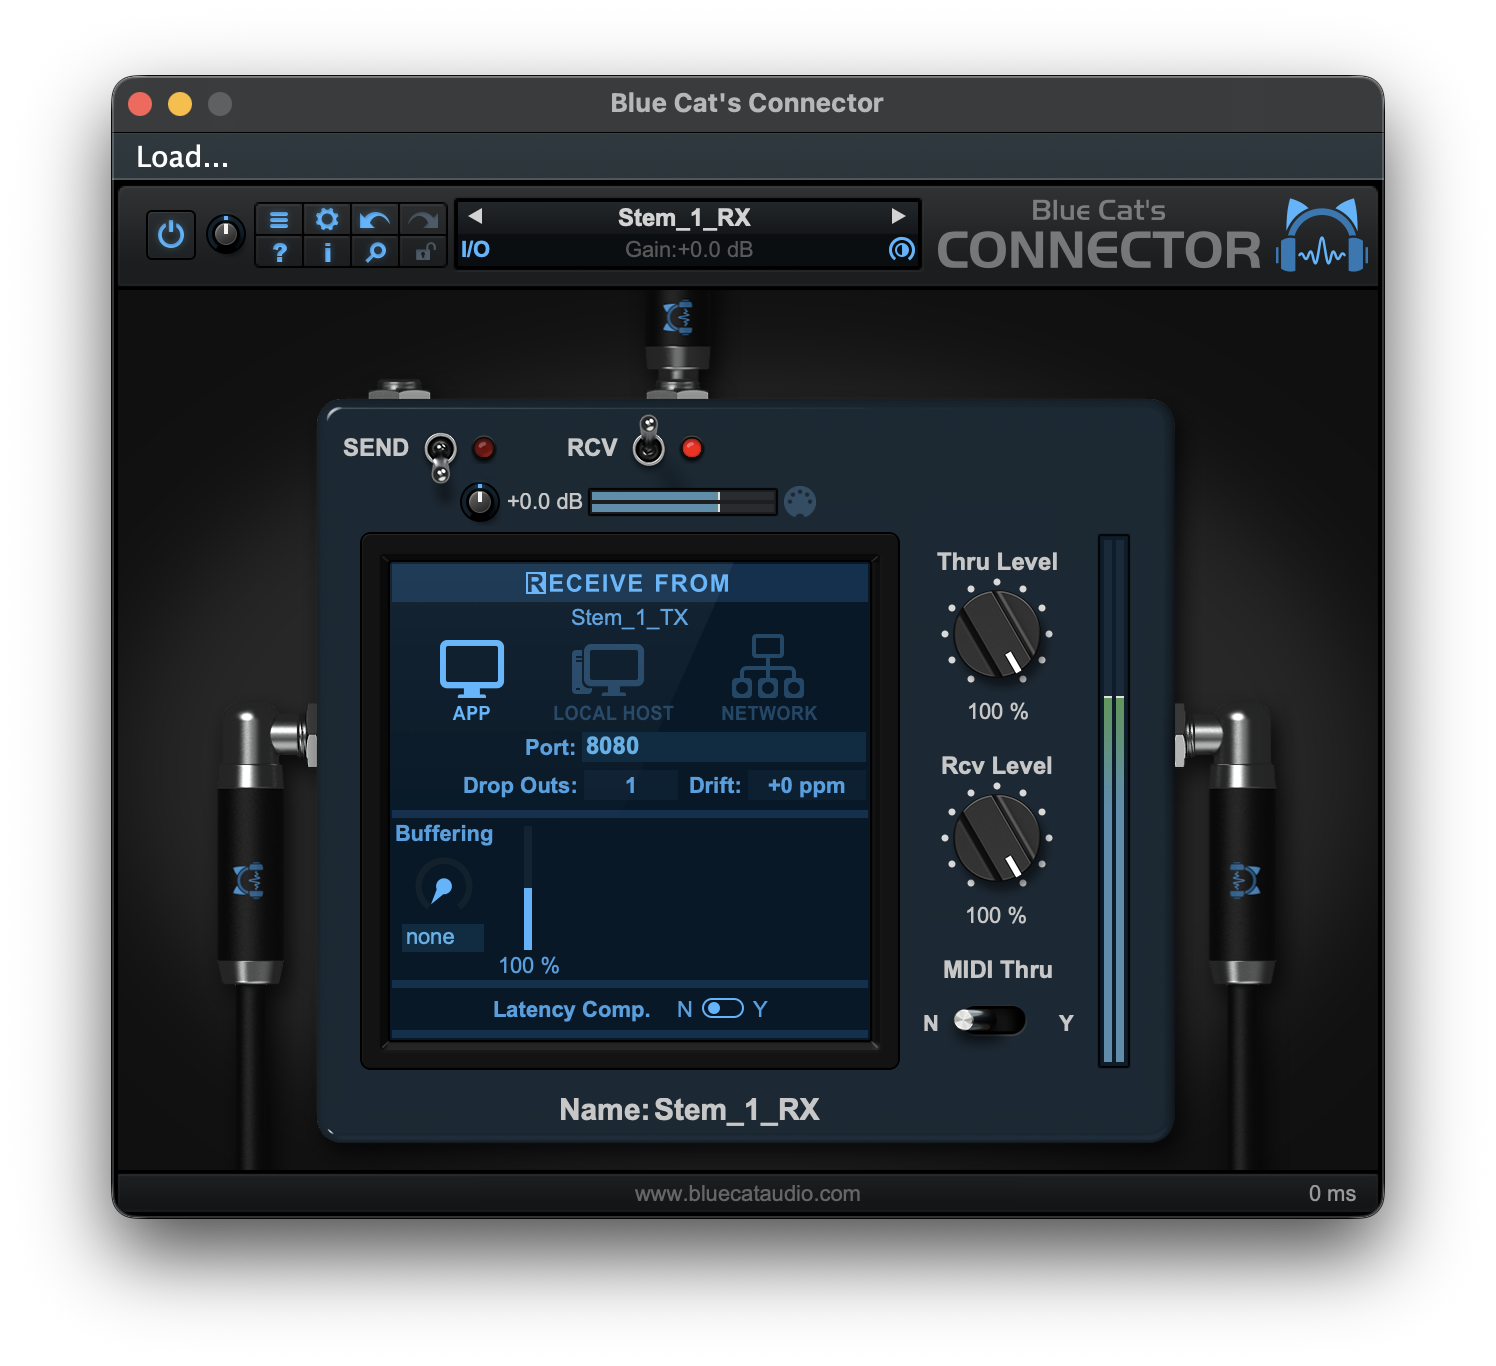
Since we previously setup all our sender nodes and started with the default port assignment of 8080, this instance of Connector will immediately establish a connection with our Stem 1 sender. Since we named that instance Stem_1_TX, we get a visual indicator of the sending instance's name just below RECEIVE FROM. This can be a very handy tool for troubleshooting connections if you run into problems. Optionally, we can update the Name parameter of our new receiver node. This will make it so the sender node shows something other than Anonymous below its analogous SEND TO indicator. Here, we will name the Connector instance Stem_1_RX (receive):
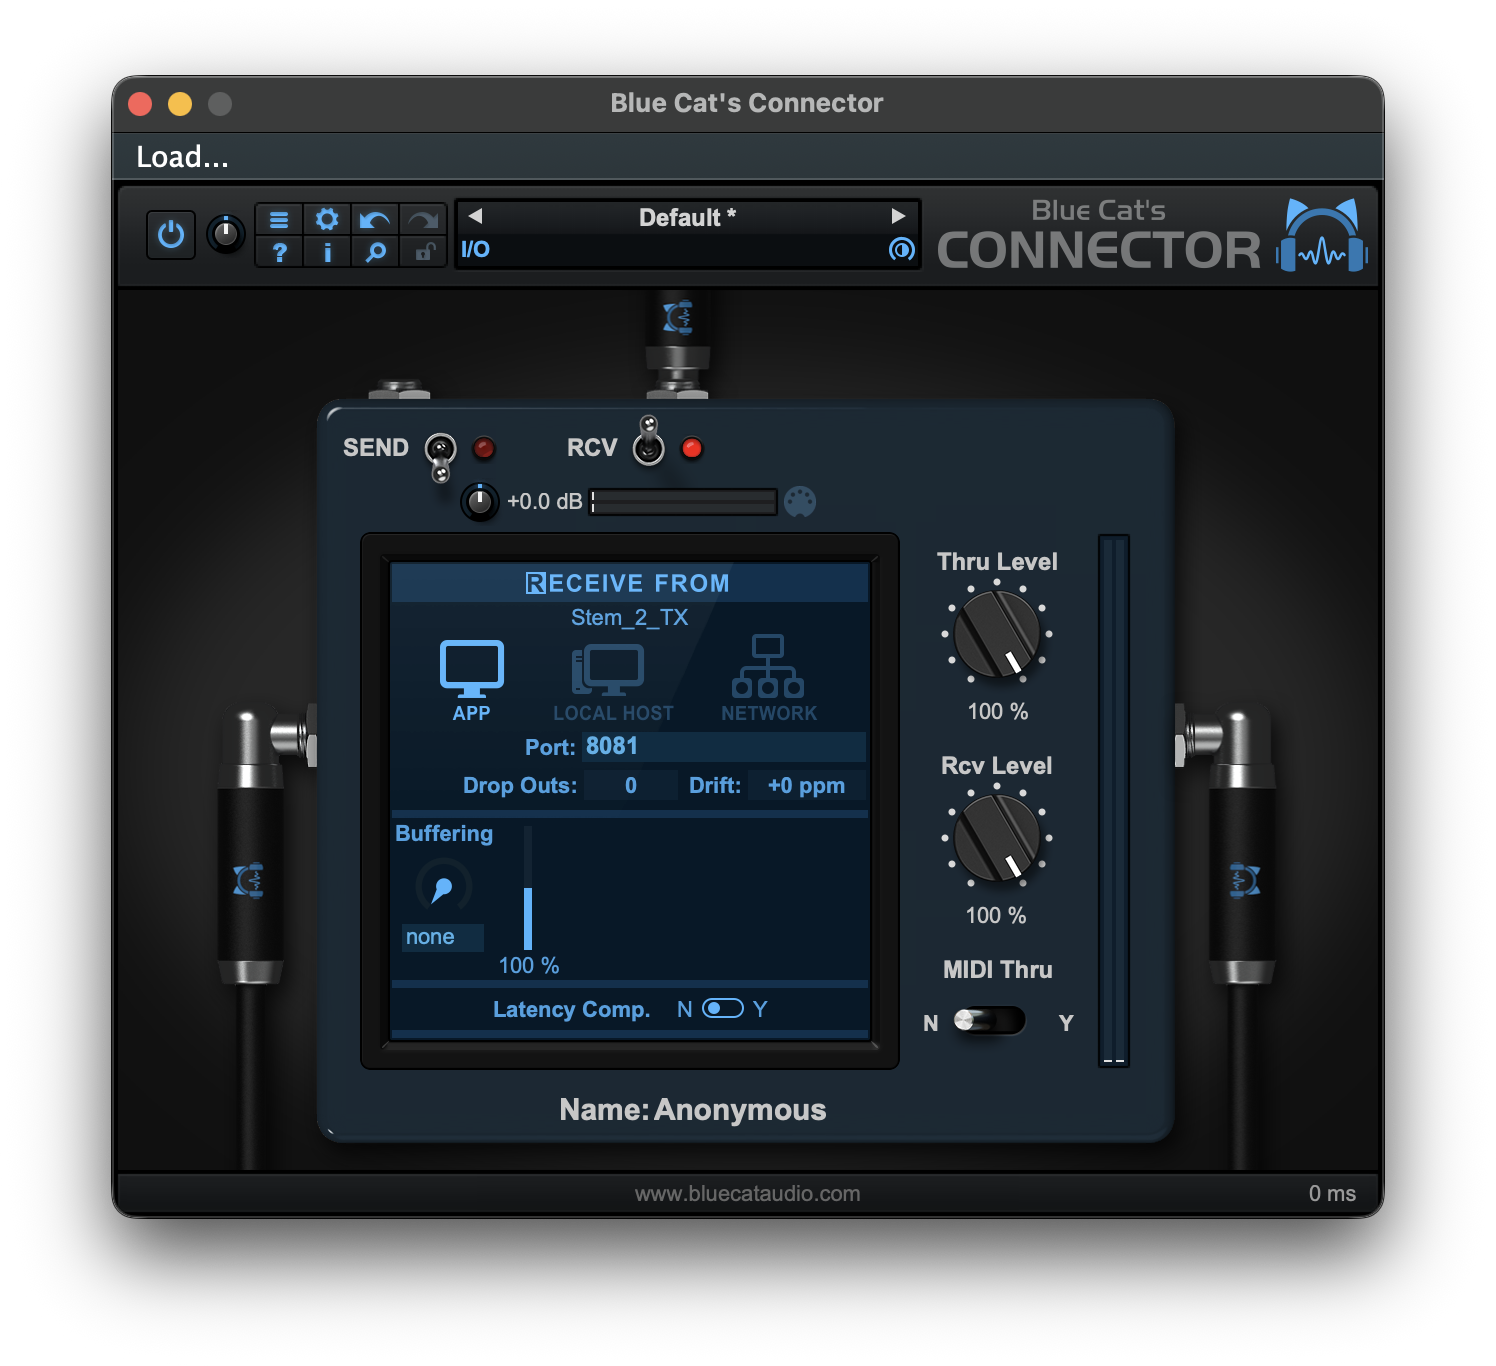
Next, open the Connector instance connected to input pins 5-6 of YSFX. This will be the Stem 2 receiver. Then, enable RCV mode. Connector will now look like the following:

Unlike the first Connector receiver, this instance will not automatically connect to the next stem. To make the connection, we need to set the Port parameter to match the value assigned to the Stem 2 sender. If you followed the example from above, the correct port will be 8081. Once we set Port to 8081 and press Enter, Connector will immediately establish a connection to the Stem 2 sender that we named Stem_2_TX:
Repeat this process for as many stems as you would like to route into THS, up to the maximum of 8 stems.
Connector Presets – Receiver
To simplify the process of setting up THS in future projects, you can save the configurations you set for your receiver instances of Connector as presets. That way, you can simply recall the presets to configure your receiver instances of Connector.
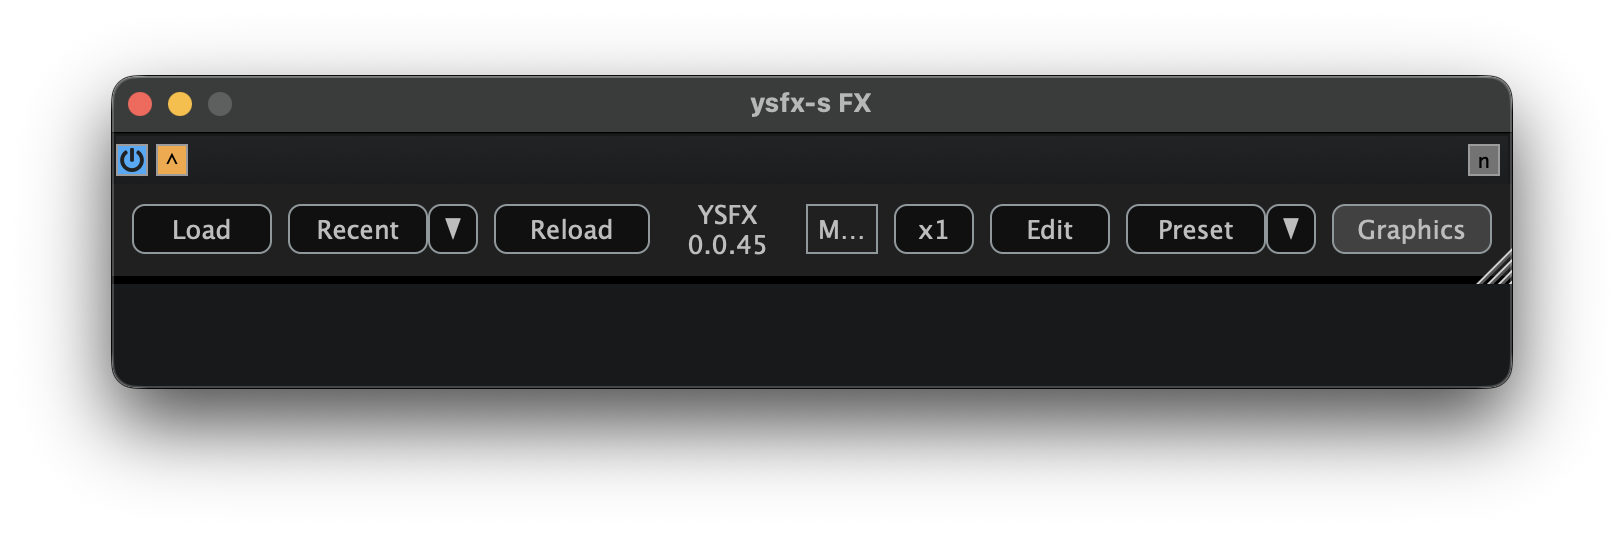
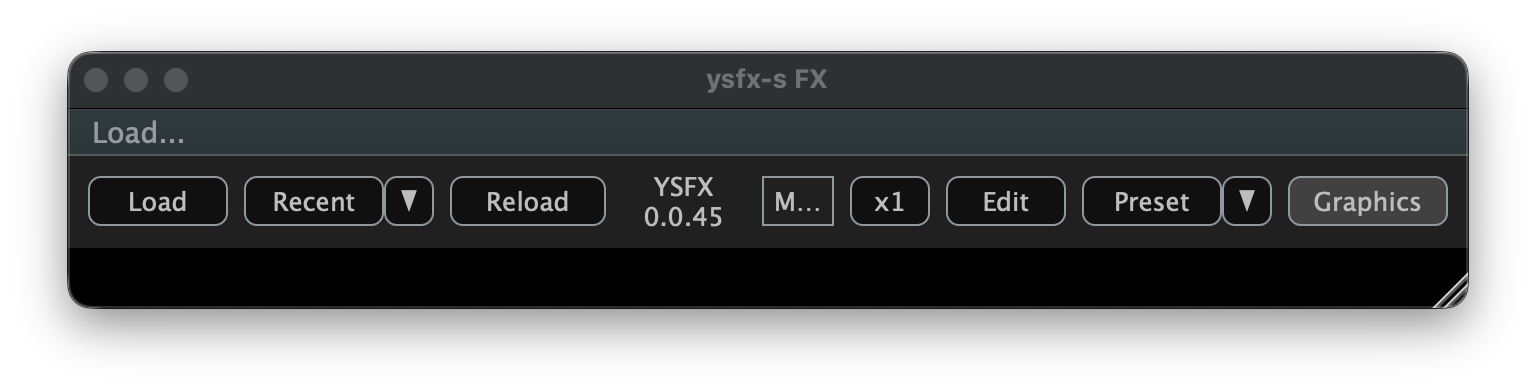
By default, YSFX will look similar to the following:
To load the audio router, click Load and navigate to the folder where you saved your copy of the plugin. Select the JSFX file for the audio router, and then click Open. Once loaded, YSFX should look similar to the following:
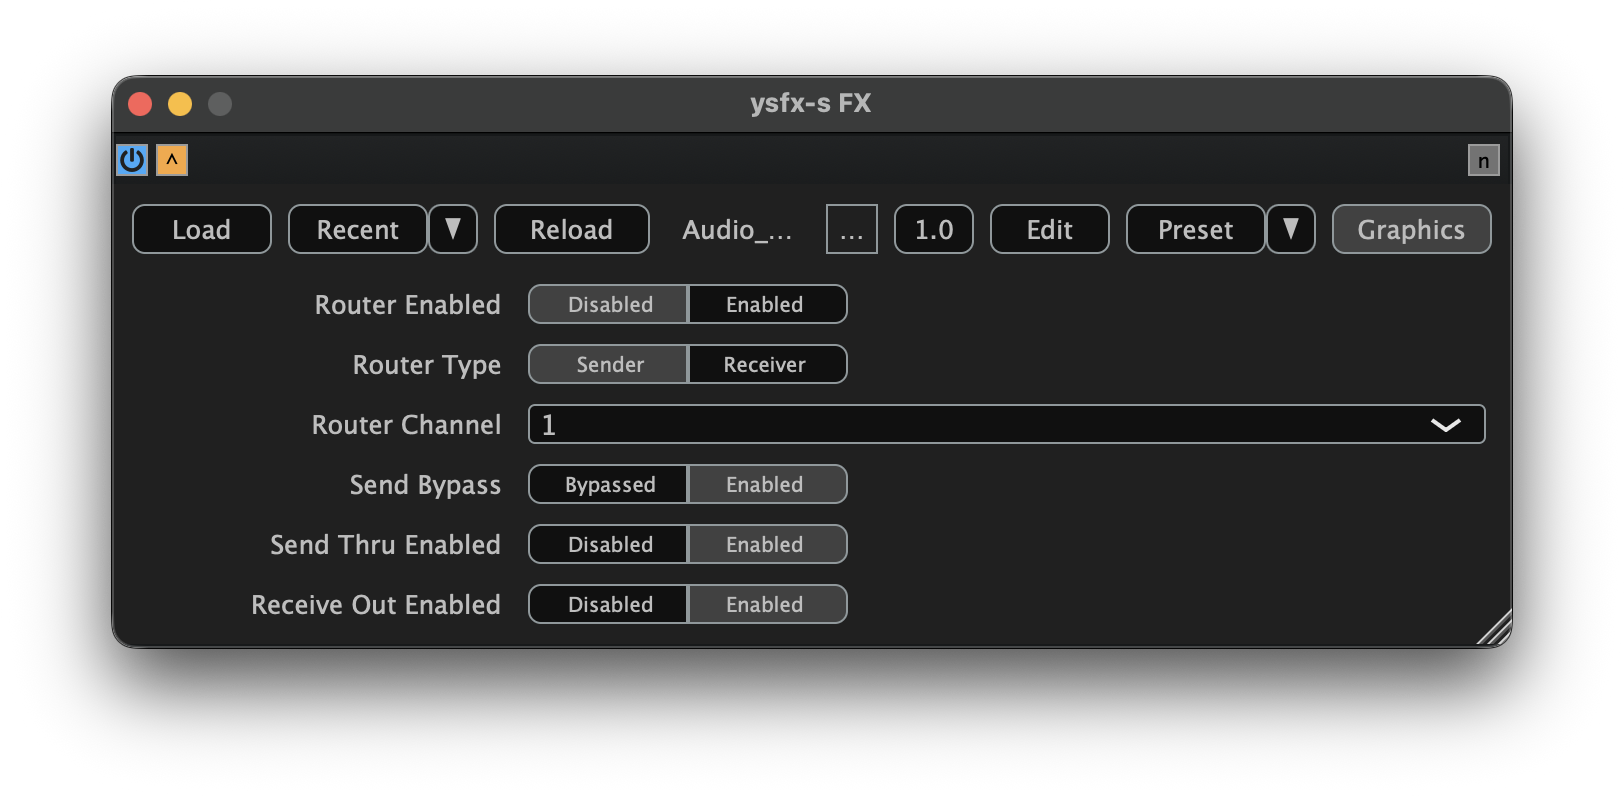
We will now configure the router as a receiver. Since this receiver corresponds to Stem Bus 1, we will set the Router Channel to 1, change the Router Type to Receiver, and set the Router Enabled toggle to Enabled. When finished, the router will appear similar to the following:
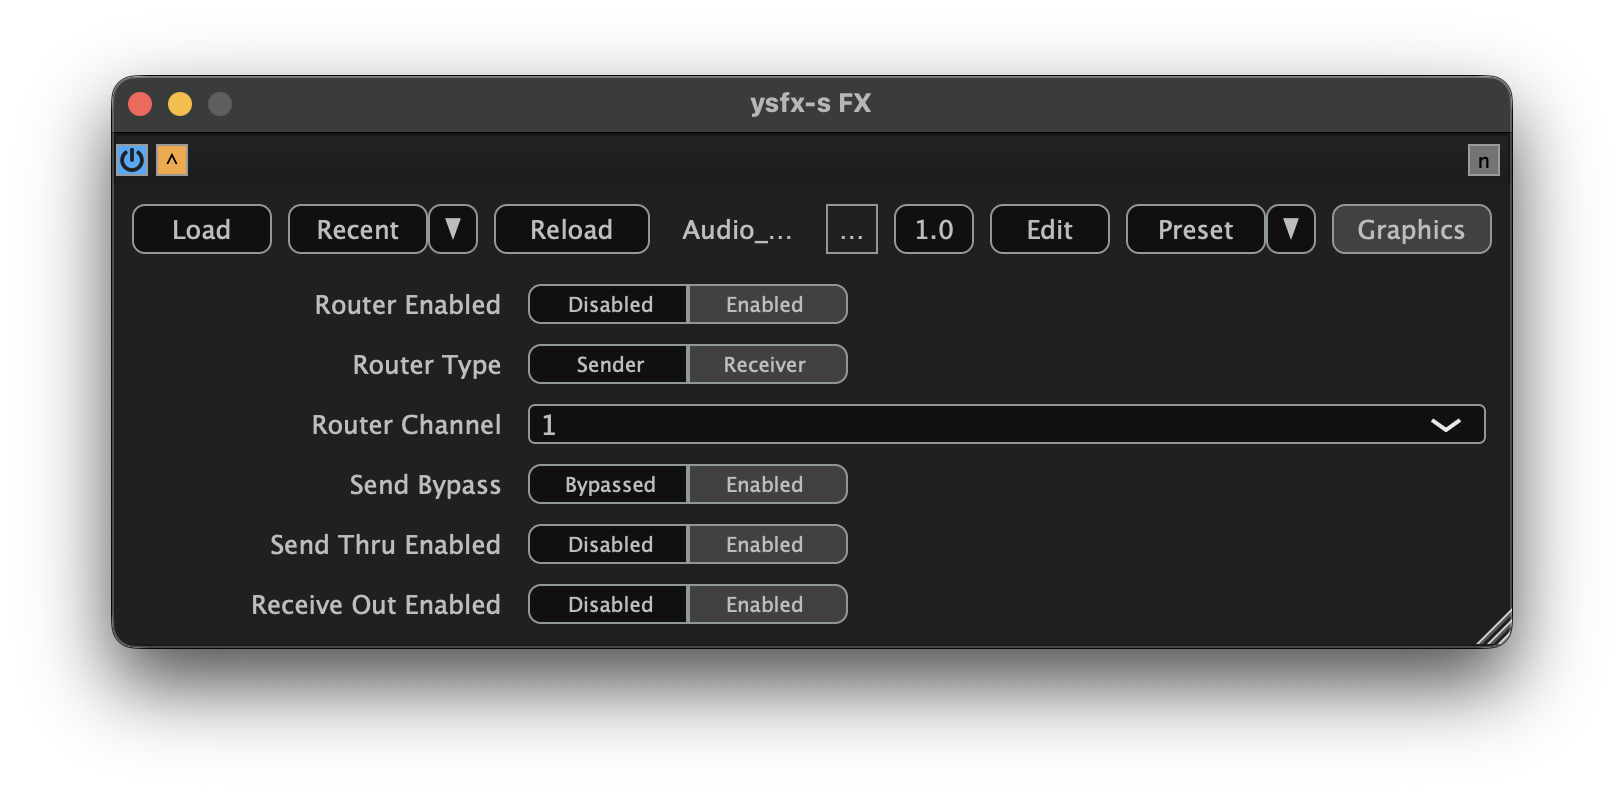
This is all that is needed to configure the receiver instance of the audio router. Repeat this process for as many stem as you would like to route into THS, up the maximum of 8 stems. As you configure each additional receiver, make sure to update the Router Channel to match the corresponding sender's channel.
When a new router plugin is identified, it will be documented here!
8.3 YSFX for THS
Now that we have connected and configured all the receiver instances of Connector, we can configure the master instance of THS. Double-click the YSFX node in your wrapper plugin. By default, it will look like the following:
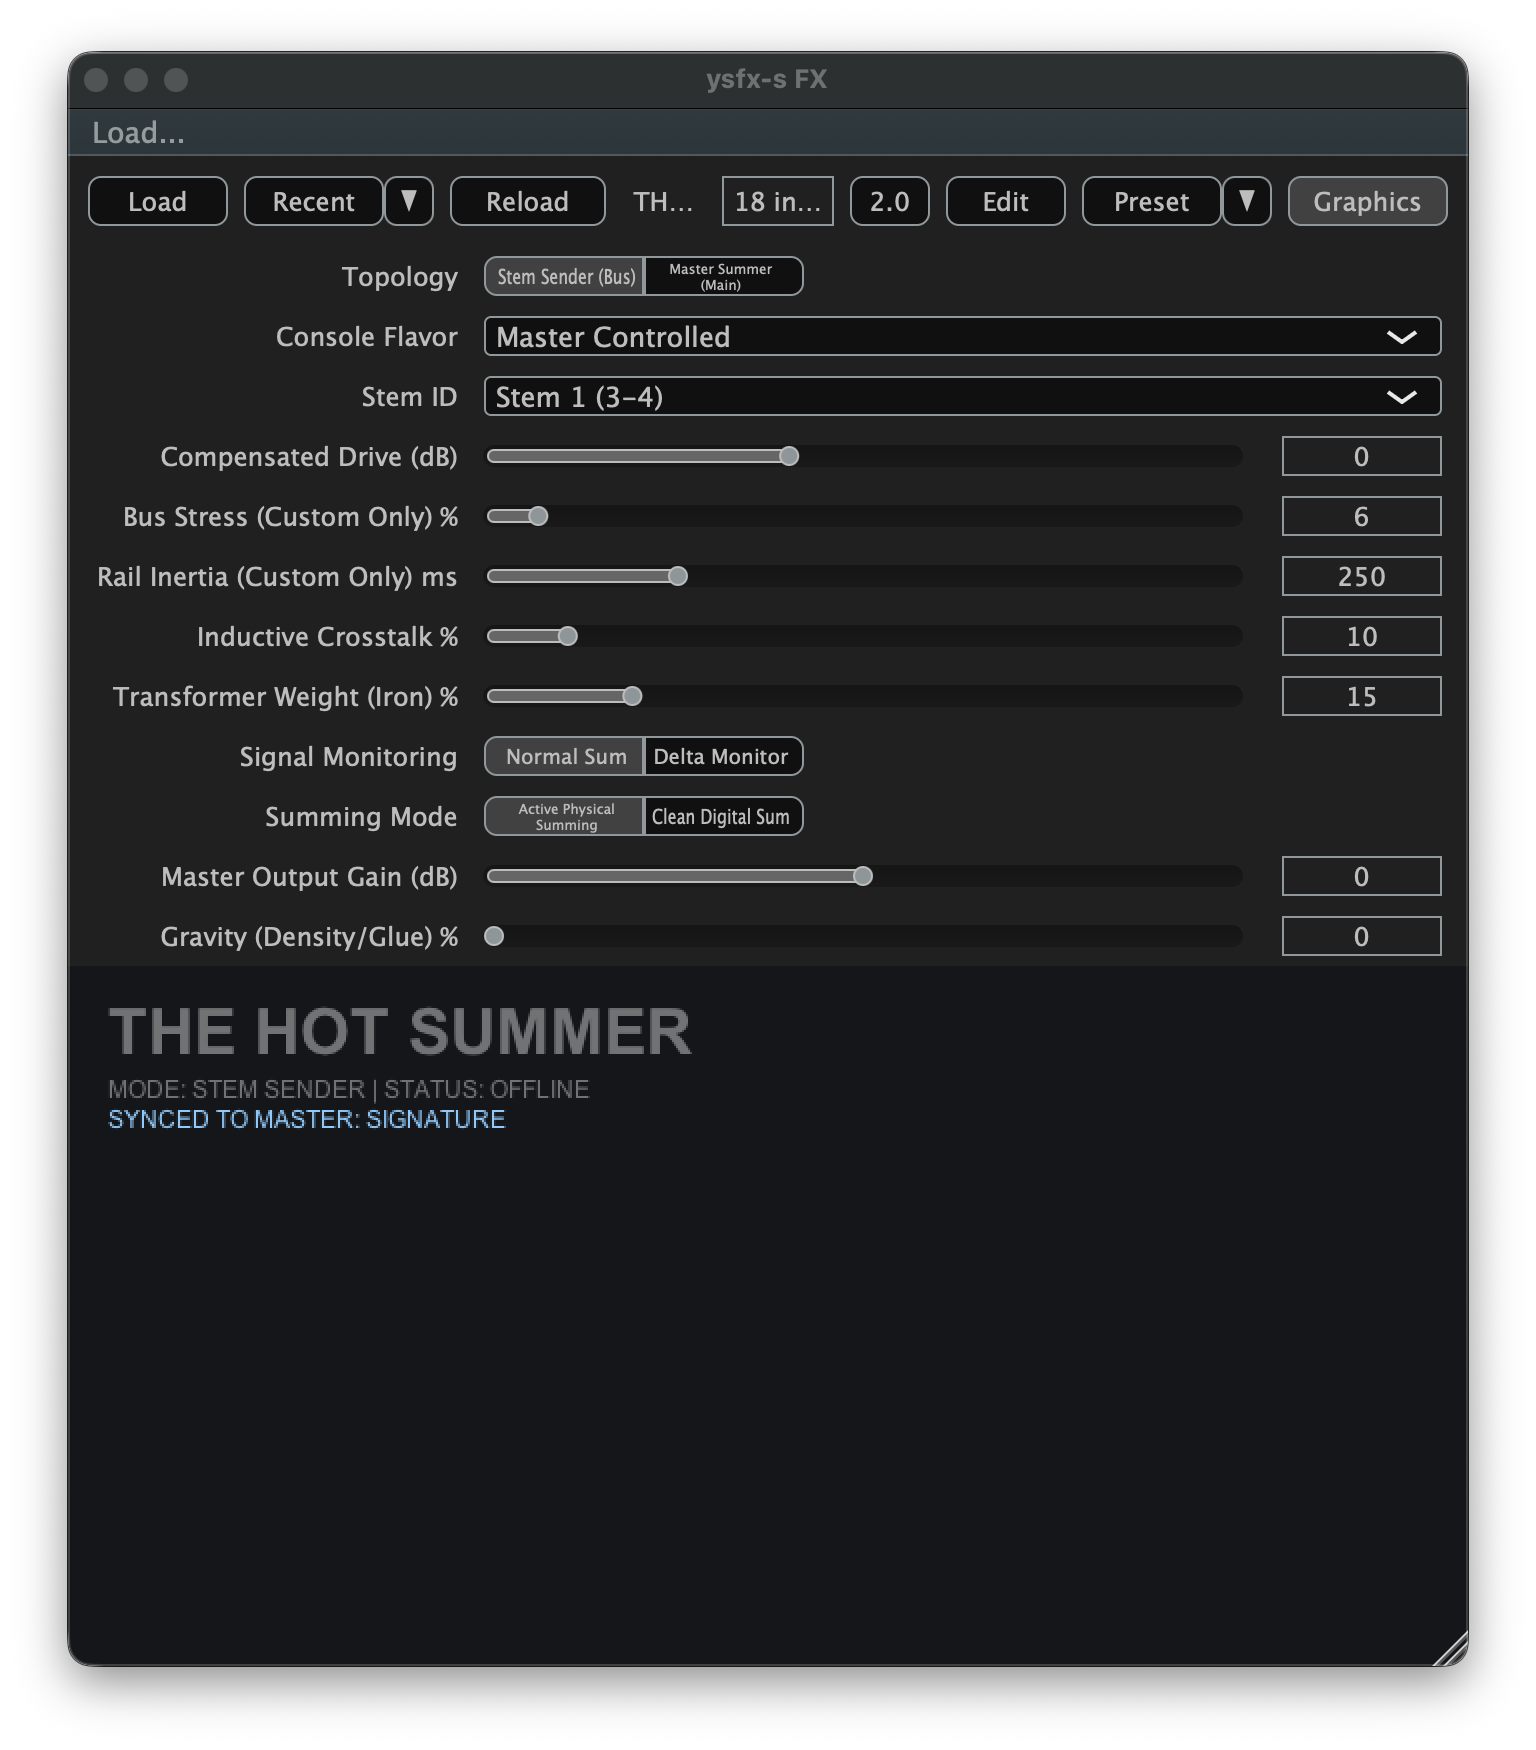
Begin by loading THS, which will initially look like the following:
Since this is our master instance of THS, we can now change the Topology parameter from Stem Sender (Bus) to Master Summer (Main). Once this parameter has changed, THS should now appear as follows:
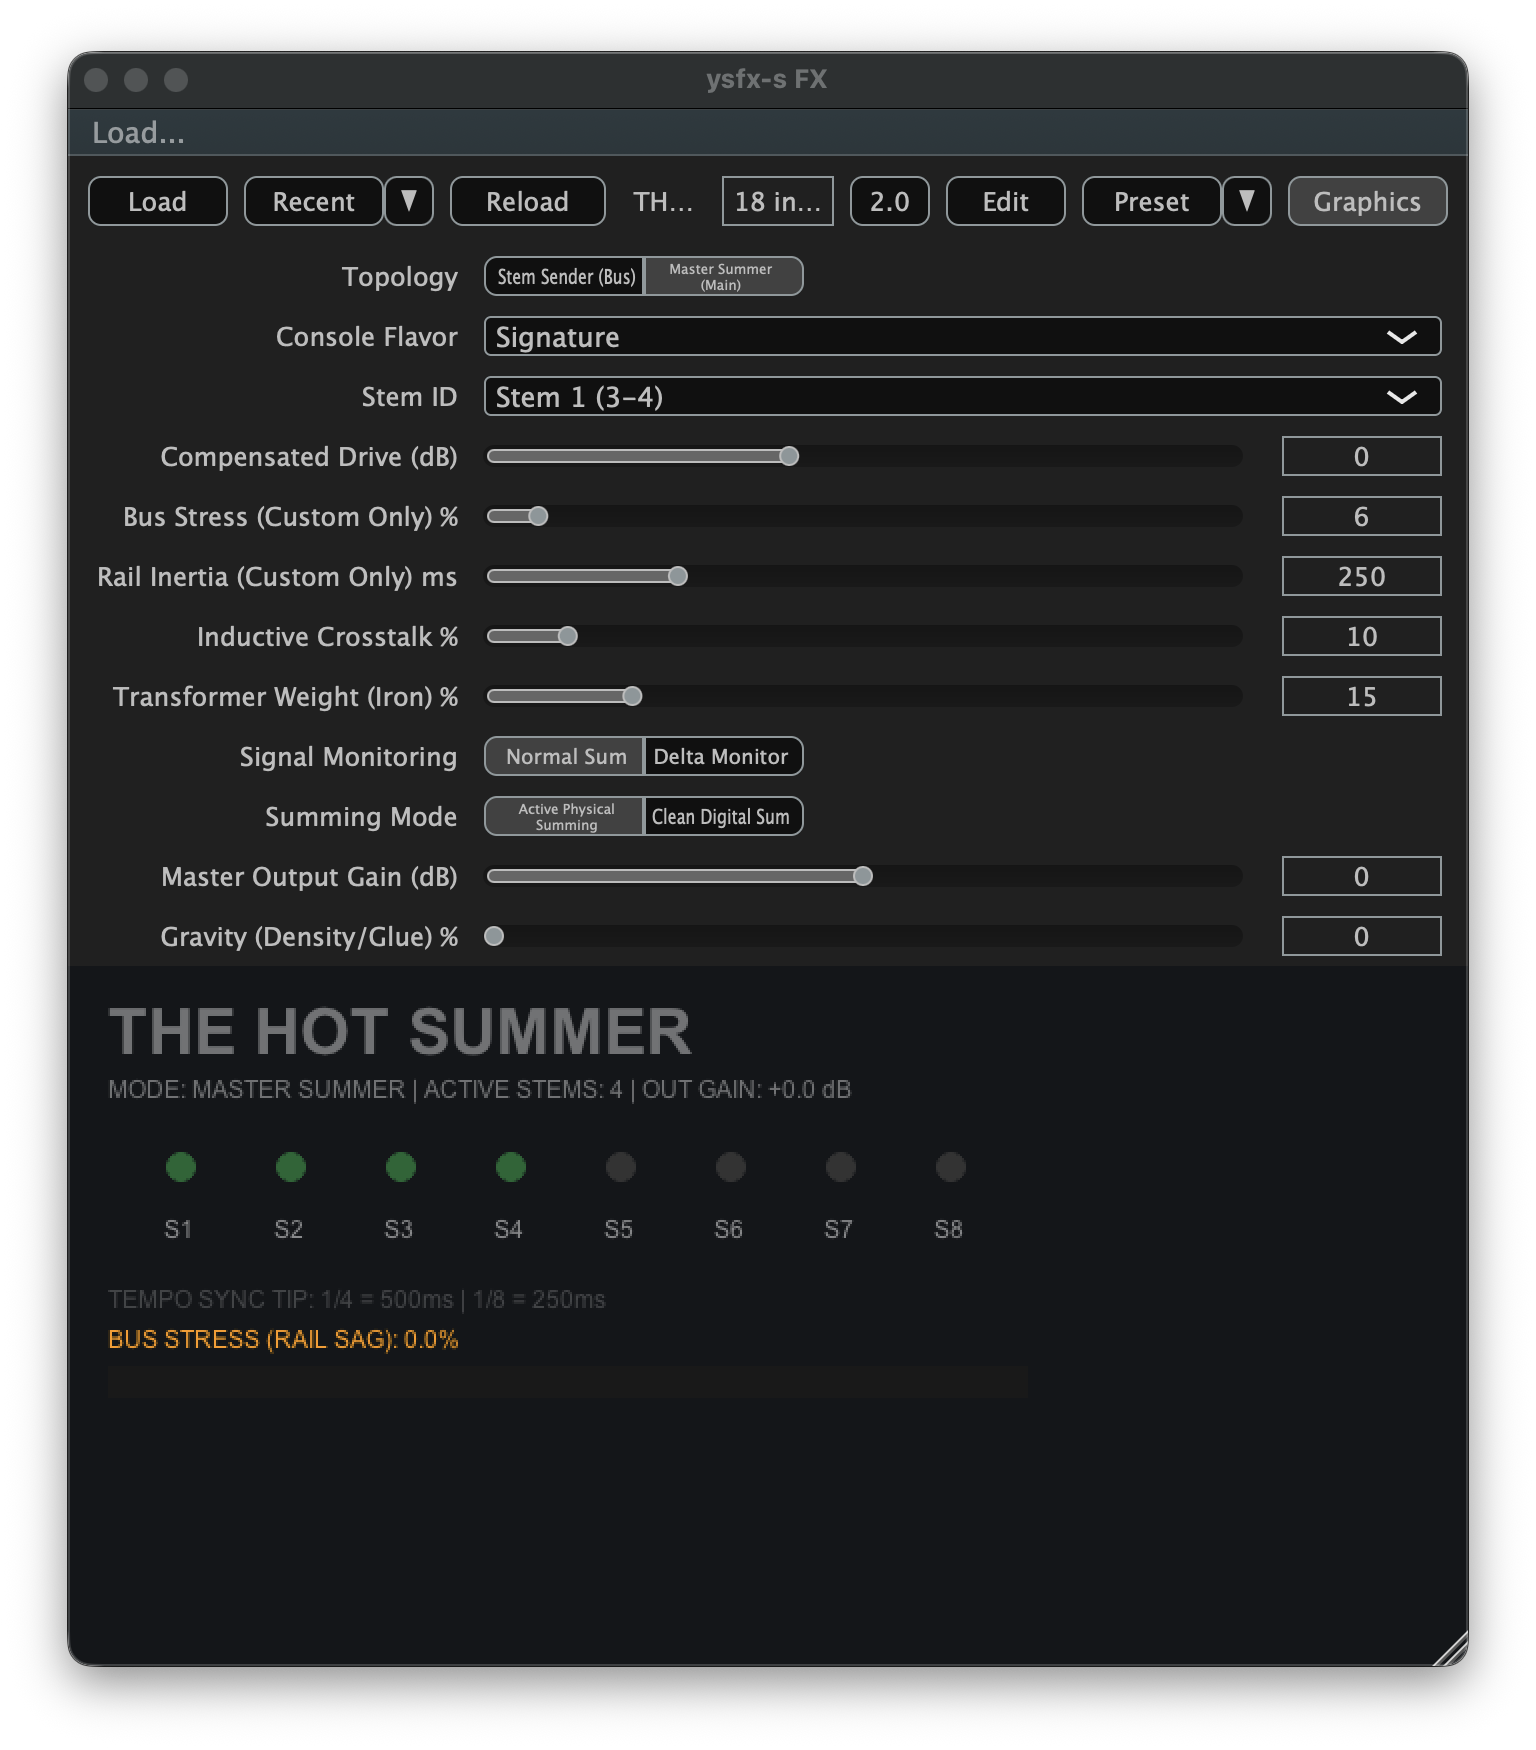
Assuming all stem bus instances of THS have been configured correctly, you should see a dim green indicator next to each configured stem. If you believe you should have more green indicators than what you currently see, revisit the Stem ID assignment of your stem bus instances of THS to verify that each stem is assigned a unique ID.
To verify that THS is fully configured and ready for use, play some sound through your project's stem busses. In Cubase, I can do this by instantiating the TestGenerator plugin to play test tones. If everything is working correctly, the green indicators in the master bus instance of THS should begin to flash bright green. This means that THS is detecting signal input from each bus. If everything was configured correctly, the indicator for all configured and connected channels should periodically flash while playing sound.
If any of the channel indicators are not blinking, go back and verify the configuration of the sender and receiver nodes of your router plugin.
If the sender/receiver pairs are configured correctly, the level meter on the right-hand side of your Connector receivers will show signal:
There are currently no visual indicators for the JSFX Audio Router. Should you encounter trouble, verify that the Router Channel and Router Type options are set correctly across all sender and receiver instances.
When a new router plugin is identified, it will be documented here!
8.4 Wrapper Recall
Metaplugin Presets
To simplify the process of setting up THS in future projects, you can save your Metaplugin setup by clicking the User presets tab, then click Save new preset. This will save all the parameters and connections for the plugins in your diagram and can significantly reduce the time needed to setup the master instance of THS.
Element Sessions
To simplify the process of setting up THS in future projects, you can save your Element setup by clicking the hamburger menu icon in the top right corner of the plugin, then click Save Session As.... This will save all the parameters and connections for the plugins in your diagram and can significantly reduce the time needed to setup the master instance of THS.
8.5 Next Steps
After completing the procedure documented on this page, THS should be fully configured for operation in your DAW using the Wrapper and Router Method!
If you wish to add TAM(D) to your project, you can proceed to the Channels setup page. I would also strongly encourage you to review the TAM(D) DAW-Specific Considerations page so you are aware of any DAW-specific constraints that may affect your use of TAM(D).