11. Master Bus
11.1 YSFX
To use THS on the master bus, you will need to begin by instantiating YSFX as the first insert on your master bus. Then, open YSFX. By default, YSFX will look similar to the following:

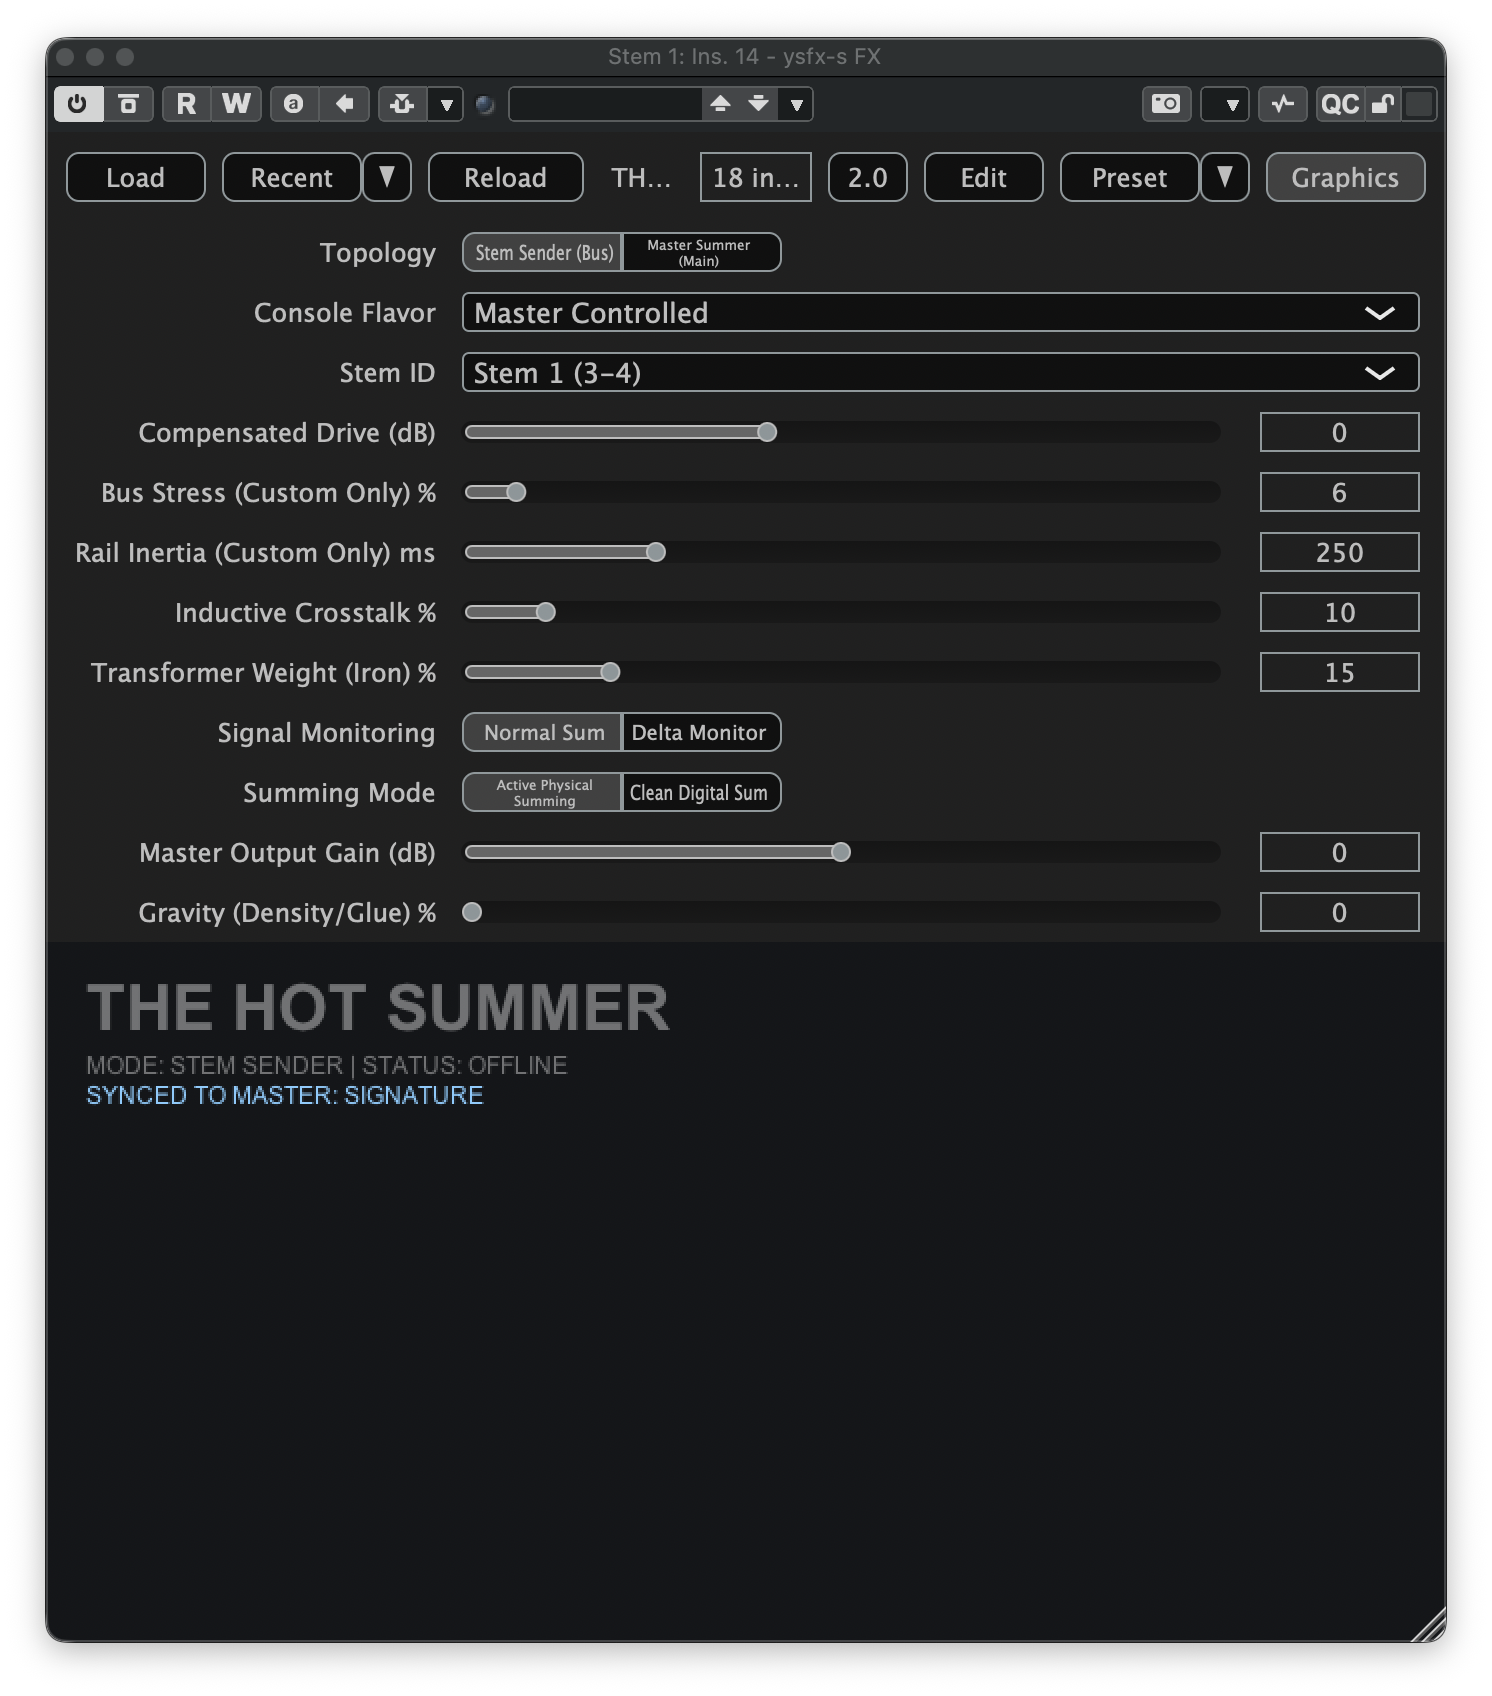
Begin by loading THS, which will initially look like the following:
Since this is our master instance of THS, we can now change the Topology parameter from Stem Sender (Bus) to Master Summer (Main). Once this parameter has changed, THS should now appear as follows:
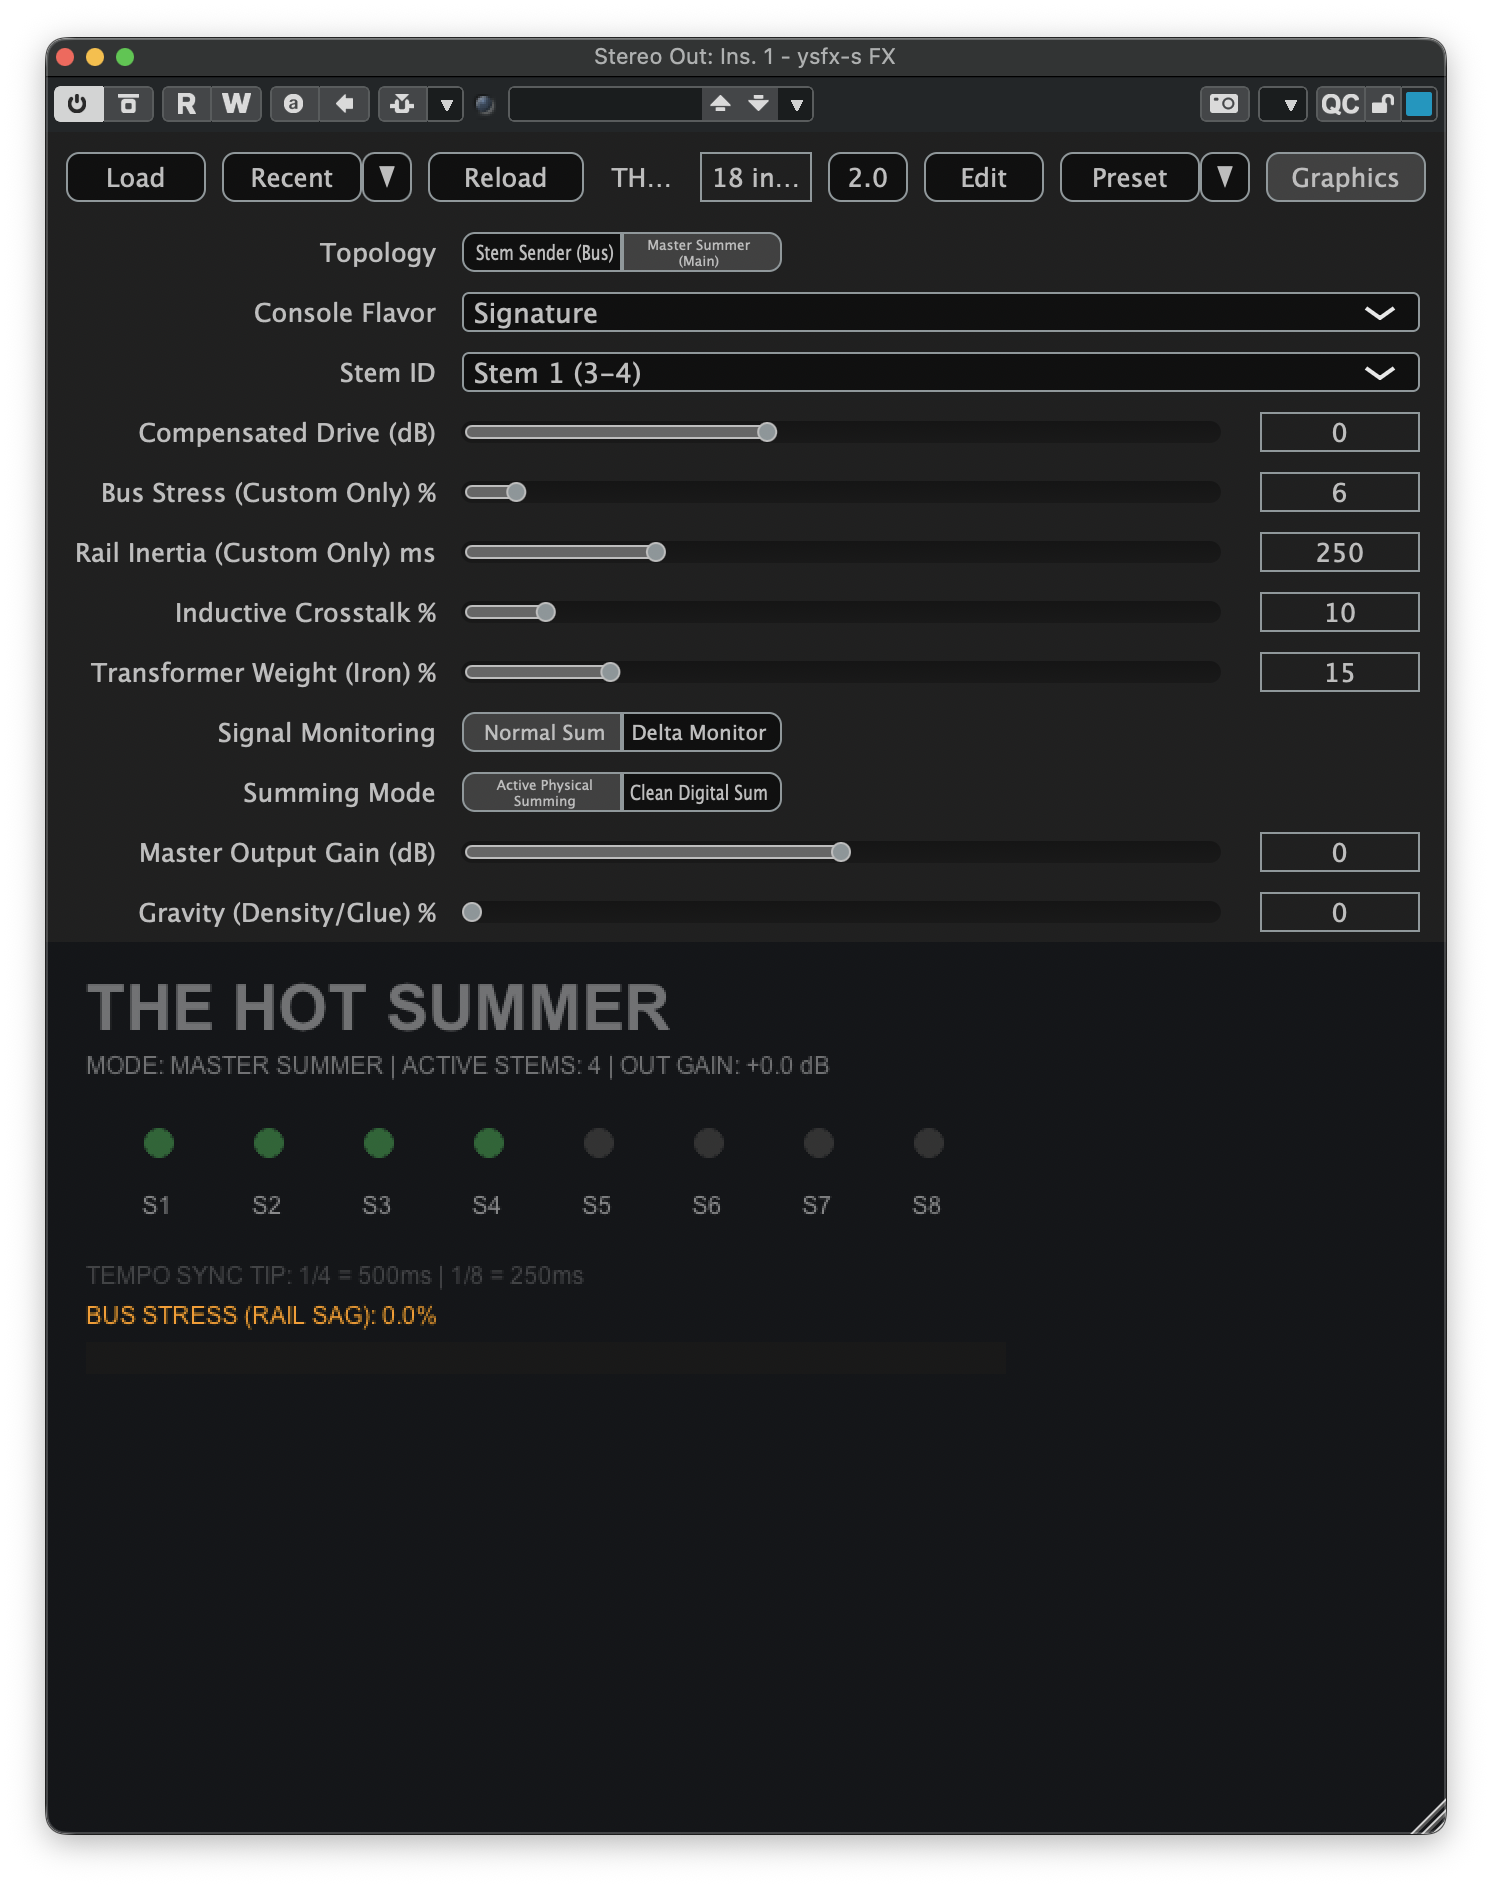
Assuming all stem bus instances of THS have been configured correctly, you should see a dim green indicator next to each configured stem. If you believe you should have more green indicators than what you currently see, revisit the Stem ID assignment of your stem bus instances of THS to verify that each stem is assigned a unique ID.
11.2 Routing Sound to THS
To route sound to THS, you will need to first ensure that the plugin's sidechain inputs are enabled. How this works will vary by DAW. In Cubase, clicking the Activate Side-Chaining button at the top of the plugin window will enable the inputs:
Now that the sidechain inputs have been enabled, you will need to route the outputs of your stem busses to the appropriate sidechain input of THS. It is critical to understand THS's expected bus mapping for this to work correctly. You can use the following table to map the stem ID assignments to their corresponding sidechain inputs:
| Stem ID | THS Input Channels | Sidechain Input |
|---|---|---|
| 1 | 3-4 | 1 |
| 2 | 5-6 | 2 |
| 3 | 7-8 | 3 |
| 4 | 9-10 | 4 |
| 5 | 11-12 | 5 |
| 6 | 13-14 | 6 |
| 7 | 15-16 | 7 |
| 8 | 17-18 | 8 |
Following the table above, we will want to route the output of our Stem 1 bus to THS's Sidechain Input 1. There are several ways to do this in Cubase. For this example, open the Channel Settings window for Stem 1. It should look like the following:
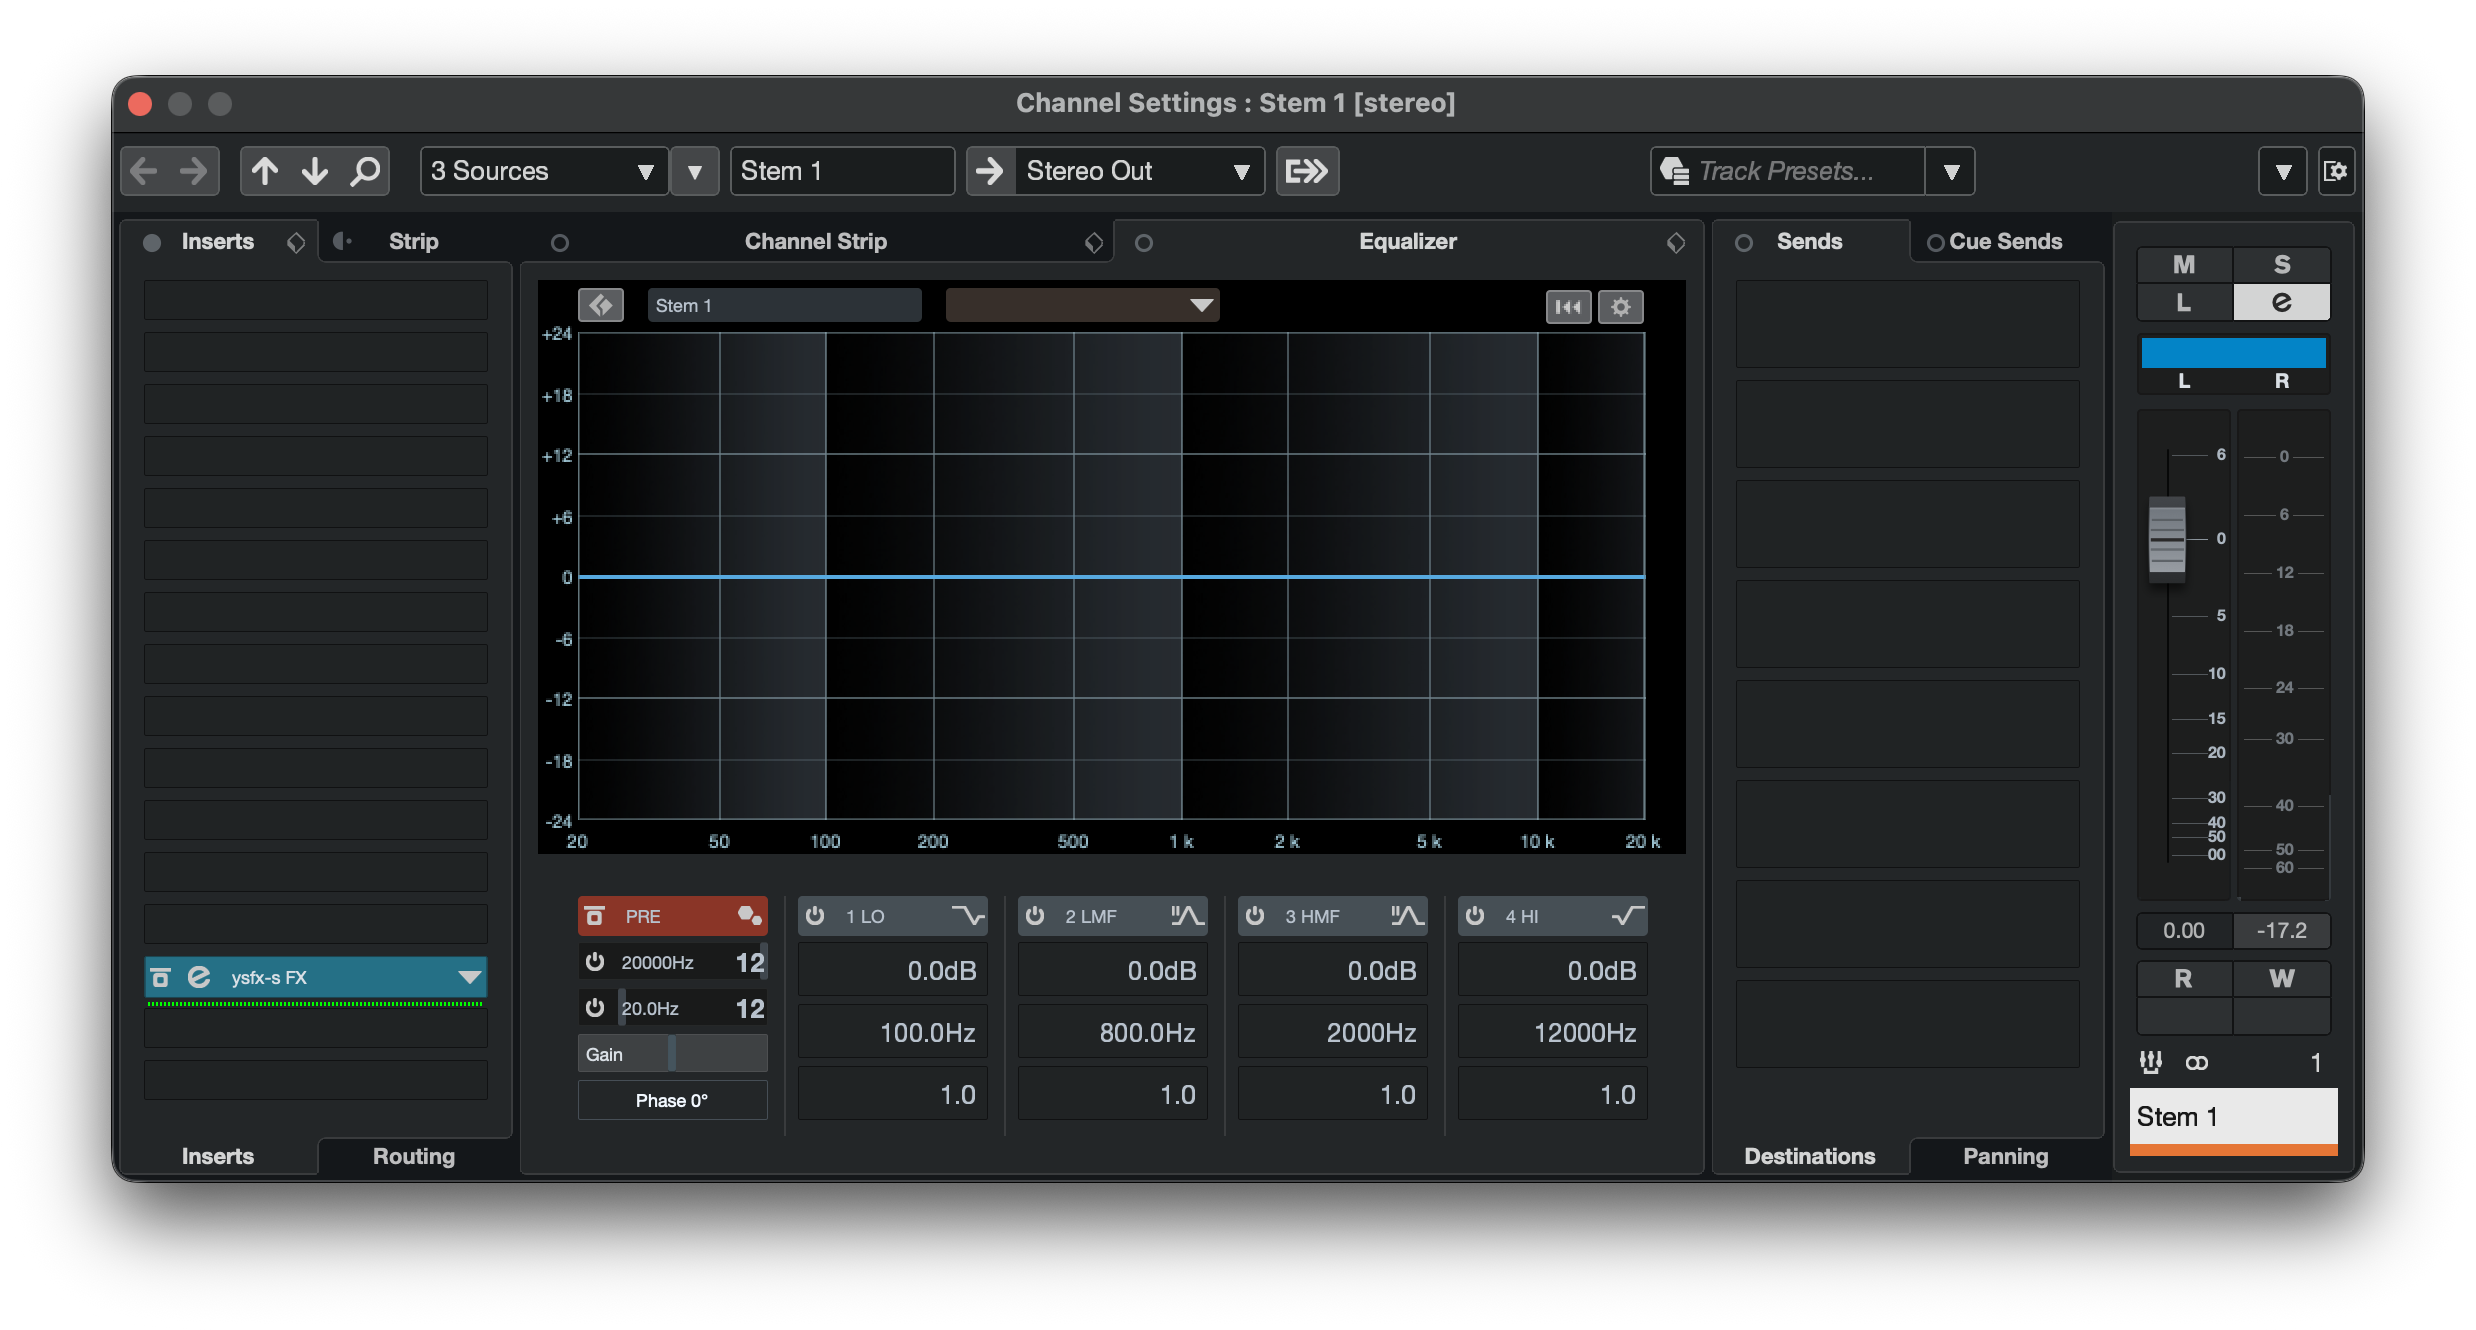
At the top of the Channel Settings window, click Stereo Out to open the routing assignment pane. It should look like the following:
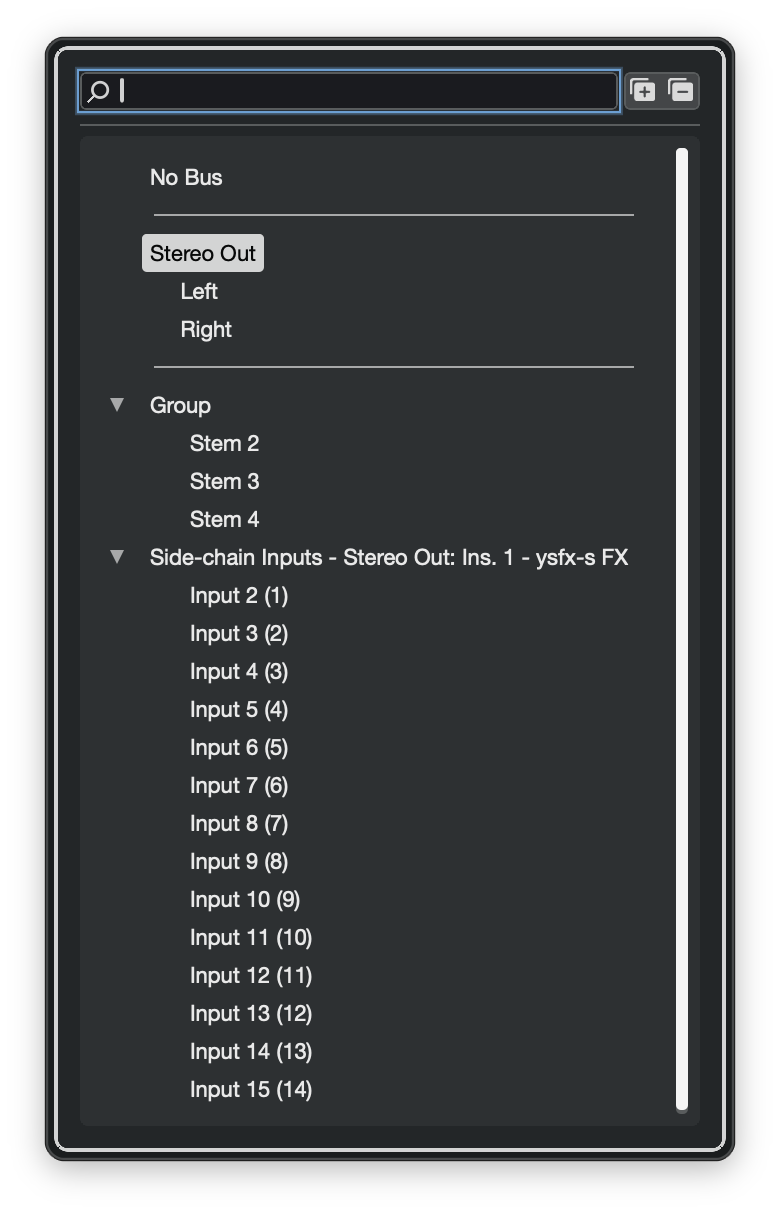
If you cannot see all the sidechain inputs for YSFX, click the Expand All button next to the search box. Since we are routing Stem 1 to THS, we want to select the Input 2 (1) option, where (1) refers to the sidechain input number. Repeat this process for all stem busses in your project, making sure to use the table above to route the stem to the correct sidechain input.
11.3 Testing the Routing
To verify that THS is fully configured and ready for use, play some sound through your project's stem busses. In Cubase, I can do this by instantiating the TestGenerator plugin to play test tones. If everything is working correctly, the green indicators in the master bus instance of THS should begin to flash bright green. This means that THS is detecting signal input from each bus. If everything was configured correctly, the indicator for all configured and connected channels should periodically flash while playing sound.
If any of the channel indicators are not blinking, go back and verify the output routing for your stem busses, making sure that each bus is routed to a different sidechain input on the YSFX plugin hosting the THS master. Additionally, verify that the selected sidechain input corresponds to the input channels specified by the stem ID selected in the stem bus instances of THS.
11.4 Next Steps
After completing the procedure documented on this page, THS should be fully configured for operation in your DAW using the Sidechain Method!
If you wish to add TAM(D) to your project, you can proceed to the Channels setup page. I would also strongly encourage you to review the TAM(D) DAW-Specific Considerations page so you are aware of any DAW-specific constraints that may affect your use of TAM(D).